
 We all have seen drones flying and performing tasks like delivering parcels and monitor an area amongst others. They seem to be quite expensive. But can you make drones at a very affordable cost?
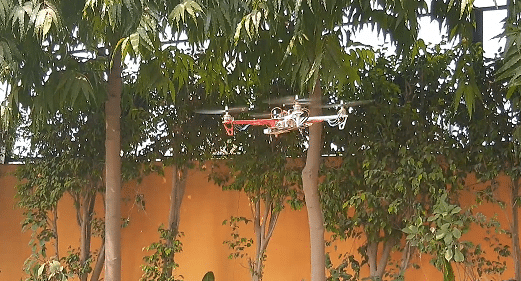
The answer to that question is YES! Today we will make our very own low-cost drone with an F450 frame that uses 1000kV motors.
Bill Of Material
We need to collect the following components to make our drone:
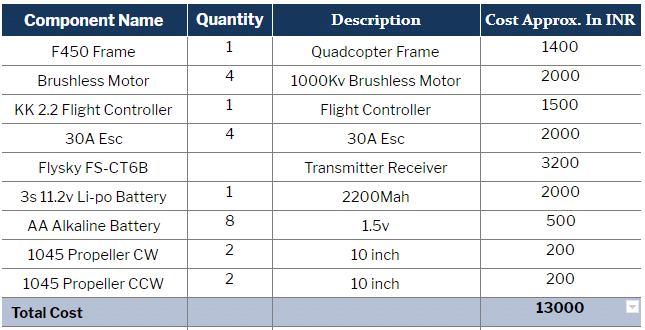
In addition to these, you might also need XT60 or any other connector as per your battery.
Construction and Assembly
Before going deep into the assembly, we need to know some basic things.

Understanding Propellers
The propellers that are present in the market have some numbers on them along with a letter (either R or L) or no letter. So let’s understand what these letters and numbers mean.
The letters R or L denote the propeller’s rotational direction.
R = Right or Clockwise direction (CW)

L = Left or Counter-Clockwise direction (CCW)
Suppose you find a propeller with a number written as 1045 or 1045R.
Here the first 2 digits i.e. 10, indicate the propeller length. This means the propeller is 10 inches in length. The next two digits i.e. 45, indicate pitch. This means 4.5-inch pitch the propeller cut the air.
On increasing the pitch, the thrust provided to it will also increase. At the same time, higher torque is required from the motor. Therefore, we need to maintain the right balance between motor and propeller configuration.
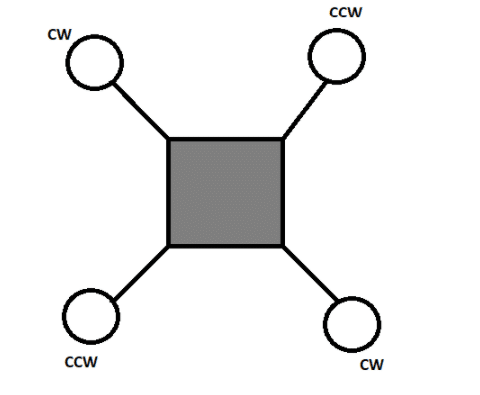
Understanding Rotation and Motor
In quad-drones, we need 2 sets of propellers that rotate in clockwise and counter-clockwise directions. For this, we need to set the motor accordingly. The easy way to set the propeller and motor direction is by remembering RRR i.e. ‘Rear Right Turns Right’. This means that the motor at the rear right needs to rotate the propeller clockwise. Likewise,
Rear left -> Counter-clockwise
Front left -> Clockwise
Front right -> Counter-clockwise.
Connections:
Connect 1st motor’s ESC pin having a yellow wire to signal pin of KK Flight controller. Do the same for the 2nd motor and so on.
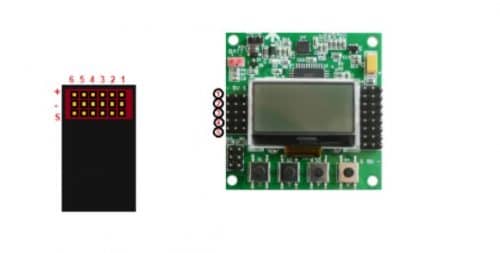
Preparing the Flight Controller for F450 Drone
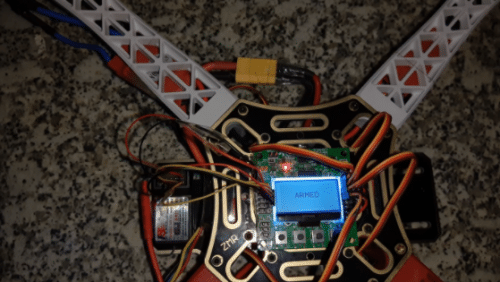
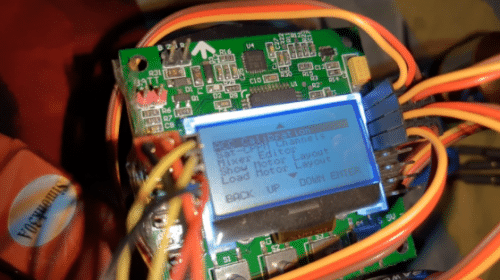
Now we need to enter some settings in the flight controller. First, shift the throttle stick down to the minimum position, turn ON the RC transmitter and then plug the XT60 battery connector to the drone. As the drone is now powered, the flight controller turns ON the display, which shows either a safety or error message.
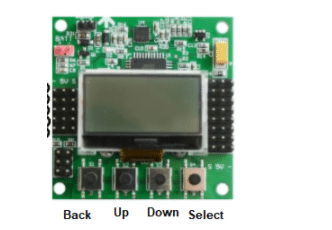
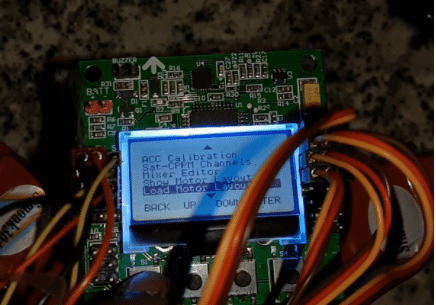
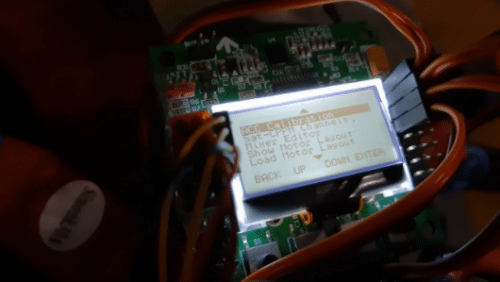
Using the buttons present on the flight controller, go to the menu, and then by pressing the down button, go to Motor Layout. Select the load motor layout type.
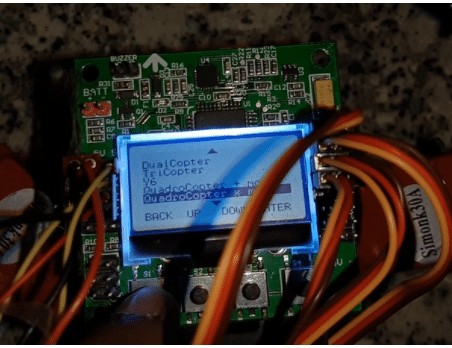
Since we are using the quad with x configuration, so select the x quad motor layout and then confirm the selection. Now press the back button
ACC Calibration
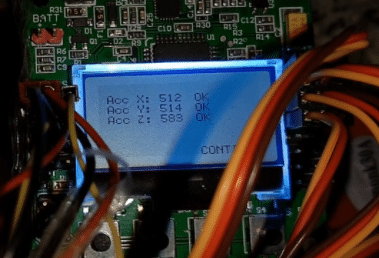
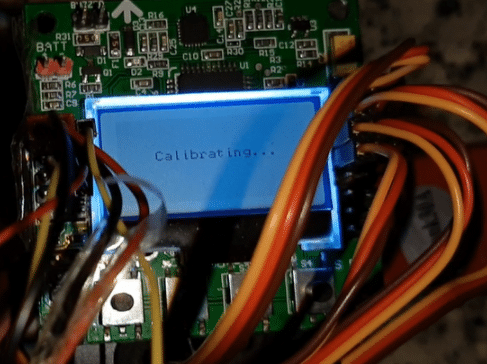
Put your drone on a flat surface, ensuring that the flight controller is stable and not tilted towards any angle. Now press the menu button and use the up or down buttons to go to the ACC calibration option. Choose it using the select button. Wait for a few seconds so that the flight controller can automatically calibrate the accelerometer. When completed, an OK message is displayed.
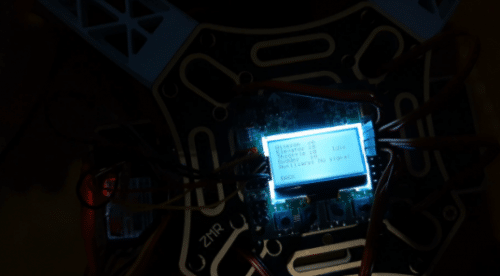
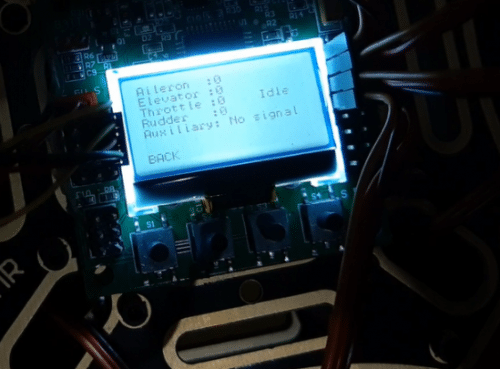
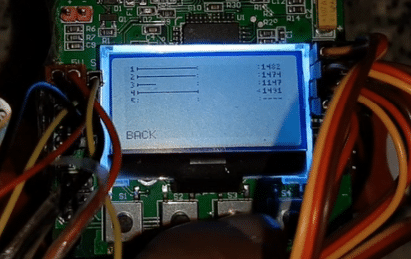
Now go to the receiver test and check the values of Rudder, Elevator, Throttle, and others. If their value is more than 1 and has a difference of more than 3 (with respect to 0), then reduce their values to 0 by using the trim option in the remote transmitter.
Once the values are trimmed, you are ready to fly the drone.
Testing
To gain flight, keep the throttle stick to the lower left for a few seconds and then gradually increase it to full.
To land the drone, decrease the throttle by shifting the throttle stick to the lower right.

What would be your costs in USD? You have not mentioned the drone to be tracked on any smart phone… and or carrying a remote controlled camera…?
Speedomerer programe Devloper want
WHERE WE WILL GET FLIGHT CONTROLLER KK2.2
You can get it from any electronic online store.
Sir,
How much weight it can lift??
Can we fix an external gopro camera to it??
Each prop can generate a thrust of 600 -700grams. The drone can easily lift the payload of 800g to 1KG .
Yes you can add the Gopro camera on it but be careful while flying with the costly mounted camera don’t crash the drone and I recommend you to use camera mount with it protective case to protect it from crash damage
Can you pls help me with the kit as I stay at a location where getting the components in the market is impossible. Would be glad if you can assemble and send I will pay the amount to you.
Contact https://www.kitsnspares.com/