

Ping Pong was the first ever video game that reached mass market. For the first time in history, the concept of a “video game” was brought into the family home, thanks to the Atari 2600 – so it’s only right that we pay a little homage to this historical gem. Now, you can re-live that Ping pong game using Arduino Uno and some common components.
Software used
The software used to program the Arduino Uno is Arduino IDE which can be downloaded free of cost from the website. The open-source Arduino Software (IDE) makes it easy to write code and upload it to the board. It runs on Windows, Mac OS X, and Linux. The environment is written in Java and based on Processing and other open-source software. The library used in this project is called TVout. This allows the Arduino to display stuff on a regular TV with composite input. To install the library, just copy the TVout folder and Paste it in location: Documents>Arduino>libraries folder.
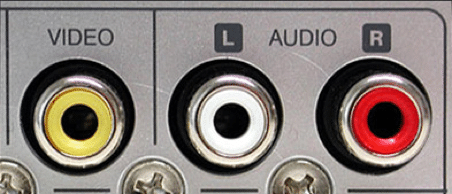
Fig. 1: Composite Input
Components required
- Arduino Uno
- 2 – 1k resistors
- 470E resistor
- 2 – 10k Potentiometers
- Push button
- RCA Male Connector
- Breadboard &
- Male-to-Female Jumper Wires.
Ping Pong Game Using Arduino
The video is the center pin and sleeve is the ground of the RCA connector.

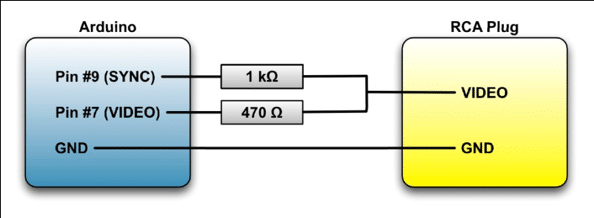
Connection of RCA Connector with Arduino
For 10k Potentiometers, the middle pin needs to be connected to either A0 or A1 on your Arduino. One of the side pins (it doesn’t matter which) should be connected to +5V and the other to GND. This will control the movement of Paddles for each player.

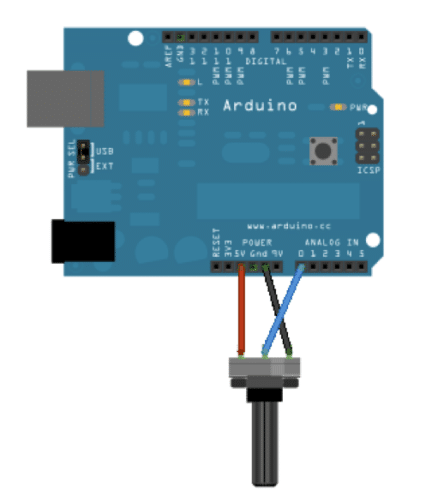 Connection of Potentiometer with Arduino
Next task is to wire the push button to pin Digital Pin 2. The resistor used in this circuit is 1k. The schematic for the same is given below. This will Start Game and also Restart the Game when the Game is over!
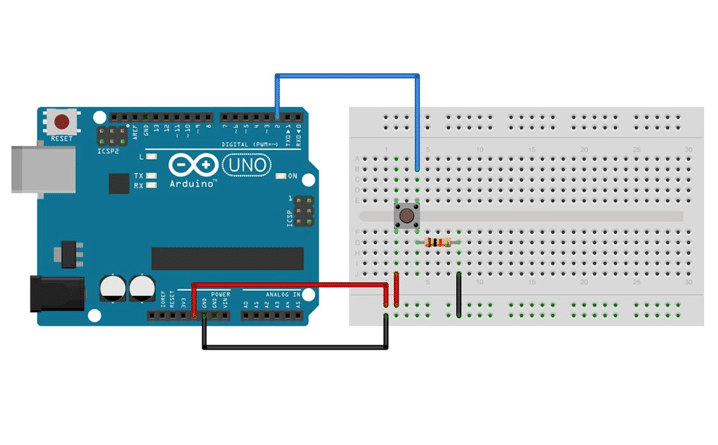 Connection of Push Button with Arduino
Construction and Testing
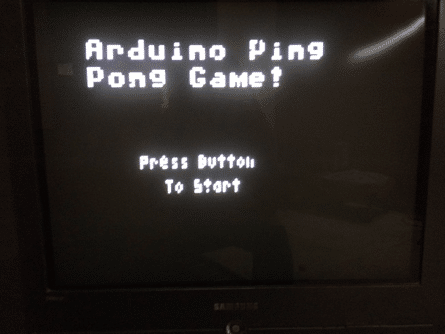
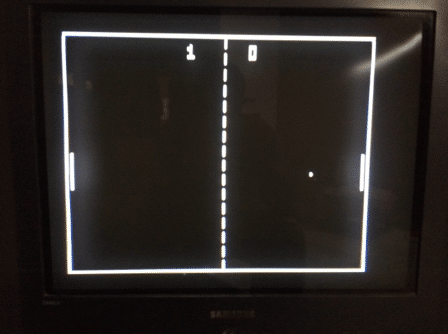
Now it’s time to test our little project. After uploading the code to the Arduino Uno, connect the Arduino Uno to your TV via RCA Connector to the Video Input (Yellow Connector) of the TV and if all goes well you should have the following output on your TV Screen.

Souce code is here?
did u find source code
Hi, this project is untested and submitted by one of the community users. As of now, we don’t have a Source Code for this article.