
 From electronics/electrical engineers to product developers, one device that is essential for electrical testing needs is the voltmeter and if you are an electronics DIYer or hobbyist, a voltmeter is such a device without which your ideas to invent something new and exciting won’t match your expectations. As a diehard electronics DIYer, I understand the problems associated with carrying a voltmeter everywhere due to its big size and heavyweight.
So as always, I came up with a solution to design a voltmeter that’s portable and can easily fit in a pocket – sort of like a key ring. Despite the small size, you won’t have to also worry about its voltage measurement capability as it can seamlessly work in a voltage range of 0V to 24V.
So without further ado, let’s begin designing this small, portable keyring-sized voltmeter by collecting the following components.

Bill Of Materials
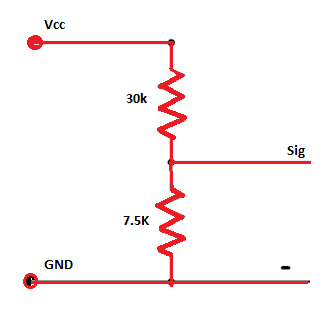
You can either use a 24V voltage sensor or a voltage divider circuit with two resistors connected in series (see pic below).
Coding
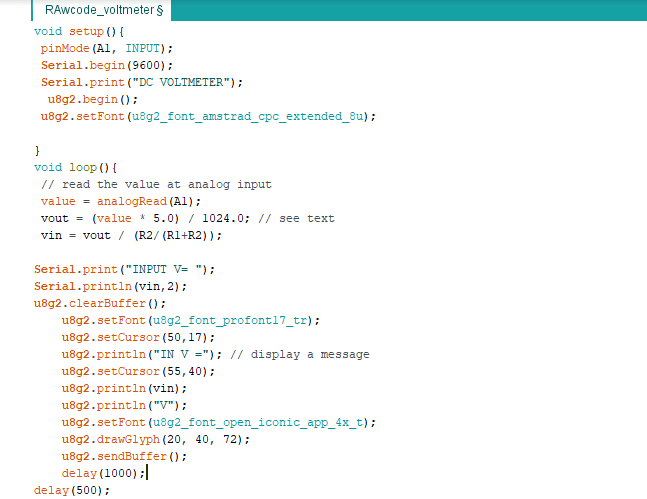
First, install the library for the OLED display, which will help in interfacing the OLED with Arduino and display the voltage gathered by the voltmeter. To install the required library, go to Tools in the Arduino IDE and open the Library Manager. Now search for the U8g2 and select Install. After installing the library, begin writing the code for the voltmeter functions. Make sure to include the U8g2 library before defining the pin numbers that will give sensor readings as an analogue output.
Then, define the resistor values that are to be used in conjunction with the sensor to calculate the precise voltage.


Now, create a setup function to set the pinmode for the sensor as input and also to start the I2C interface with OLED along with a serial port for debugging and calibration, if needed.
After this, create a loop function for converting the sensor readings into voltage. Also, create a code for displaying the calculated voltage value on the OLED screen.
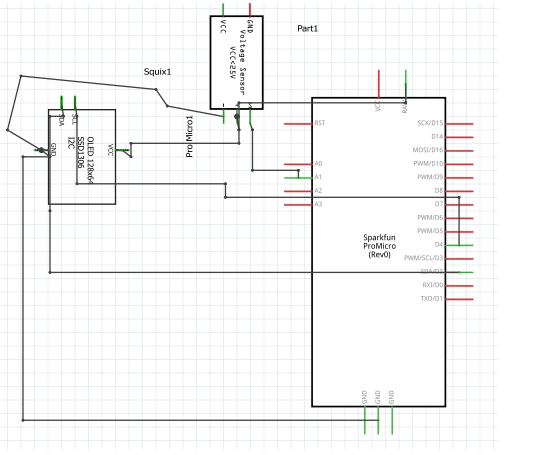
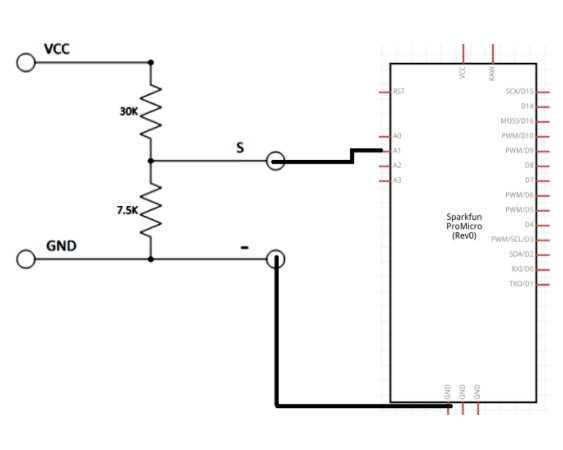
Connection
Upload the code to Arduino and connect the components as shown in the circuit diagram below.
Testing
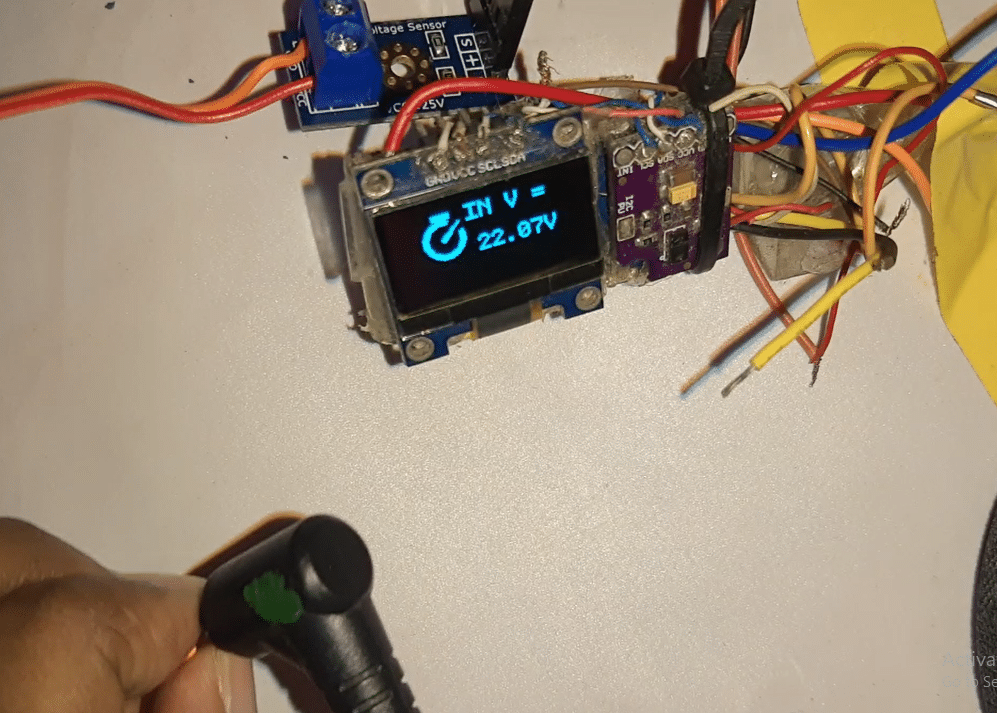
After connecting all components, power the device using a battery or USB and check the voltage reading of any battery or DC output voltage source.
On successful testing of the voltage on PCB or any circuit, you can use this voltmeter during the design of any electronic device. Just make sure to connect its positive terminal to the power source and negative terminal to GND.
Congrats!! Your portable finger-sized voltmeter is now ready. You can easily use it and carry it with you wherever you want.


