
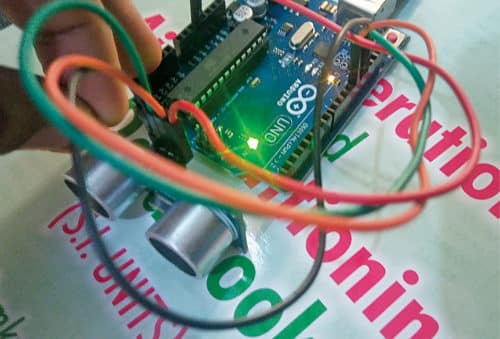
 This Arduino-based distance meter can be used for measuring the distance between the sensor and object in the range of 2cm to 400cm using an ultrasonic sensor. The author’s prototype and ultrasonic module are shown in Figs 1 and 2, respectively.

Circuit and working
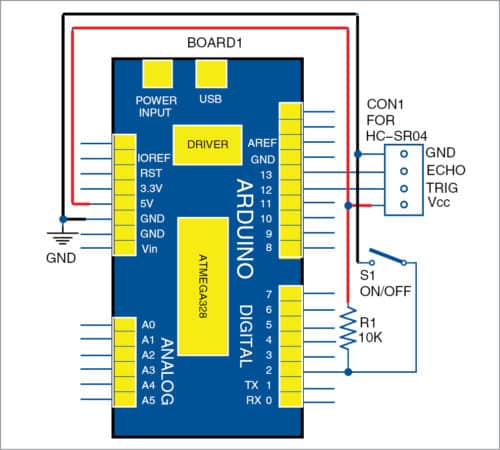
The circuit diagram of the distance meter is shown in Fig. 3. It is built around Arduino Uno board (board1), HC-SR04 ultrasonic sensor and a few other components. HC-SR04 is a low-cost ultrasonic sensor that consists of transmitter and receiver units.
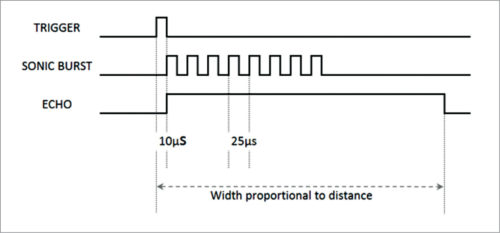
When the controller gives a high signal to trig pin of the sensor, the sensor emits eight-cycle sonic bursts at 40kHz. After sending the sonic bursts, the sensor sets the echo to high till the sonic bursts return to the sensor. The length travelled by this pulse shows how far the object is.
Ultrasonic waves follow the properties of generic sound waves. Due to this, there might be a change (microscopic) in speed of sound waves in either direction with change in temperature. This change generates errors in calculation and, hence, different values are obtained for the same object kept at the same place when the temperature changes. To overcome this, a special algorithm is used, which gives the exact distance. This algorithm is based on probability and statistics.
Software
The software used to program Arduino Uno is Arduino IDE. It can be downloaded for free from this link. The open source Arduino software (IDE) makes it easy to write codes and upload to the board.

The library used in this project is Ultrasonic Library, which can be downloaded from this link. To install this library, extract the downloaded folder, copy and paste it in under Documents->Arduino->Libraries folder.
Construction and testing
Assemble the components as per the circuit diagram given in Fig. 3. Connect the USB cable with Arduino Uno. Open Arduino IDE and go to FileExamplesUltrasonicButtonSerial, and open the code.
Compile and upload this code to Arduino Uno. Open Serial Monitor under Tools of Arduino IDE to see the sensor output (distance between sensor and object). Make sure the baud rate is 9600. Note that alignment of the ultrasonic module with the object plays a major role in getting accurate sensor output.

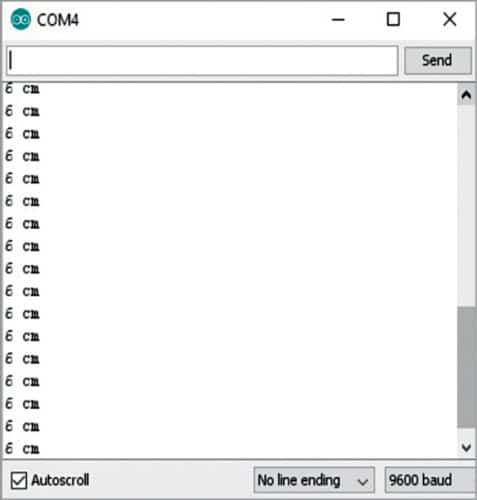
Keep an object near the sensor. When switch S1 is closed, the sensor transmits ultrasonic waves. The distance between the object and sensor is displayed on the serial monitor, as shown in Fig. 5.
Arnav Bansal is currently employed as R&D engineer in an automation company. He primarily works on custom Internet of Things (IoT) devices.


