
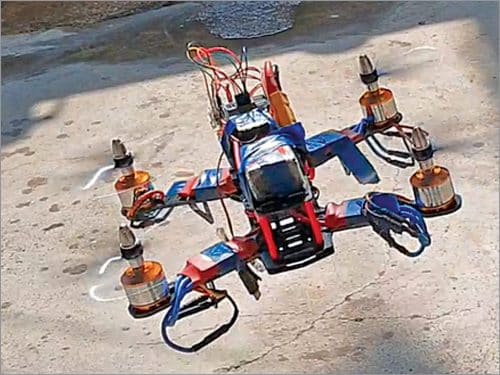
 Racing drones are fast and can therefore cover long distances quickly. We can use racing drones for other applications as well such as public announcement as described in this article. The KK.2.2 flight controller used in ‘Make Your Own Quadcopter Drone’ DIY project had some problem with setup and stabilisation of the drone. But we can make a smart public announcement drone using QAV250 frame and CC3D OpenPilot hardware. The author’s prototype is shown in Fig. 1.
QAV250 drone frame being small in size, it requires a high RPM and kV rated motor for flying at a high speed and flexibility in movement. We need a smaller size flight controller and propeller that can fit in the drone frame. A motor having higher than 2,200kV rating and propellers between 12.7 and 15.2cm (5 to 6 inch) in size would do the job. But when ‘A2212’ 2200kV motors were used with 12.7cm propellers, it did not produce enough thrust to fly fast enough. Therefore larger ‘6045’ propellers of 15.2cm size with 10.2cm pitch (6-inch with 4-inch pitch) were used.
Assembly
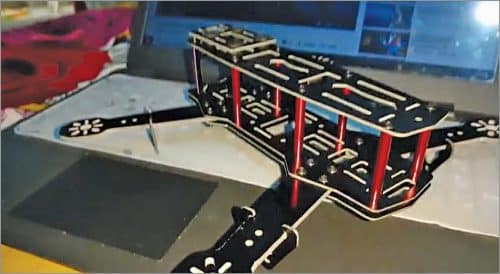
First of all, assemble the frame of the drone. The QAV250 drone frame has two base plates, four arms for the motors, one top plate, and four landing gears. Place all the four arms between the two base plates and screw them. Add the landing gears on the four arms and then fix the top plate on the base plate. The drone frame is now ready to equip with electronic controller and other components on the base plate. The assembled frame is shown in Fig. 2.
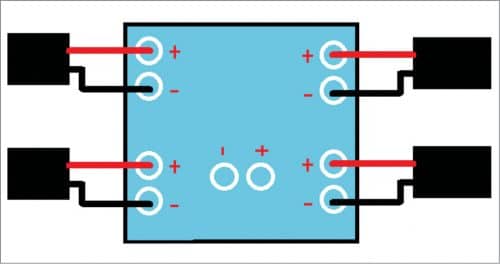
Connect ESC wires to the power distribution board along with the XT60 plug, as shown in Fig. 3. Place the power distribution board in the middle of the QAV250 frame and fix it. Next, fix the ESC on each arm of the frame, as shown in Fig. 4. Screw all the A2212 motors on the drone frame.

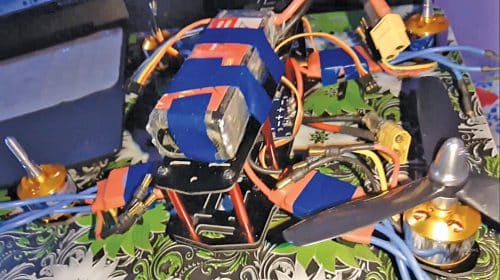
Connect three wires from each ESC to the three wires of each motor. Then connect the three wires of each ESC to CC3D flight controller with +, -, and S marked on the flight controller board. Black wire of ESC is ground (GND) pin that needs to be connected to ‘–‘ , red wire is positive pin that should be connected to ‘+’, and yellow wire is PWM signal pin that may be connected to ‘S’ pin of the flight controller, respectively (refer Fig. 5). Next, connect the radio receiver to CC3D flight controller, as shown in Fig. 5.
Preparing the flight controller
The flight controller can be programmed using OpenPilot ground control station (GCS) or LibrePilot GCS software. You can download and use any one of these. We used LibrePilot while testing.
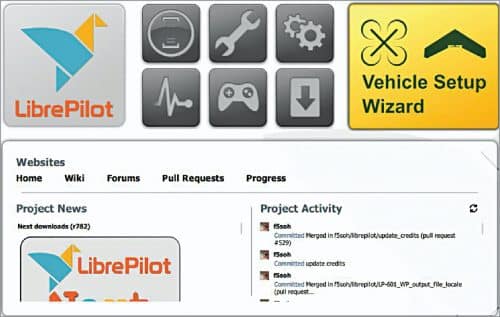
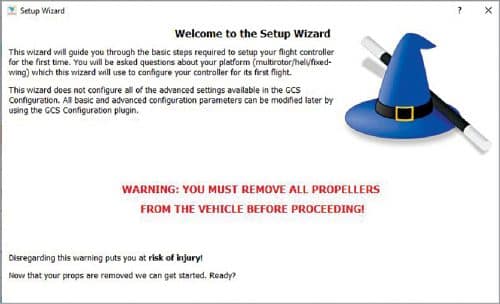
Open LibrePilot software and connect the flight controller to a PC via a USB. From the LibrePilot software select Vehicle Setup Wizard (refer Fig. 6). From the range of options, choose to update the firmware by clicking on Upgrade and then wait for the firmware to upload on the flight controller. You will get a window (refer Fig. 7) where you can do ACC calibration.

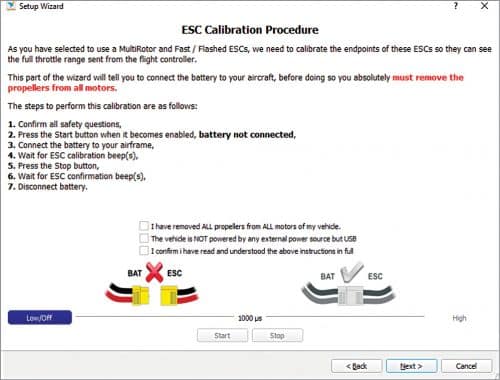
Put the flight controller on a flat surface and enure it is facing towards the front motor. Calibrate the accelerometer and the motor ESC as per the given instructions. Disconnect the battery from the power distribution board. Then click on start and wait for a twitching/beeping sound from the motor. Repeat the procedure once again. The ESC is now calibrated, as shown in Fig. 8.
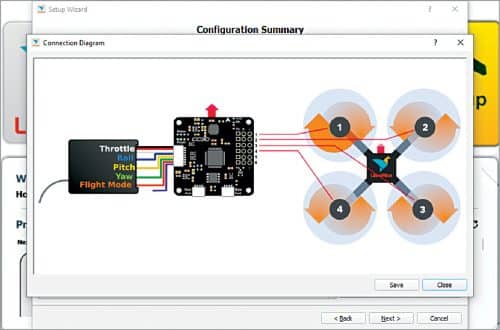
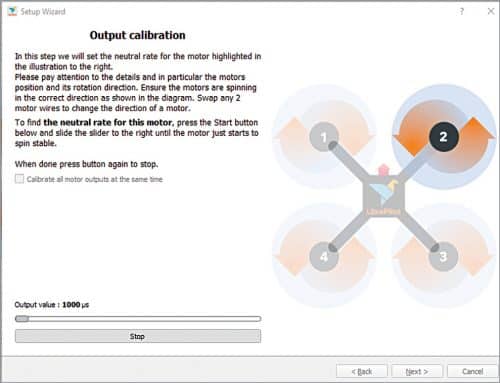
You are then taken to output calibration, as shown in Fig. 9. Here the rotational direction of a motor is shown. Click on start and then move the sliders until a motor starts moving smoothly. Then click stop. Ensure that the rotational direction of a motor matches with that shown on the screen of LibrePilot software. If not, then interchange any two wirings of the motor to ESC to change the rotational direction. Repeat the procedure for all motors and save the settings.
Next, it will take you to the transmitter receiver setup wizard. Make sure that the transmitter remote is on, the receiver is connected, and the LiPo battery is connected to the power distribution board. Follow the instructions given by the software.
Move the remote sticks as shown in the GUI and then put all the sticks to the centre. Next, move all the sticks to the max positions in both directions and save the settings. After that, define the process for arming the flight controller. To do so, go to the arming settings and select the options for arming.
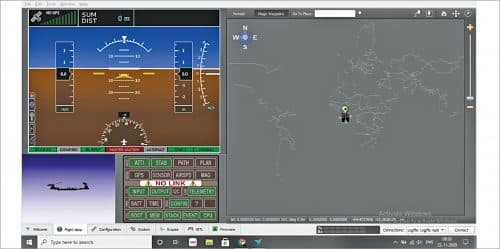
Next, add the FPV camera to drone. The FPV camera has three wires: yellow, red, and black. Flight data window shows the movement of the drone (refer Fig. 10).
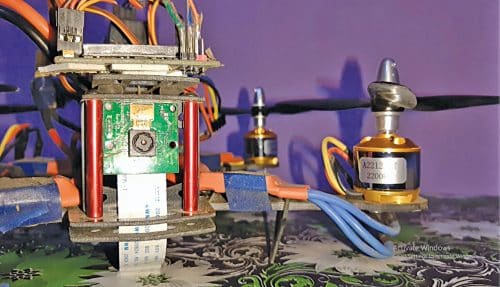
Connect the red and black wires to power supply according to the requirement of your camera. Raspberry Pi camera module was used in the prototype as it was already available, as shown in Fig. 11.
Preparing public announcement system
AIY Voice Bonnet may be used for making and recording the announcements. It comes with an SD card that is pre-loaded with AIY Raspbian image. But if you do not have that, you can prepare the SD card using a disk imager.

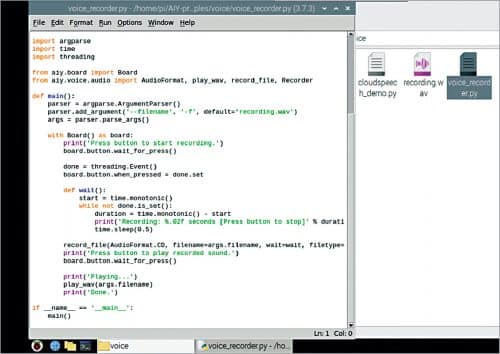
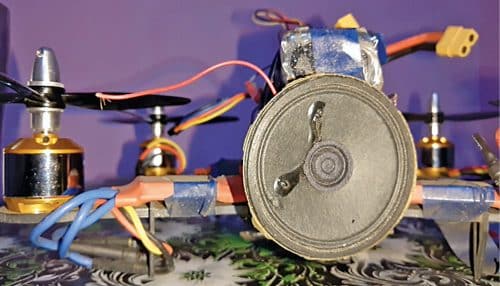
Create the code (voice_recording.py) for recording the audio through Raspberrry Pi (Fig. 12). Run the voice recording code on Raspberry Pi terminal and then press the button on the Bonnet to record the audio for public announcement. Run the code to play the audio you want to announce. Else, you can simply play the recorded file through AIY Voice Bonnet. Loudspeaker attached to the drone for public announcement is shown in Fig. 13.
Now you can fly the drone in and around the area where you want to make public announcements and play the audio.
Download source code
Ashwini Kumar Sinha is an electronics hobbyist and tech journalist at EFYi


