
To avoid the risk of contracting Covid-19, it is important not to touch surfaces including switches, doorknobs, and keys that have been frequently used by other people. This project is for a contactless switch that works with hand gestures.
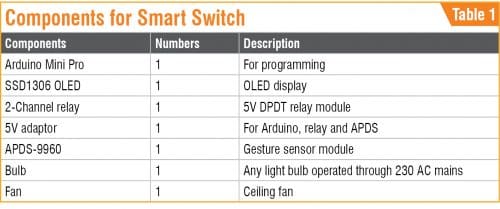
The smart switch includes a sensor that can detect hand movements and translate them into commands for controlling lights, fans, and various other home appliances. The author’s prototype for this switch, with its OLED display installed on the wall switchboard, is shown in Fig. 1. The list of components required for designing the gesture-controlled switch is given in Table 1.

Coding
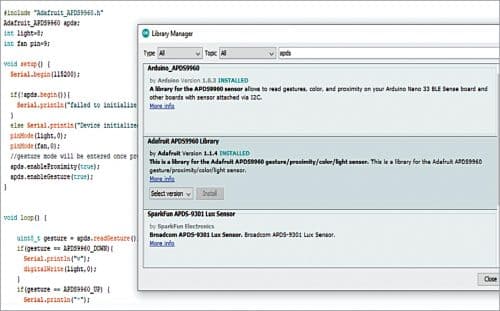
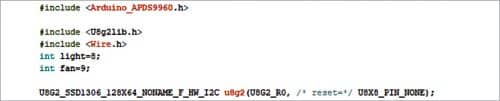
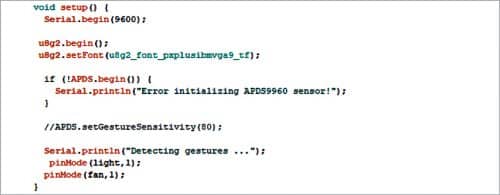
First, install the required libraries in the Arduino IDE. Go to Select->Library Manager->Search APDS9960 and U8g2lib as shown in Fig. 2. Then add each library to Arduino code as shown in Fig. 3. Define Arduino pin numbers for controlling the light and fan. Next, create a setup function where you can initialise the sensor and set the pin mode output for light and fan control as shown in Fig. 4.
Create a loop function to update the sensor readings and use your hand gestures as inputs to control Arduino output pins. Also create a switch condition in the code, as shown in Fig. 5, for specifying the commands based on the type of hand gestures (up, down, left, and right). The icons (arrow symbols) below indicate the gestures and commands to be displayed on the OLED:

Up: Light on
Down: Light off
Left: Fan on
Right: Fan off
After coding is done, compile it in Arduino IDE and upload the code to Arduino board.

Connections and testing
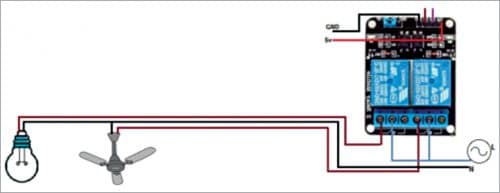
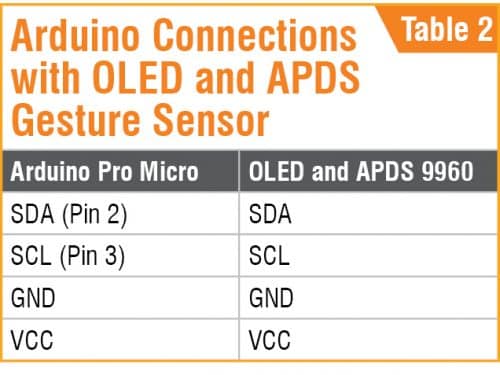
Connect the components as shown in Fig. 6, following Table 2. Then connect the 230V AC mains with the common pin of the relay module to control the light and fan as shown in Fig. 7.


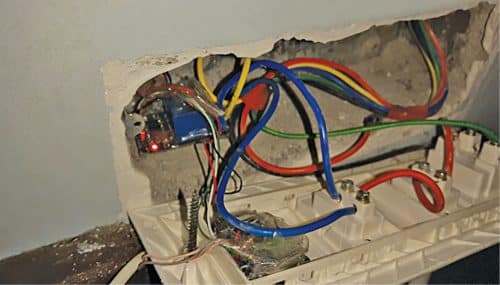
Install the automatic contactless switch on the wall switchboard as shown in Fig. 8. Switch on 5V adaptor to power the device and relay module.
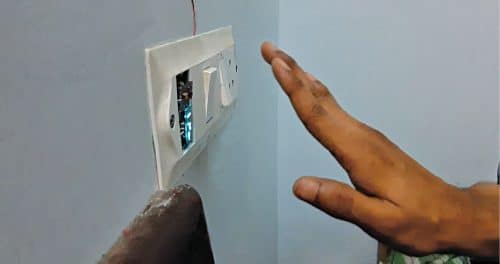
When you move your hand from down to up direction in front of the sensor, as shown in Fig. 9, light will switch on and at the same time an up arrow will be displayed on the OLED. If you move your hand from up to down position, the light will switch off and a down arrow will be displayed on the OLED.
Download Source Code
Similarly, when you move your hand from left to right in front of the sensor, the fan will switch on and a left arrow symbol will be displayed on the OLED. If you move your hand from right to left, the fan will switch off and a right arrow will be displayed on the OLED.
Ashwini Kumar Sinha is an electronics hobbyist and tech journalist at EFYi


Which board is used for programming arduino mini pro or micro? In this post both are mentioned
The project will work with anyone of the three Arduino boards: Micro, Nano and Mini.
please explain the connections clearly also add the block diagram
how do i do the same project using node mcu???
Sir I want the coding pls send me sir
The Source Code is present within the article.
Sir, how can I control the speed of the fan?