

In previous segments, we delved into lidar-based obstacle detection and the integration of lidar and lane detection systems for the ADAS system.
If you are a design engineer or a newcomer, understanding the comprehensive design of autonomous electric vehicles (EVs), drones, and ADAS systems is crucial.
(For a comprehensive overview, refer to Part 1 and Part 2: Anti-Collision System articles published in the June and July issues.)
Video Tutorial:
Building upon the foundation of the earlier ADAS system design, we now progress to implementing lidar technology to scan the ROS environment. This scanning process generates real-time maps of the surroundings using simultaneous localization and mapping (SLAM).
Furthermore, our focus is on localizing the vehicle within the map without relying on GPS data. Such a system within the ADAS and autonomous vehicle drive landscape enhances localization accuracy and aids in path planning even in scenarios where GPS connectivity is compromised, such as tunnels or subways.

It significantly aids in navigation by dead reckoning, which is a method of calculating an object’s current position based on a previously established point.
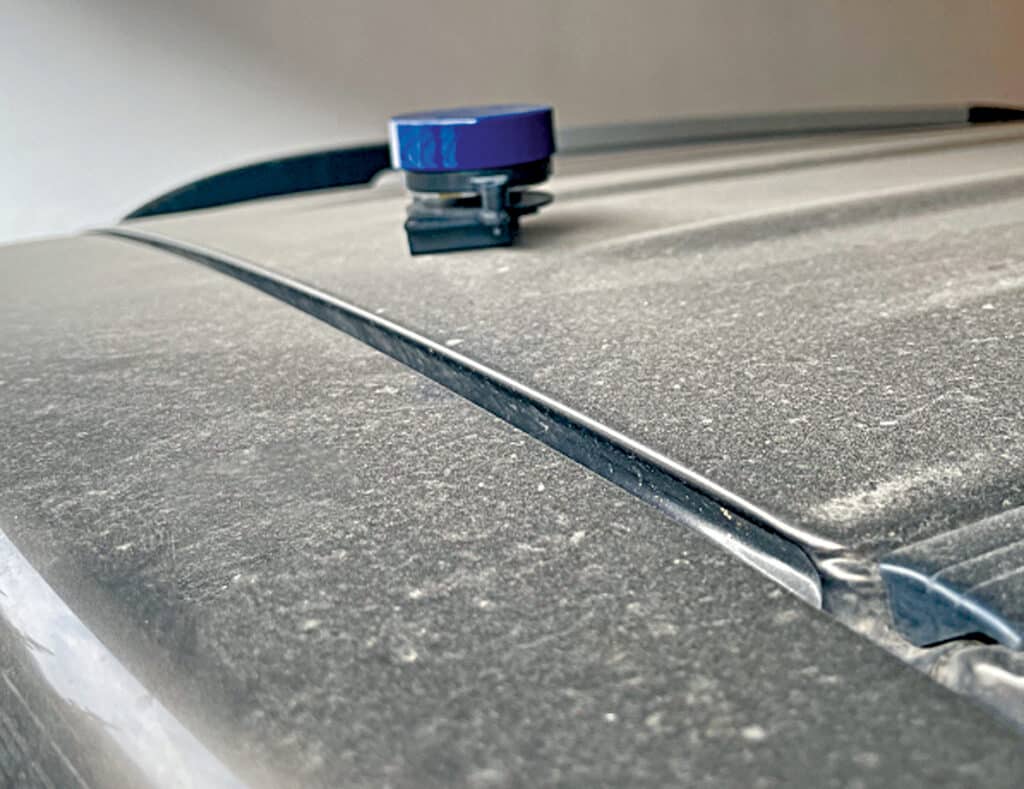
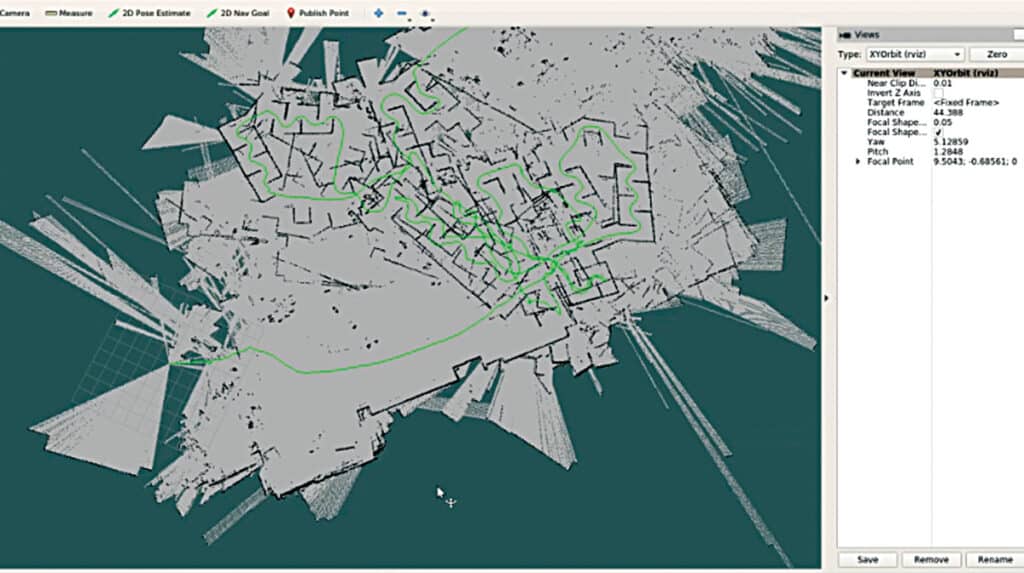
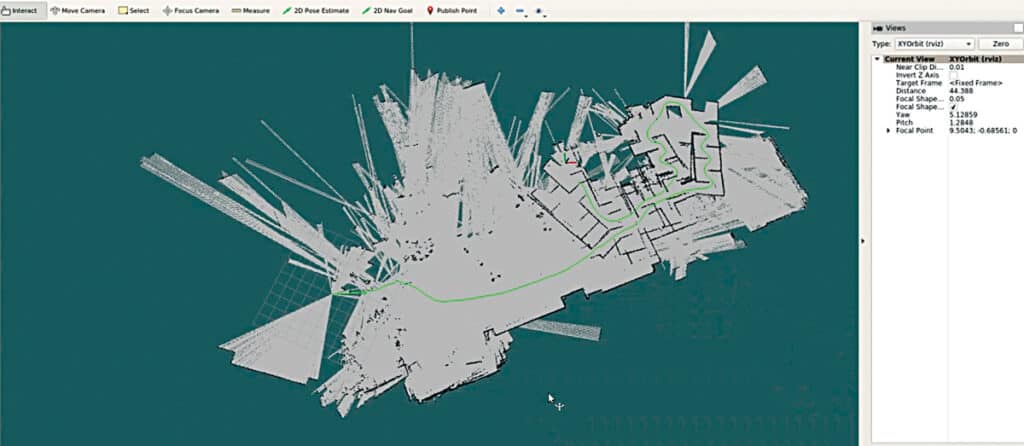
Illustrated in Fig. 1, we observe a vehicle equipped with lidar technology. Subsequently, Fig. 2 showcases the ROS environment mapping the surroundings, generating paths (indicated by green lines) on maps through real-time tracking of the vehicle’s movement.
This fusion of capabilities empowers the ADAS system to navigate and drive vehicles without collisions by efficiently avoiding obstacles.

To facilitate this advancement, a list of components required for the project is outlined in Table 1. If you have previously constructed the ADAS system as per this series of articles, you likely possess these components.
| Bill of Materials | ||
| Components | Quantity | Description |
| Nvidia Jetson/ Raspberry | 1 | 4GB Ram |
| Lidar | 1 | 360 degree lidar |
| SD card | 1 | 32/64GB |
| HDMI display | 1 | 17.8cm HDMI display |
Before delving into the project, it is essential to familiarize yourself with three key concepts: SLAM, Hector SLAM, and dead reckoning.
SLAM (simultaneous localization and mapping): It is a fundamental problem in robotics and computer vision, where the goal is for an autonomous system (such as a robot or a self-driving car) to simultaneously build a map of its environment and accurately determine its own position within that map in real time.
Hector SLAM: It is a popular and efficient open source SLAM algorithm designed for mobile robots. The key feature of Hector SLAM is that it is a feature-based algorithm, meaning it focuses on detecting and tracking features (such as lines or edges) in the environment to build the map and estimate the robot’s pose.
Dead Reckoning: This is an essential navigation technique for estimating the current position of a moving object based on its previous known position (last fix), movement data (speed, heading, and time), which are commonly employed when GPS data is unavailable. It is also known as “deduced reckoning” or “DR.”
Installing Hector SLAM
Before installing the Hector SLAM, first, install the robot operating system (ROS). In our previous article we shared the step-by-step guide to install robot operating system.
Subsequently, set up the drivers and software development kit (SDK) for your lidar. If utilizing the RPI lidar, you can directly proceed to Hector SLAM installation. However, if employing the YD lidar, continue with the following steps:
git clone https://github.com/YDLIDAR/
YDLidar-SDK
cd YDLidar-SDK/build
cmake .
Make sudo make install
Check Github YD-LDR for resources.
Next, create the ROS workspace for the lidar and then install the ROS driver using the following commands in the LXTerminal:
mkdir -p ~/ydlidar_ws/src
cd ~/ydlidar_ws
catkin_make
echo “source ~/ydlidar_ws/devel/setup.
bash” >> ~/.bashrc
source ~/.bashrc
cd ~/ydlidar_ws/src/ydlidar_ros_driver/
startup
sudo chmod +x initenv.sh
sudo sh initenv.sh
Integrating Hector SLAM
Open a new LXTerminal and run the following command to install Hector SLAM:
sudo apt-get install ros-kinetic-hector-
slam
wgethttps://storage.googleapis.com/
google-code-archive-downloads/v2/code.
google.com/tu-darmstadt-ros-pkg/Team_
Hector_MappingBox_RoboCup_2011_Rescue_
Arena.bag
The Hector SLAM is now ready. Modify some lidar settings in the lidar launch file for indoor positioning.
To do so, first, go to the YD lidar workspace and open the src file.
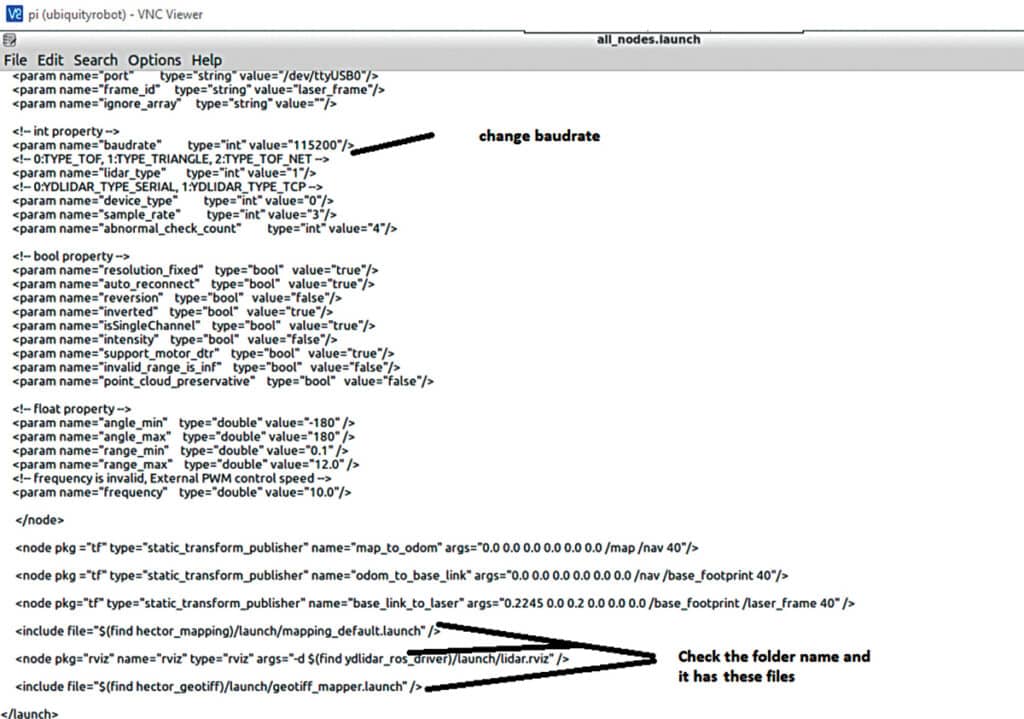
Then open all nodes.launch file and change the parameters as per Fig. 3, which shows configuration of the ROS nodes according to lidar.
Testing
Connect the YD lidar to the USB port of the RPi board/Nvidia Jetson board, power it, and access its desktop GUI.
For positioning, execute the following command in the LXTerminal:
roslaunch ydlidar_ros_driver all_nodes.launchThis command will generate a map showcasing the robot’s current position and its immediate surroundings.
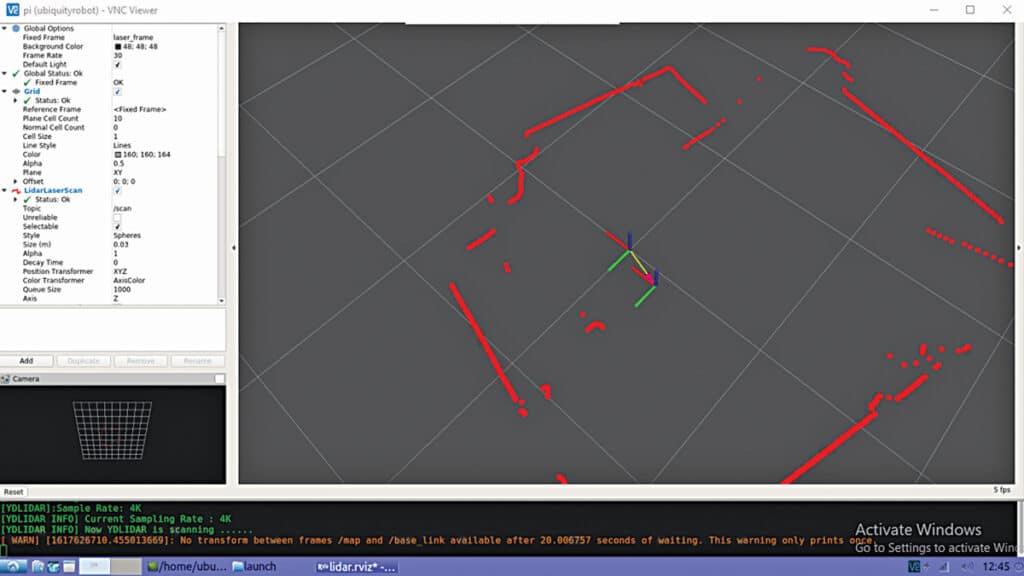
Fig. 4 presents the SLAM data, while Fig. 5 illustrates the ROS Hector SLAM’s depiction of mapped paths captured via lidar.
In next segment, we will merge this ROS environment with the previous lane detection system.
By doing so, we will establish an integrated framework for implementing autonomous driving and the ADAS system.
To test the Hector SLAM and obtain a real-time map, run the following commands:
roslaunch hector_slam_launch tutorial.launch
rosbag play Team_Hector_MappingBox_
RoboCup_2011_Rescue_Arena.bag --clock
rostopic pub syscommand std_msgs/String “savegeotiff”
Check the video tutorial below for better understanding-
Ashwini Kumar Sinha, an IoT and AI enthusiast, is a tech journalist at EFY


