Wearing a face mask is an important safety measure in today’s scenario since the outbreak of coronavirus disease, which is airborne. It is necessary to properly cover the nose and mouth during respiration. However, some people, knowingly or unknowingly do not follow this instruction, especially in public places.
Therefore, to ensure that people obey this rule, we will create a concept camera that uses a machine learning (ML) model to detect the presence of a mask on a human face and if not worn correctly, it sends a notification to properly cover the nose and mouth.
Bill of Materials

Creating ML Model
For this project, we will need Raspberry Pi to run the ML model. With the help of image processing, it will detect the presence of a mask on the face. After creating the ML model, train it using Edge Impulse.

So first create a new project and install Edge Impulse on Raspberry Pi.
Next, open the Raspberry Pi terminal and install the dependencies by running the following code in the terminal.
curl -sL https://deb.nodesource.com/setup_12.x | sudo bash –

sudo apt install -y gcc g++ make build-essential nodejs sox gstreamer1.0-tools gstreamer1.0-plugins-good gstreamer1.0-plugins-base gstreamer1.0-plugins-base-apps
npm config set user root && sudo npm install edge-impulse-linux -g –unsafe-perm
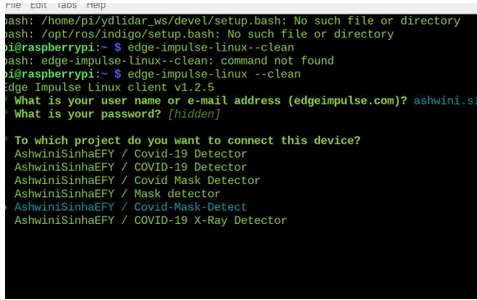
After installation, run it using edge-impulse-linux
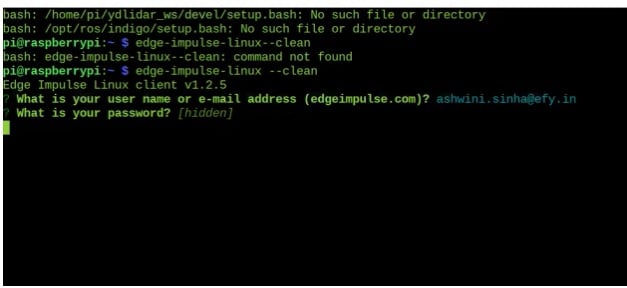
Your email id and password will then be asked for Edge Impulse. Simply enter the details and log in (refer to Fig 2).
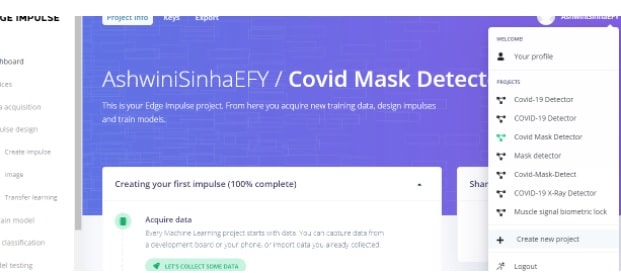
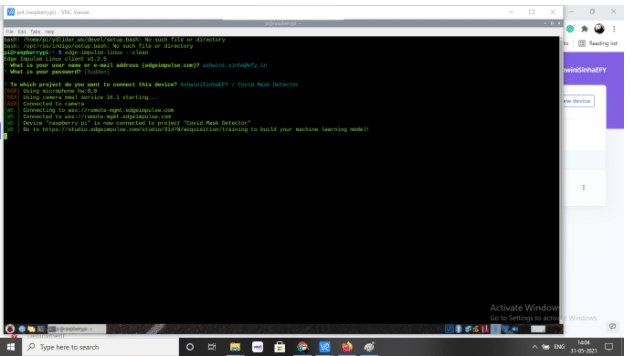
Now it will ask you to select the project with which the device needs to be connected. Enter the project name (I have named it as Covid-Mask-Detector) (refer to Fig 3).
Preparing the Datasets
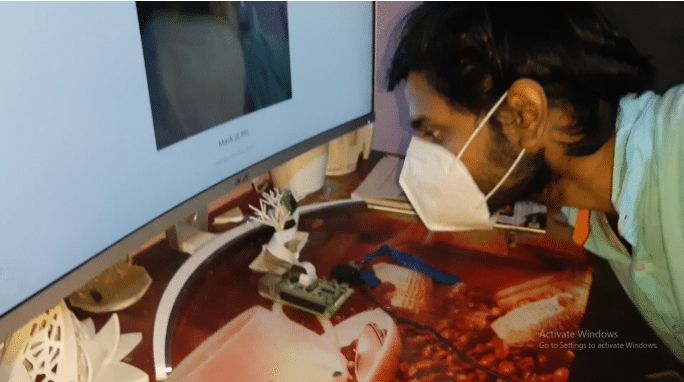
To prepare the datasets for the ML model and later implement them for training it to detect masks, use the Raspberry Pi camera for capturing the image of the face. Then run the command edge-impulse-Linux in the Raspberry Pi terminal.
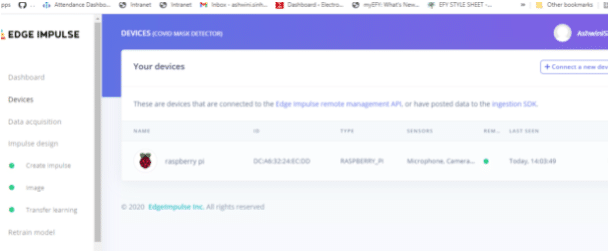
On selecting the project name, you will receive a URL in the terminal that needs to be opened in a web browser like Chrome or Firefox. After opening the URL, a user interface (UI) appears where the live video stream from the Raspberry Pi camera gets displayed.
Now capture several images of yourself without wearing a mask and label them as ‘no mask’. Repeat the same process but this time while wearing a mask and label them as ‘mask’. (Refer Fig 4, 5, 6). After that, click on the button ‘testing’ and repeat the same process as previously done in the training phase. Now the datasets are ready for training and testing of the mask-detecting ML model.

Training and Testing ML Model
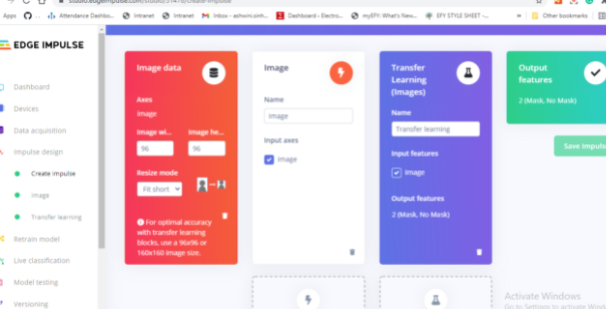
In the Edge Impulse menu, set the processing and learning block. In the processing block, we can see options for sensor, image, and other data. Since the image needs to be processed, select the image option here.
In the learning block, the first option, that is, ‘Transfer Learning (Images)’ is suitable for image classification. So select that.
Next, enter the parameters for the image and then go for transfer training so that the ML model training gets completed (Refer Fig 7,8,9,10).
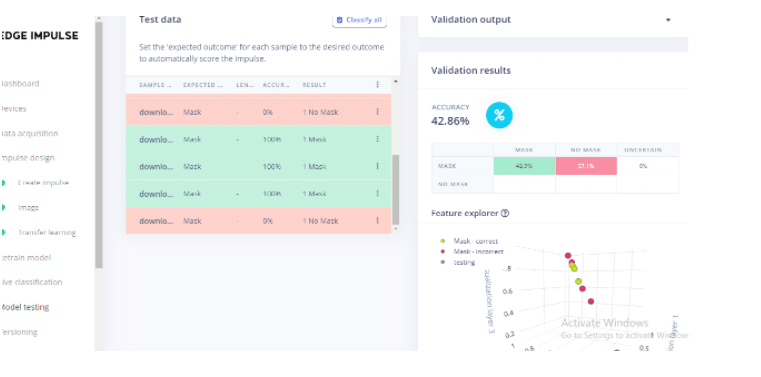
Testing ML Model
To test the learning and accuracy of the ML model, go to testing and click ‘Classify all’. The ML model will classify all the images in the earlier created testing datasets and give results based on their accuracy. If you are not satisfied with the accuracy level, then you can add even more images with the appropriate label and feed them to the ML model.
Also, while creating the ML model, increase the number of training cycles to ensure more accuracy. After being satisfied with the accuracy of the trained and tested ML model, you can then test it with the ‘Live classification’ option.
In Live classification, you get the live video feed from the Raspberry Pi camera. Simply click on ‘Classify t= ’ and the camera will capture your facial image. It will then give the result stating whether or not you are wearing a mask.
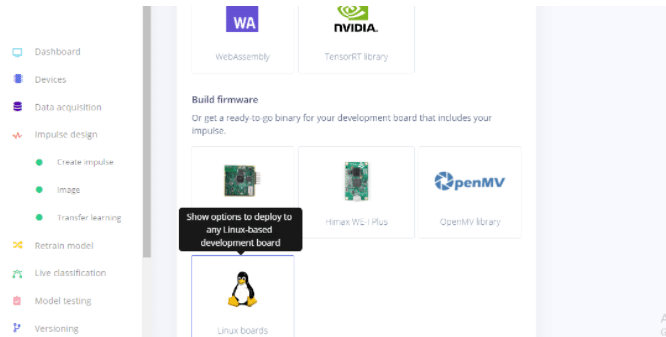
Deploying ML Model on Raspberry PI
Now select the board on which you want to deploy the ML model. Because you are using Raspberry Pi with a camera, select the Linux board and run the command Edge-impulse-runner-linex on the Raspberry Pi terminal. You will then get a URL in the terminal. Open it in a browser, wherein you can see the live video stream coming from the Raspberry Pi camera.
Now whenever you come in front of the camera, your face will be detected and the result shown on the screen (whether you are wearing a mask or not).
If you want any more tasks to be performed after the mask detection such as playing a sound or opening and closing of a gate, then you can export the ML model and program the tasks in Python using SDK. Check the SDK documentation to learn more.