 The Object Finder Robot uses OpenCV and computer vision along with a pre-trained model of TensorFlow running on the Raspberry Pi for detecting and classifying an object. In this robot, we have connected a servo motor that is mounted with a camera on top of it for capturing an overall continuous video of the surroundings. Using the TensorFlow module, it will try to detect the object.
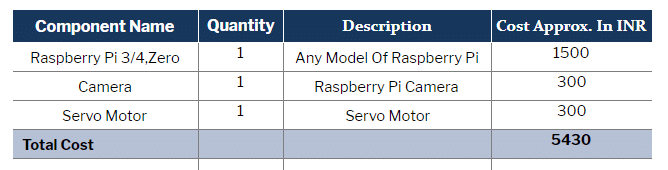
Bill of Materials
Coding
First, we need to install the following libraries.
- Guizero
- dlib
- Tensorflow
- Opencv
- Matplot
- scipi
Use the following syntax to install the libraries

sudo pip3 install library name
sudo apt-get update
sudo apt-get upgrade

sudo nano /etc/dphys-swapfile
Then change the line CONF_SWAPSIZE=100 to CONF_SWAPSIZE=1024
sudo /etc/init.d/dphys-swapfile stop
sudo /etc/init.d/dphys-swapfile start
sudo pip3 install opencv
sudo pip3 install numpy
wget https://bootstrap.pypa.io/get-pip.py
pip3 install dlib
pip3 install tensorflow
After the installation, you can now proceed with the cloning of TF modules, examples and files using the following command:
git clone https://github.com/tensorflow/tensorflow.git
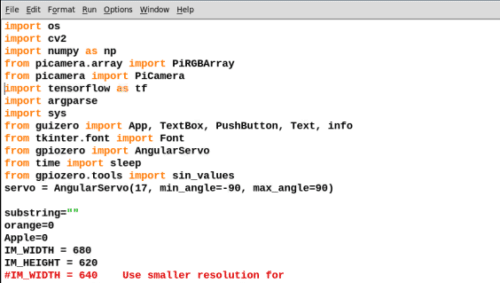
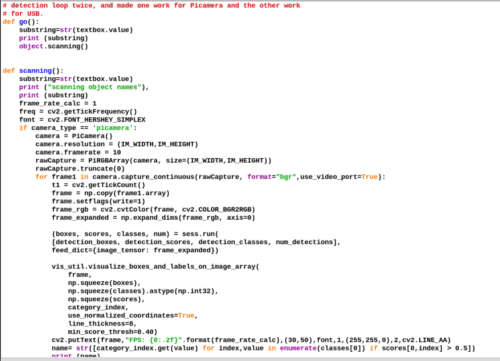
After installing the required libraries, we can now start our coding. Open the Python IDE and create a new file in the tensor flow object detection folder. Then, import the installed libraries in the code and set the pin for the servo motor.
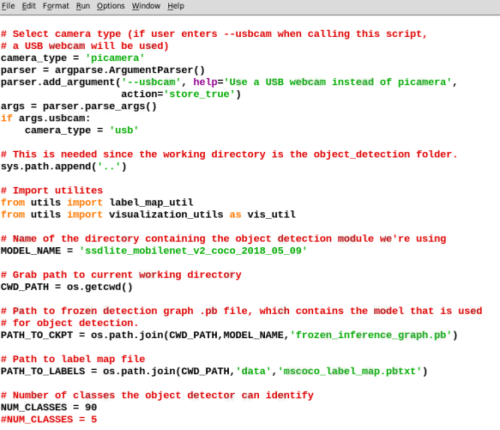
Now we will write a code that will make the GUI ask for the name of the object that you want to find. The GUI opens in a new window in which the name of the object to be found has to be entered. After that, we will create a code that converts the input into a string and saves that as an object to be detected. Next, we will set the path for the object detection model.
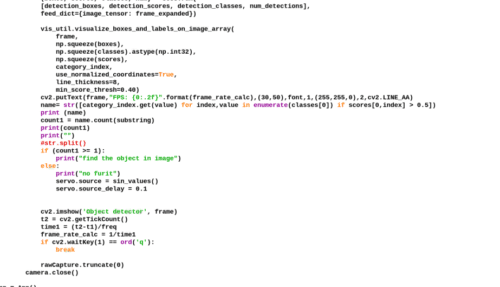
Next, we will create a function scanning feature that captures the video from the camera, cuts it frame-by-frame, tries to recognise the object and then labels that with a name to give the desired result. That result will then be converted in the form of a string. So, by searching the name of the object in the detected object result, we can find out whether the scanner has detected that object.
This piece of code allows the servo to move or “sweeps the camera to 180 degrees” for finding the object.
After completing the code, connect the servo motor as shown in the circuit diagram and then mount the camera on the shaft of the servo motor.
Connection

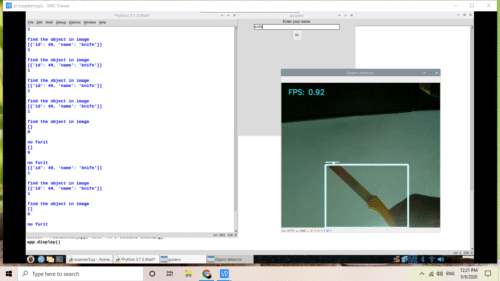
Testing
When you run the code, a window will appear asking you the name of the object that you want to find. Enter the name of that object in the text box and then click on find. Again a new window will appear on your device screen showing the video footage from the camera. The movement of the servo shaft will enable the camera to scan the surroundings for finding the object. When detected, the servo stops there and informs you that the object has been found.