
 At this time of COVID-19 outbreak, the demand for ventilator and health monitoring devices has increased with each passing day. To overcome the shortage of these devices, we don’t have any other good solution yet that can help us in fulfilling this requirement. we can try to design own RaspberryPi COVID -19 Ventilator.
So, today we have decided to make a small ventilator prototype using Raspberry Pi. It will also be capable of monitoring our health and provide data about our heartbeat and SPO2 levels.
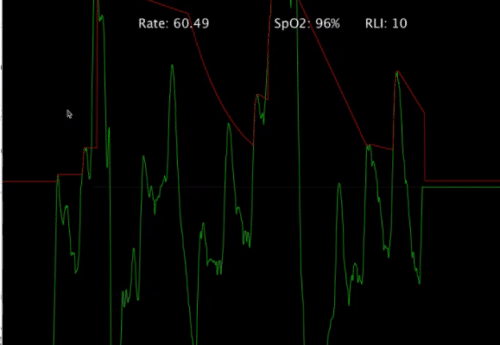
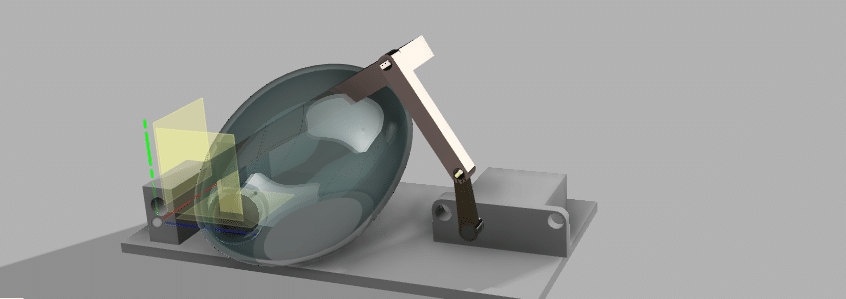
Our ventilator prototype uses a servo motor that applies pressure on an air sack (BVM bag), thus pushing oxygen-concentrated air into the lungs. When the servo motor comes back to its earlier position, it results in pressure being released from the air sack (BVM bag), making it retain its original shape. This helps to draw out CO2 from the lungs (similar to the process of breathing in and out). The entire ventilator mechanism of respiration should be in sync with a patient’s normal respiratory rate. This can be achieved by changing the speed of the servo motor in the program. We have also used the MAX30100 sensor that gives us live data about the rise and fall of pulse rate and oxygen level in the blood of a patient. By implementing Raspberry Pi and any standard LCD display, we can observe the pulse rate and blood oxygen percentage as a graph on the display screen. (Refer Fig 2,3,4,5)


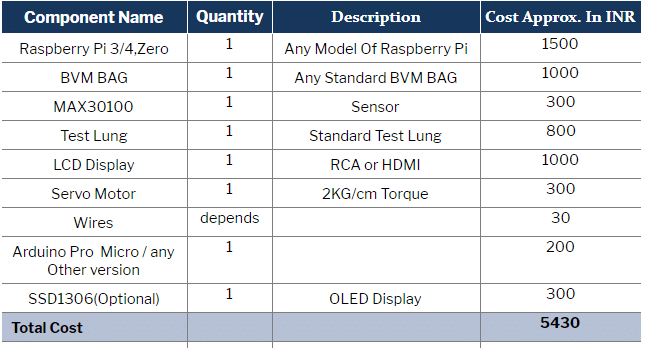
So let’s start our project by collecting the following components for RaspberryPi COVID -19 Ventilator:
Bill Of Material
 We also need extra cardboard and pipe for mechanical construction.

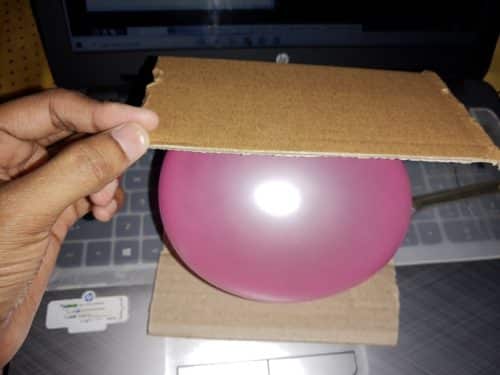
NOTE:-Here, I am using a balloon instead of a test lung and a BVM bag. But for good results, please use a BVM bag and standard test lung. You will also need to make some mechanical changes to the BVM bag for it to work properly.
Do keep in mind that this DIY project should be implemented only under strict medical supervision.
Now let’s begin our project with some mechanical arrangement and construction.

Construction of ventilator
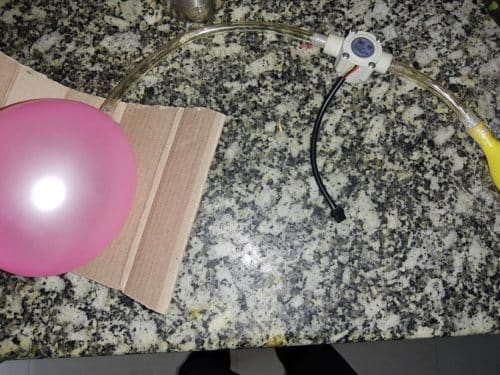
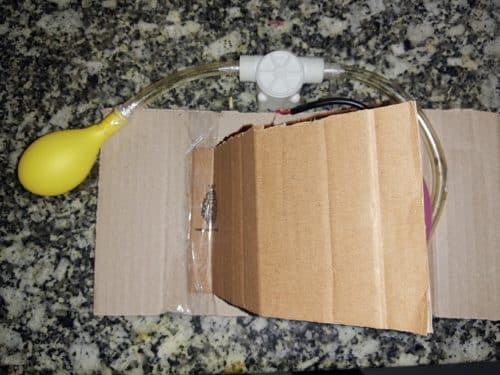
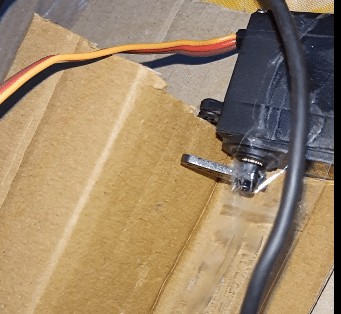
Here, we will take any cardboard and fix the BVM bag on its flat surface. (Refer Fig 7). Now we will take one end of a pipe and insert that into the opening of the BVM bag (here I have used a flattened balloon). The other end of the pipe will be attached to the standard test lung (here also I have used a balloon). Now we will place another cardboard piece on top of the BVM bag so that one side of the BVM bag is fixed to one end of the cardboard and its other side with a servo motor shaft.(Refer Fig 7,8,9,10).
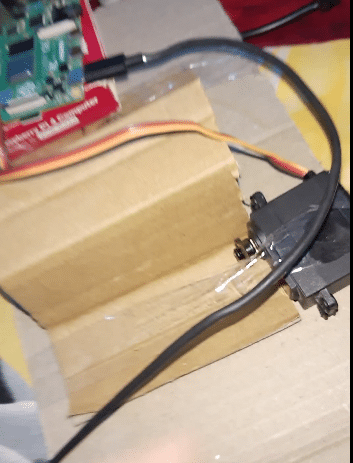
After the mechanical construction, now let’s go for the electronic construction and codingConnect the RPi with the servo motor in the following way:-
| RPI | SERVO |
| GND | GND |
| 5V | 5V |
| GPIO 17 (Gpio zero pin number) | SIGNAL PIN (Yellow Wire) |
The Health Monitoring System
For coding of the health monitoring system, open the Arduino IDE, go to Library manager and install the following required libraries
- SSD1306 Chart
- Max30100
After their successful installation, we can start coding.
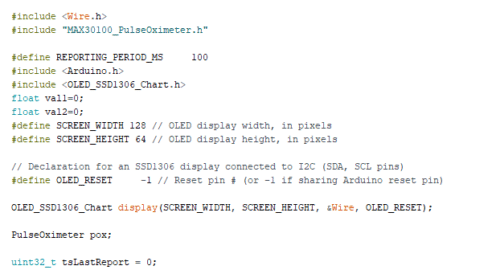
First, we will initialize the libraries in the code and create two variables, val1 and val2.
Next, we will create a setup function that will start the OLED display and the MAX30100 sensor. It will also set the graph length and breadth.
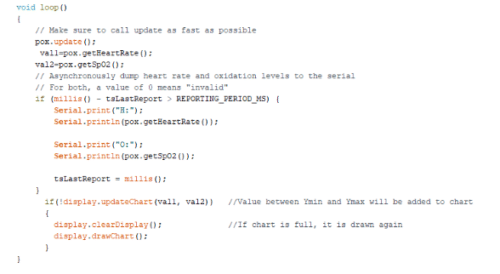
Then we will create a loop function that checks data from the MAX sensor, displays it on the OLED and also sends that to the serial port.

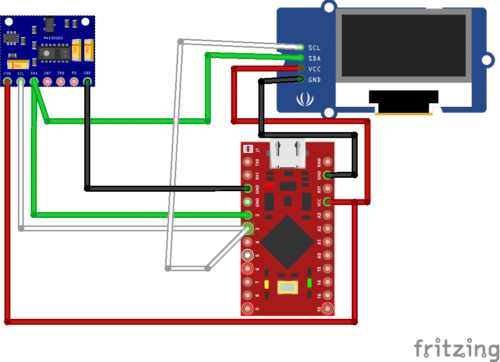
Next, connect the components as shown in the circuit diagram.
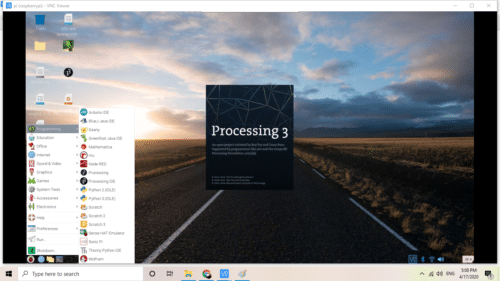
Now for visualizing the live graph and health data, we will setup the Processing 3 in Raspberry Pi. To do so, open the Raspberry Pi and run the given system in terminal.
curl https://processing.org/download/install-arm.sh | sudo sh
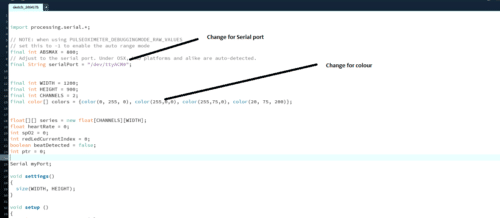
Next, open the Processing 3 (Refer Fig 15). Get the code named ”rolling graph.pde” from the Arduino Library extras folder and then paste that in the Processing IDE in Raspberry Pi.

Testing
Now power the Raspberry Pi and then connect it with the display. Run the code for ventilator and then run the code for health data i.e. “rollinggraph.pde” in the Raspberry Pi Processing. Also, connect the Arduino with MAX30100 into the Raspberry Pi USB port.
When the code for the ventilator runs, the servo motor shaft starts moving and results in pressure being added on the BVM BAG. Hence, oxygen goes through the pipe and flattens the lung. Then the servo motor comes back to its original position, restoring the BVM bag to its previous stae. This continuous process simulates the contraction (breathing in) and relaxation (breathing out) of a human lung.
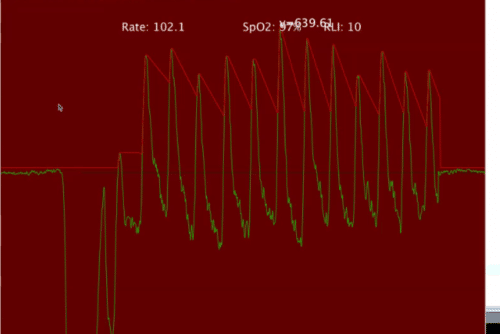
For health data visualization, simply put your finger on the MAX sensor. As soon as it will start to glow, the live graph of the data health will be obtained.
NOTE:- To change the breathing rate of the ventilator, add the time delay in the code .
![]()
Also for health data monitoring, change the port name to the port name of Arduino. Here my Arduino port name is ttyACM0.]
Congrats, Our prototype of RaspberryPi COVID -19 Ventilator is ready.
Download Source Code


Sir
I am interested in involving and going for constructing
The full assembly and loading the software
The Corona kit which appeared in your above
Article .
If any body willing to finance ,I can take responsibility to supervise the project until testing and compliance.
I am an electrical and power electronics
Engineer .
Regards
Gopal Raju
9535168189
You can improve it further and cam makes the design into a finished product with some mechanical construction and code modification.IF you need any help in construction you can modification can ask me
sir did u built this project ? i wanted to know few things about making it. pls reply.
Yes you can contact me on whats app 7061350809
Hi, thanks for sharing your project. What I don’t get, how could the servo apply any force with this little leverage?
I understand that you might be on a low budget but in terms of mechanical construction, it would be nice to see a finished prototype. Thank you very much.
Mechanical construction can be modified to get more force by attaching the lever to the servo and another end of the lever to be fixed on another side
Sir
I am interested in involving and going for constructing
The full assembly and loading the software.
I am an computer science
Engineer student .
Hi,the project is really well.
i have adoubt in mechanical construction how the pipes be connected with servo motor.expecting your reply??
this is a concept DIY having the demo how you can design your own ventilator, here servo motor is used to exert force on the BVM bag or ballon to push the air in and out helping in respiration. The pipe is connected to BVM bag, not to the servo motor
Sir can u show it’s working
Sir, please share the block diagram
bro did u get the block daigram from sir ? if yes pls share me also.
Sir I want to do the same project in my project.did u help me .pls share block diagram
I am interested in this project. it is good technology help to coron patient.
sir, boooth arduino and raspberry pi are needed to make this program ?
both*
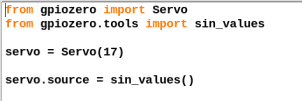
Yes, Both are used but if want to eliminate the arduino you can make code in python with numpy and directly connect the sensor to RPI.