
 General X-Ray-based Covid-19 detection systems are fast and give quick results along with the status of how much the COVID-19 virus has infected the lungs. Previous Covid-19 detection systems took time to give reports while the infected person needed immediate attention. Also, all such detection systems used parts that required to be disposed of after every use, creating a high demand for raw materials.
But our X-Ray-based Covid-19 detection system needs to be installed only once with an X-Ray machine. The detection system gives a timely status of infection inside the lungs. There are two ways to achieve this: by using the Python library or by creating and training an ML model. Here we talk about first creating and training the ML method. Also published soon will be other methods where we use pre-trained model.
Bill Of Material
Let’s start our project by collecting the following components.


Note :- You can eliminate the cost of HDMI display by using your laptop or any monitor/TV as a display screen instead. You also need an X-Ray image of the lungs.
Prerequisite
Install the latest Raspbian OS on the Raspberry Pi board. Next, you need to prepare X-Ray image datasets of lungs that are infected and not infected by Covid-19. You can obtain this by visiting kaggle, an online resource for X-Ray infected dataset prepared by a community of experts and doctors. You can also obtain data from GitHub. Download the datasets containing X-Ray images of normal lungs and Covid-19 infected lungs.
Now choose a platform for making your ML model and train it to detect Covid infected lungs in X-Ray images. Here we have various options such as TensorFlow, PyTorch online options like SensiML, Apache Spark, EDGE Impulse etc. Here I am using EDGE Impulse.

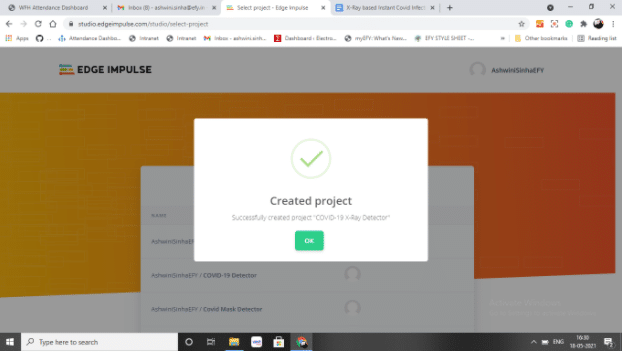
If you are also using Edge Impulse, then select create project. You are then asked to choose how you wish to use the project. Since you want to use the project for creating an image processing ML model, select the image.
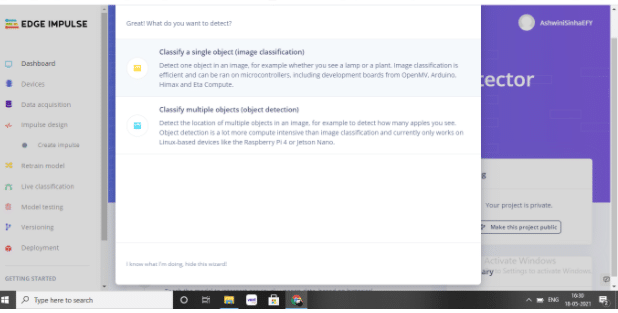
Then you will be asked how you want to classify the image (multi-object classification or single-object classification). Here you can select any. I am using single-object classification (refer Fig 2). On clicking the newly created project, you will be asked to specify how you want to use it. Select connect a development board, which will upload the data to the project (refer Fig 3).

Installation on Raspberry Pi
Open the terminal and install the dependency for EDGE_Impulse on Raspberry Pi using the command given below:
curl -sL https://deb.nodesource.com/setup_12.x | sudo bash -
sudo apt install -y gcc g++ make build-essential nodejs sox gstreamer1.0-tools gstreamer1.0-plugins-good gstreamer1.0-plugins-base gstreamer1.0-plugins-base-apps
npm config set user root && sudo npm install edge-impulse-linux -g --unsafe-perm
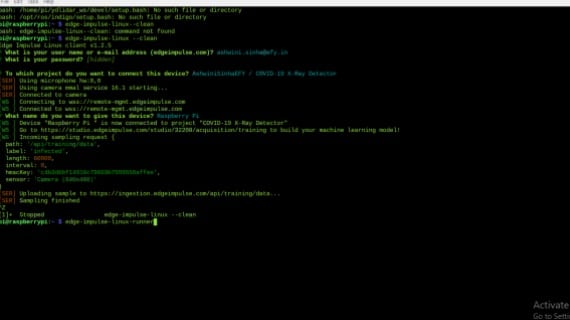
After installation, run it using edge-impulse-linux.
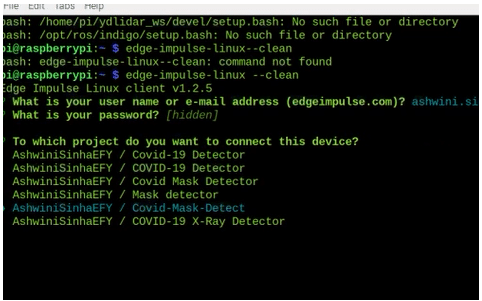
You will then be asked for your email id and password for EDGE Impulse. Simply enter the details and log in (refer Fig 4).

Now it will ask you to select the project with which the device needs to be connected. Enter the project name (in my case, it is COVID-19 Detector) (refer Fig 5).
Dataset Preparation
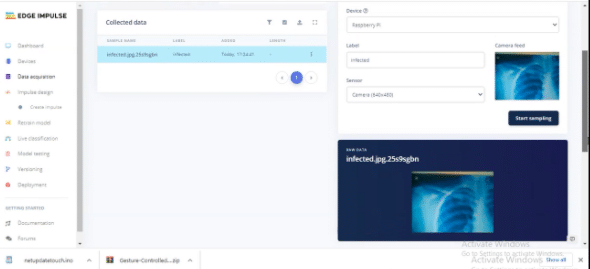
Now you are given the URL for uploading the datasets. There are two options: either use Raspberry Pi’s camera to upload datasets of X-ray images (by placing the X-Ray images in the camera frame) or use the PC/Raspberry Pi to upload the X-Ray image files (refer Fig 6). I recommend you use the latter.
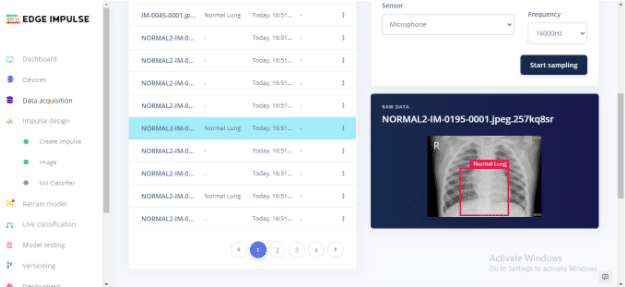
So to manually upload the datasets, that is, images of X-Ray from the PC, select them as testing/training images. After selecting, upload them for training and set the level for classifying the images. Here I am setting the label as COVID-19 infected and Normal Lungs (refer Fig 8). Now upload X-Ray images of the normal lungs and Covid-19 infected lungs as per their relevance.


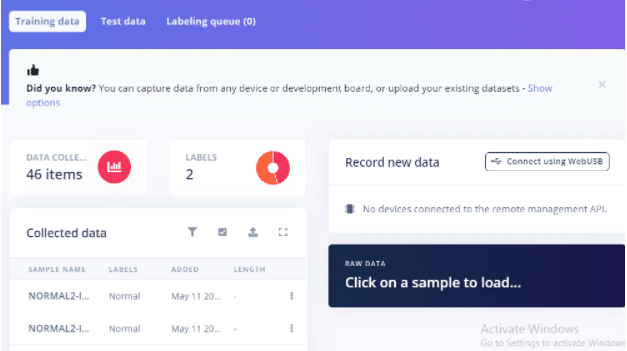
In case you miss uploading the images to their respective categories, you can later add and/or label them as ‘Infected Lung’ or ‘Normal Lung’ by using the Edit option. But please be careful while labelling the datasets. If you label X-Ray images showing normal lungs as Covid Infected then your model will get trained incorrectly, thus decreasing the accuracy. When you initially download the datasets (from the website), make sure to have two separate folders: one for the training datasets and the other for testing datasets. In both of them, create two more separate folders named Infected lung X-ray and Normal lung X-ray. Upload images from both these folders separately and categorise them correctly after uploading (refer Fig 9).
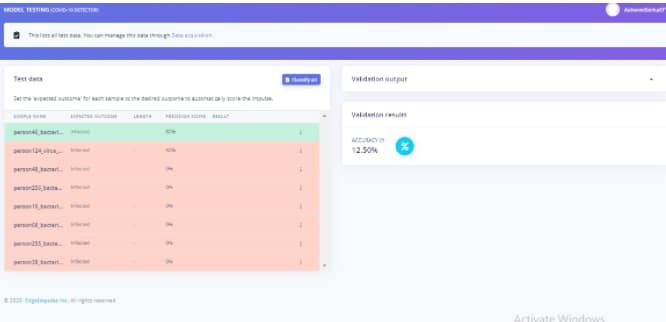
Repeat the same steps for uploading the X-ray images of infected lungs and healthy lungs for testing datasets. The option for uploading X-ray images for testing datasets can be found next to the training option (refer Fig 10).
Training ML Model
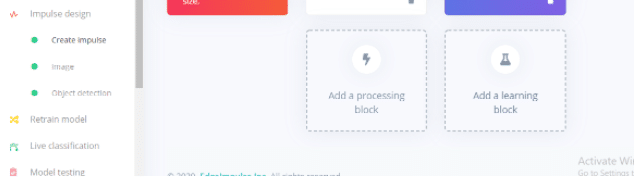
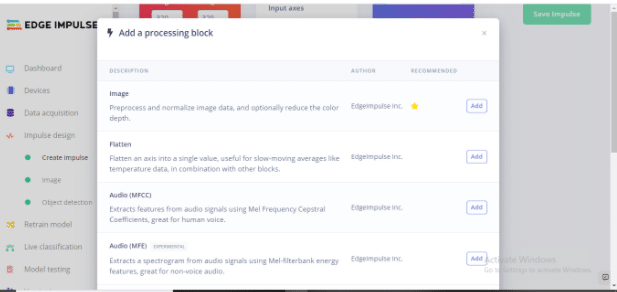
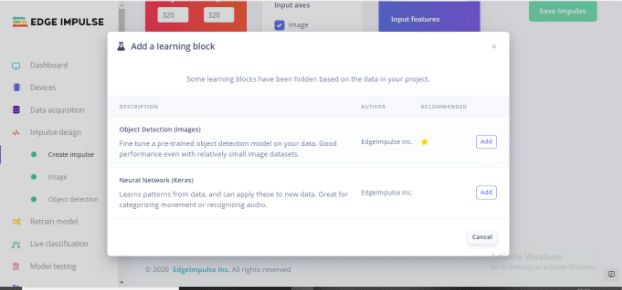
After uploading the X-Ray images of infected and non-infected datasets, you are now ready to train the ML model. Go to Impulse design, click on create Impulse and select the create Impulse (Refer Fg 11). Next, add the processing block and learning block here (Refer Fig 12, Fig 13).
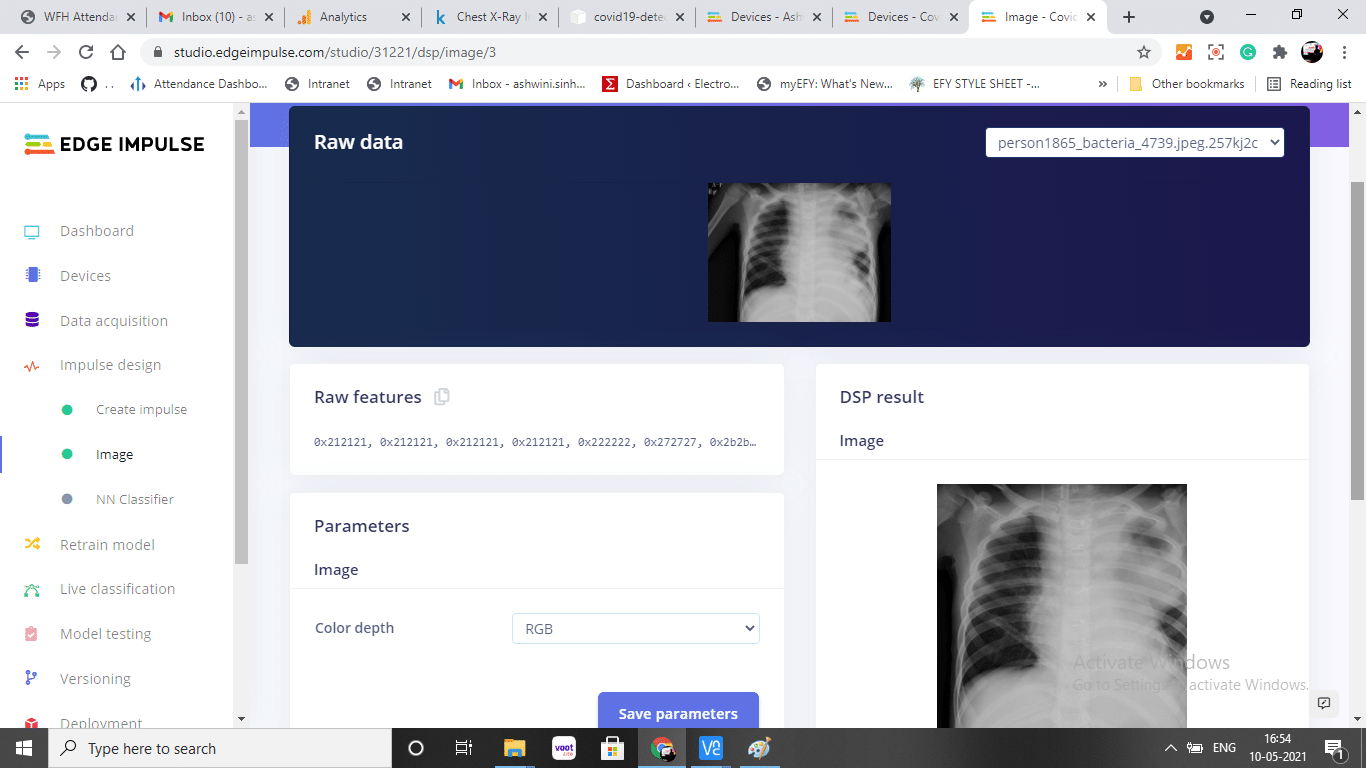
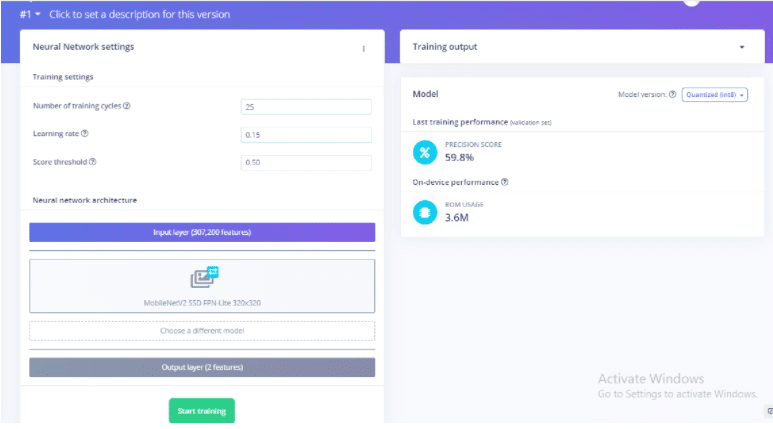
After adding the processing and learning blocks, you need to set the parameter. Here, get the features extracted from the X-Ray Image and then save them (Refer Fig 14, Fig 15). Now get to a new option for training the ML model. For this, select the ML model training to be created using Keras expert mode or normal mode. Here we are using the simple mode. In this mode, there are options to set the number of learning cycles If the number of learning cycles is increased, then the accuracy increases because it goes in the loop for various cycles of learning but it takes time to make ML Model learn. You will get an option to set for threshold and learning rate whose values affect the accuracy and time of the ML model generated for Covid virus detection.
Testing
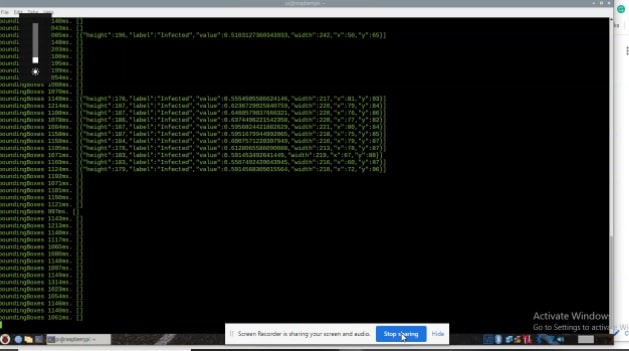
Now the trained model is ready for testing. Here we can test the model with an already uploaded X-Ray image, for which the model will try to detect the infection of the Covid virus in the lungs.

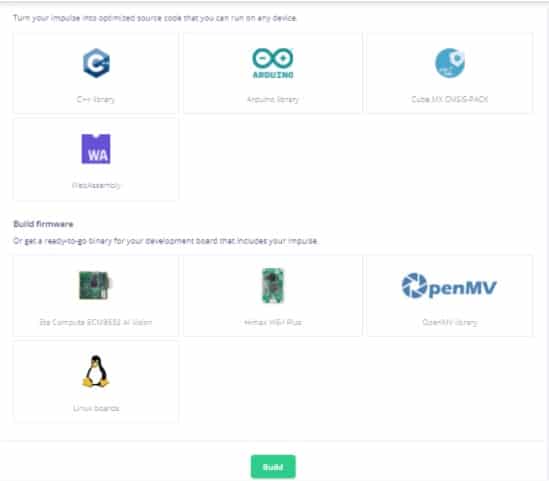
Deploying ML Model
Now our ML model is ready to be deployed. Here we have many options and hardware on which we can deploy our ML model to detect the Covid-19 virus infection in an X-Ray image of the lung. Since we are using Linux, select Linux. After that, open the terminal and then run the program.
Edge-impulse-runner-linex
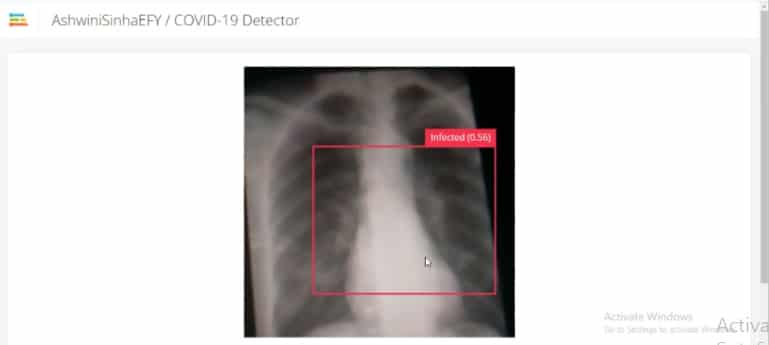
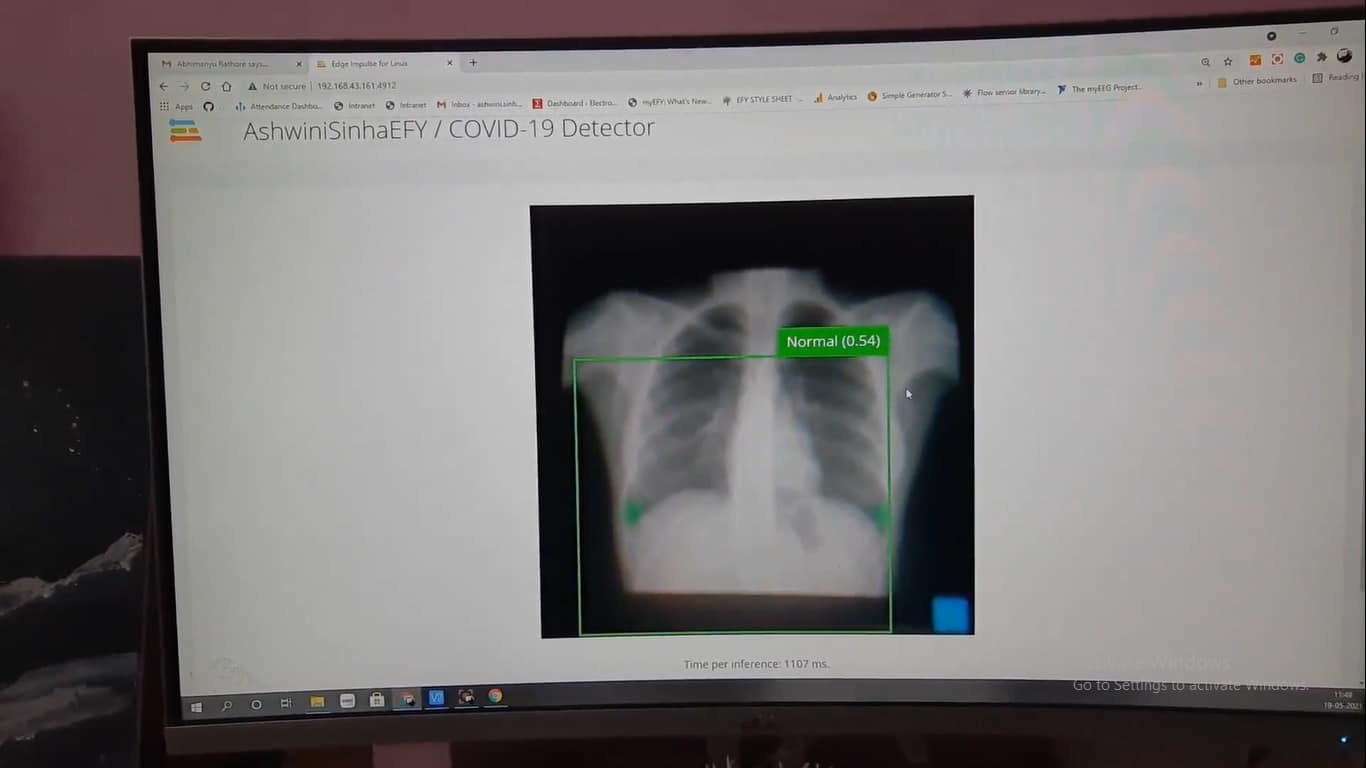
After this, the Raspberry Pi starts downloading the ML Model and runs the model to give you the URL where you can see the live camera video from Raspberry Pi. Now put the lung X-ray image in front of the camera with full light. The model starts detecting the infected lung and tells the Covid test results in a few seconds.
There are more options to deploy the ML model of Covid detection. By using SDK we can detect the Covid and deploy the ML model in a programming language like Python. Else you can directly upload the X-Ray image in a testing data set and then run the ML model in live classification to detect the Covid-19 virus infection in a matter of seconds.


its just waste. COVID19 starts from nose or mouth, in chest its the severe case so if person has any other lung abnormalities it will detect covid19 only
Do we have any code for this ?
NO yo can make ML model online and o the classification directly from the EDGE IMPULSE engine no code required
if yu want custimizatuo=ion then you can download the ML model file and install edgeimpulse SDK and do code in python as well but it can cun without code as well