

Object detection wherein every activity gets displayed in a live classification or IP address is a trending topic nowadays. Taking advantage of this, if machines can also recognize objects as humans do, then it would be very interesting.
Using the Edge Impulse platform, users can train their AI, ML models without possessing deep knowledge of programming or AI, ML concepts. Edge Impulse is a cloud-based platform that incorporates computing in Raspberry Pi for acquiring live videos and images via a camera interface.
It could run on both intranet and the internet, thus helping experimenters and hobbyists to project their designs and develop various problem-solving applications. Some examples are:
- Live entrance door monitoring
- Unknown person alert
- Industrial object classification and separation using robotic arms
- Fruit counting on a tree or machine separator
Components Required
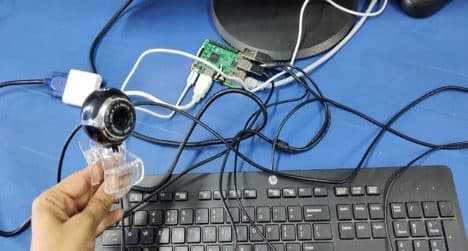
- Raspberry Pi 3 B
- USB camera
- Keyboard
- Monitor
- Mouse
- Edge Impulse website
- SD adaptor (32 GB)
- HDMI to VGA cable
- 5 V power adaptor with USB Type-C connector
- SD card reader
Development and Working
- Download the Debian-based Raspberry Pi desktop imager on any PC
- Launch Raspberry Pi Imager
- Choose OS as Raspberry Pi OS (32-bit)
- Choose SD card
- Select Write
- Insert SD card into Raspberry Pi
- Connect Raspberry Pi to power supply, keyboard, mouse and monitor
- If OS is properly installed, then a new window saying “Welcome to Raspberry Pi Desktop” will appear
- Connect USB camera to take a photo
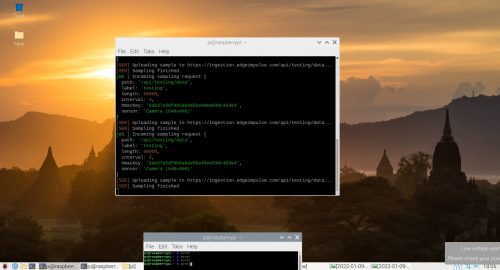
- Go to the RPi terminal
- Install below commands
• curl -sL https://deb.nodesource.com/setup_12.x | sudo bash –
• sudo apt install -y gcc g++ make build-essential nodejs sox gstreamer1.0-tools gstreamer1.0-plugins-good gstreamer1.0-plugins-base gstreamer1.0-plugins-base-apps
• sudo npm install edge-impulse-linux -g –unsafe-perm - Next, go to https://www.edgeimpulse.com/

- Enter your name and email id
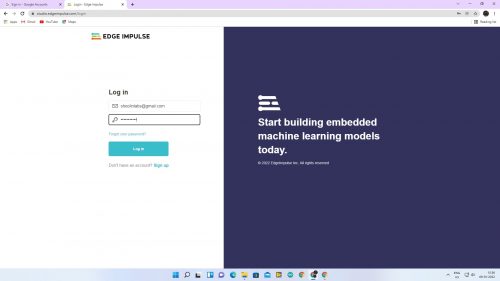
Edge Impulse Login - Sign up for free and login to your account

- After that, run Edge Impulse using the following command
• edge-impulse-linux

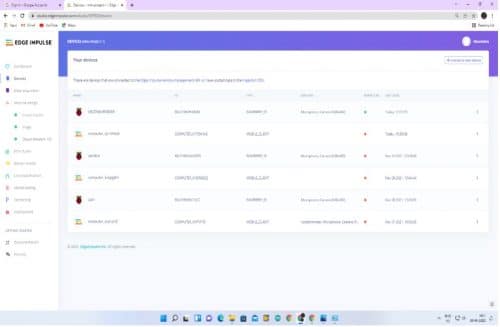
- If the connection is proper, then the Device section of the Edge Impulse Raspberry Pi cam will appear

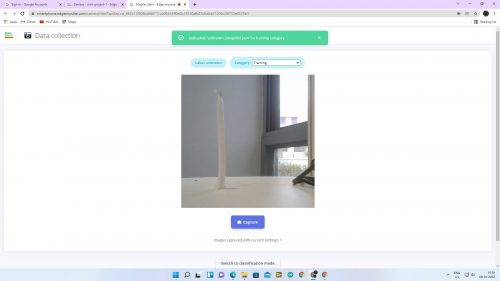
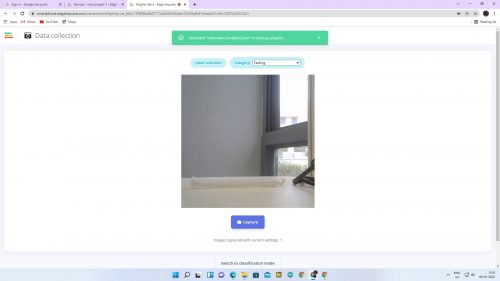
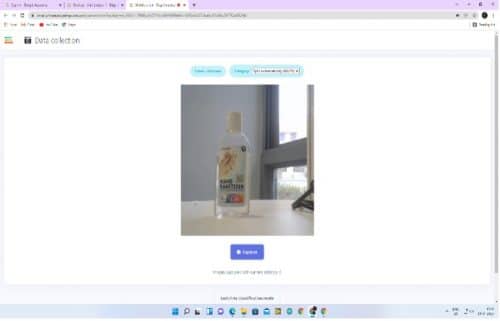
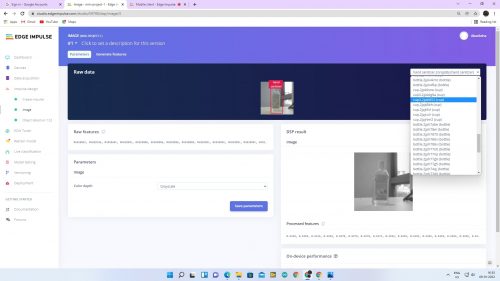
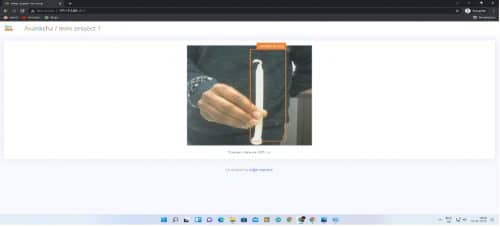
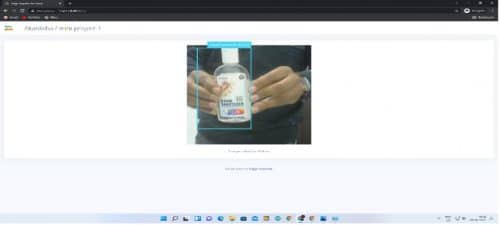
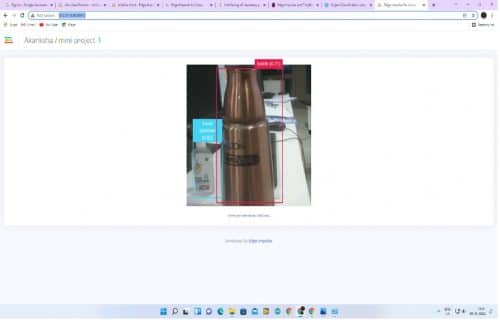
- Here, you can take a photo of any object like a bottle, cup, or any face
- In the Data Acquisition section, take at least 100 photos of the different objects for training and testing purposes. You can rebalance your data with a splitting ratio of 70:30
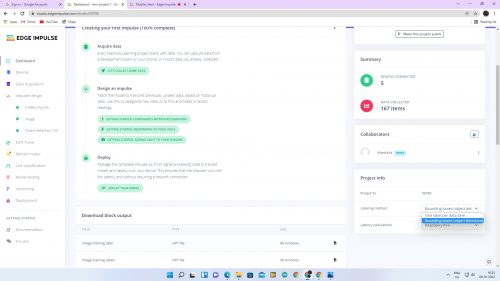
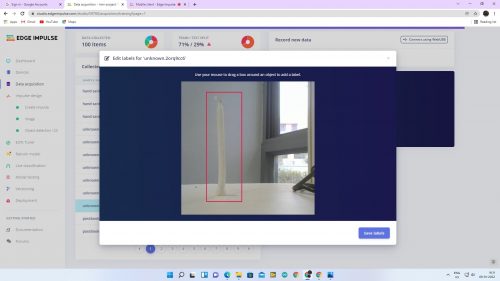
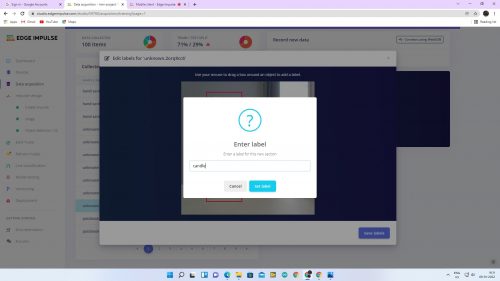
- After this, go to the dashboard and select Labeling Method. It should be bounding boxes (for object detection)
- Label all the objects via Labeling Queue

- Now go to Impulse design
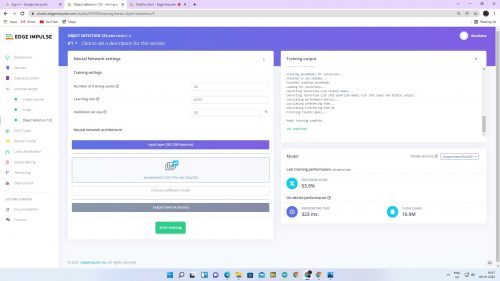
- The image width and height should be 320×320
- Change the object detection project name
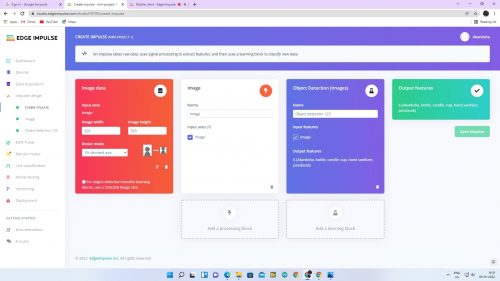
- Save Impulse
- In the Image section, configure the processing block and select raw data at the top of the screen. You can save parameters either in RGB or grayscale
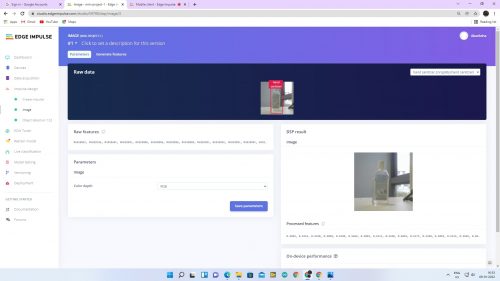
- Now go to Feature generate
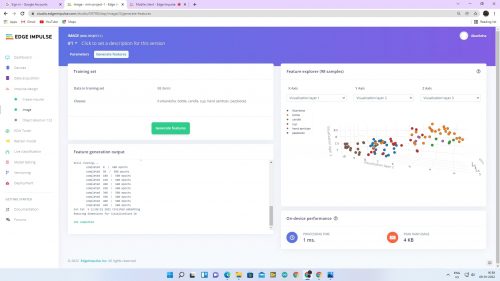
- Due to different image dimensions, the reduction will occur
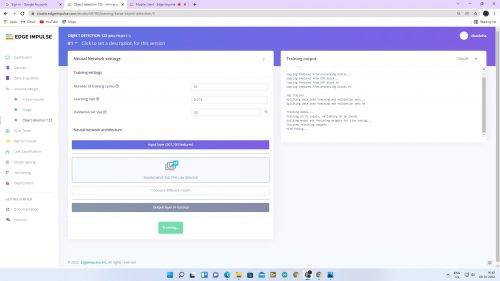
- In the object detection section, the numbers for the Training Cycle and Learning Rate are 25 and 0.015, respectively
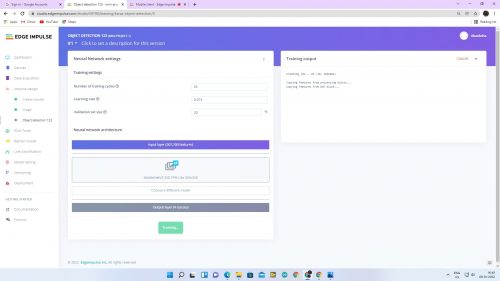
- Start training
- After training the model, get a precision score
- For validating your model, go to Model Testing and select Classify all

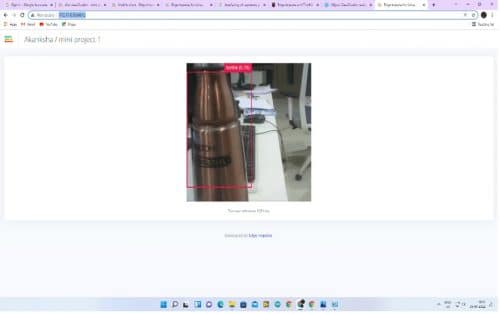
- Now go to live classification. In real-time, an object is shown near the USB camera with the relevant label (like a bottle or cup)
- If you want to see with IP address, run the following command in the RPi terminal
• edge-impulse-linux-runner - Build and download model in Raspberry Pi
- Enter the IP address as http://192.168.1.19:4912 for live classification in Raspberry Pi

Akanksha Gupta is M.Tech in ECE from NIT Jalandhar. Currently, She is a Research Scholar in the Electrical Department at IIT Patna.
Sagar Raj is a Founder & Director at LIFEGRAPH BIOMEDICAL INSTRUMENTATION Pvt Ltd (incubated at IC-IIT Patna) and Shoolin Lab Jaipur. He works in the domain of IoT and Embedded systems.


