

Engineers are the drivers of executions. They bring changes by executing the job perfectly and efficiently. However, many a time while trying to make the execution more efficient they want to tweak & tinker with the system or the process minutely such that if it gives the desired result they will implement it on the other hand if it goes wrong, they can reverse it quickly and being an inquisitive engineer tweaking & tinkering is an inherent quality.
For achieving that feat an engineer needs to generate the pulse of the system or the process at many steps of the cycle but most of the engineers are neither instrument engineer nor very much aware of the modern electronics as a result of which they cannot test their hypothesis and gets frustrated easily & inwardly.
But had he knew about hardware computing by the Arduino microprocessor way, he could have created his own pulse generation system without any body’s help.

Well, the word ‘Microprocessor’ is enough to drive off 100 miles a mechanical or a Civil engineer. But believe me in this article what I’m going to tell you is all about Physical computing & Microprocessors but stripping everything and leaving only its hands and feet and the brain which are ready to work for you when you are not there or sleeping!
Now come about the Interaction design which is the creation of meaningful experiences between humans and objects. It’s a good way to explore the creation of beautiful and may be even controversial experiences between us and technology. Interactive design encourages design through an iterative process based on prototypes of ever-increasing fidelity. This also entails the beautiful world of Physical computing. It involves the design of interactive objects that can communicate with humans using sensors and actuators controlled by a behaviour implemented as software running inside a small ‘computer-on-a-single-chip’ called Microcontroller.
In the past, using electronics meant having to deal with electronic engineers all the time, and building circuits one at a time; these issues kept creative people from playing around with the medium directly. Most of the tools were meant for experts and required extensive knowledge. However, physical computing with Arduino means nothing less than doing artistry with electronics. With Arduino, an engineer or an artist can get to know the basics of electronics and sensors very quickly and can start building prototypes with very little efforts and then imagination starts playing around and one can get himself immersed in the world of creation of physical computing so easily.
Classic engineering relies on a strict process for getting from A to B; The Arduino way delights in the possibility of getting lost on the way and finding the much better C instead.
This is the tweaking or the tinkering process that we the engineers are so fond of – playing with the medium in an open-ended way and finding the unexpected.
Lets consider the following few cases one by one.
Case:1
Imagine, you are installing a pump which will run according to the level of the reservoir or the flow channel. The pump works flawlessly. For running and stopping of the sophisticated pump round the clock an operator is installed. One day the operator did not turn up and there was nobody to stop the pump when there was no level and you lost the pump. Frustrated you want a level controller to take care of the operation. The instrument guy says it’s all wire & pulley type level controller which cannot be placed on that high stream flow. You ask for a contactless level controller. Nobody is there to help you out.
Case:2
You want to view, measure & log the pump body temperature at several places of this ash slurry pump because it’s the pump which you cannot afford to loose due to spare problem. The instrument guy says that they have only bearing temperature monitor, no other kind of monitor is available and not to talk of selective temperature logging. You feel frustrated.
Case:3
You have installed an UPS system using 12 volt batteries of two different companies. However, rating and volts are all same but you have a hunch that in the 10 year life span of the battery one particular type will fail before the other. Your purchase department did not listen to your warning while placing the order. You want to monitor all these 60 batteries individually (during charging and discharging) while they are all in service. On the minute indication of one type of batteries delivering small currents during discharging and taking large current while charging, you want to record.
Not too long ago, working on hardware meant building from scratch, using hundreds of discrete components with strange names like resistor, capacitor, transistor, ICs and so on. Every circuit was wired to do only one specific application and making changes required you to cut wires & solder connections and redo it again.But with the appearance of digital electronics & microprocessors these functions are achieved by small changes in the software programs. Software is easier to modify than hardware, with a few keypress, one can radically change the logic of a device and can develop into another finer system. In all the above cases it’s very easy to develop his own level controller, temperature logger or a CAN bus battery monitoring system which will cost less than a few grands.
But it seldom happens that the engineer knows about the Arduino or the instrumentation man is aware of the easy physical computing by Arduino and both becomes frustrated – one for not having and the other for not providing.
Introduction to Arduino UNO:
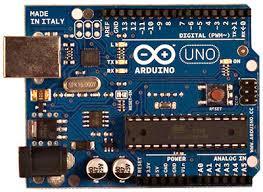
Well, lets roll up the sleeves and have a close look what’s there in an Arduino. This magic board is about 9 years old. First developed in Italy, the first edition price was some $80 but over the years after being sold for a few million boards now the price in the international markets have come down to $10. In India the clones are available for as low as Rs:500 (ebay.in). However, the hardcore Arduino users make their own Arduino for as low as Rs:60 (The cost of the microprocessor chip)
![[Arduino – UNO; based on ATMEGA 328 P – PU ;courtesy aliexpress.com ]](https://www.electronicsforu.com/wp-contents/uploads/2017/05/Screen-Shot-2017-05-10-at-11.17.00-AM.png)
There is another bigger version of Arduino called – Arduino Mega. Which has more of the above pins besides it has slightly more memory to take more complex programs. But the most favorite form of Arduino is the Arduino ‘UNO’ which has wrapped the electronic world by storm.
What it does:
Well those small holes are those I/O [Input / Output ] pins. You add your sensors, relays, actuators, displays, LCDs, LEDs with those pins and then write a
Well those small holes are those I/O [Input / Output ] pins. You add your sensors, relays, actuators, displays, LCDs, LEDs with those pins and then write a minuscule, tinier than tiny program which is also called sketch and then upload it in it with the help of that cable & computer. The black 28 pin microprocessor takes the upload to its heart content and then keeps on doing endlessly whatever you have instructed in that program. It never defaults & never sleeps like the human operator. It becomes a genie for you.
OK now the audacious engineer will ask, ’So what? How to tie everything up with this board?’
Connections:
It’s very simple, just like a motor has a supply point so is true for all sensors, relays, servos, LEDs or any other devices. Find out the supply lines of the device first. Most of the low power devices have 3.3 volt or 5 volt connections.
 Now look at carefully the UNO board and it has the 5volt as well as 3.3 volt supply available onboard. Connect the devices to that supply lines first. Now find out the signal line of the device next. If it’s an analog measurement connect it to any of the analog I/O pins if not, connect it to any Digital I/O pins.
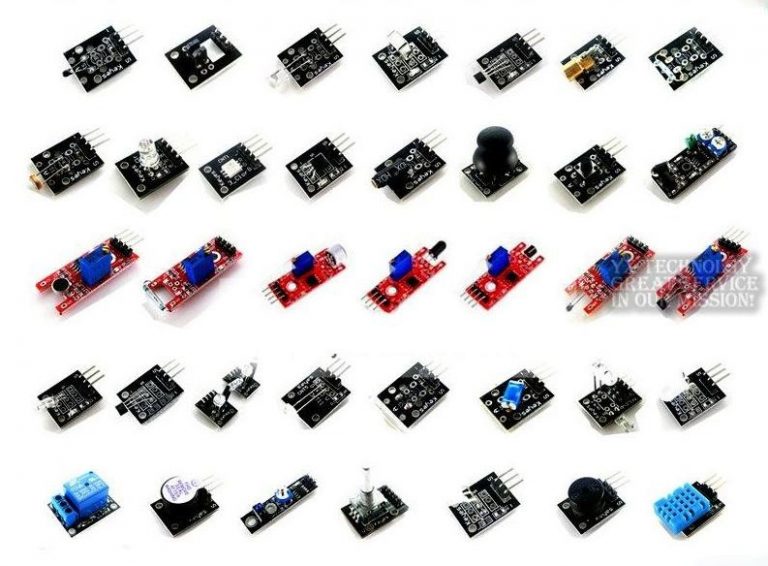
sensors
Sketch:
The programs in Arduino is called sketches. Perhaps it’s no less valuable than an artistic sketch. It’s small, light does not reveal many things but function wise it’s complete! Perhaps that’s symbolises a sketch.
OK, after connecting the power line and the sensor line it’s time to write down the sketch to perform the work.
Arduino IDE:
For creating and uploading sketches, Arduino has a beautiful open source Integrated Development Environment (IDE). Download it from the Internet as per your operating system ( Windows / Macintosh or Linux ) and then install it on your computer or laptop. Over the years this IDE installation has become so easy that you just need to double click it for a complete installation on all these different kinds of operating systems.

Above sketch is a classic sketch called the “Hellow World” program of physical computing. It turns an LED connected on it’s digital pin-13 one second ‘on’ and then one second ‘off’. The sketch is divided into two parts – setup & loop [anything starts with a ‘/’ or ‘//’ is comment and not part of the sketch]. Setup initiates the initial condition – like the beginning of the process etc. Loop is the infinite loop in which the sketch will work endlessly unless the power supply is stopped. Arduino UNO can get power supply from any of the two sources – the USB cord or the separate 9 Volt DC plug [centre positive, the common adaptor supply] .
After uploading of the sketch into the brain of the microprocessor [for which you need to attach the USB cord] remove the USB connection and insert the 9Volt DC plug into the external supply of the board and your automated system is ready to deploy for the actual fieldwork!


Gracias por este artículo bien claro para los que nos estamos iniciando en el arduino como yo
Hola,
Gracias por los comentarios…