


Loading cement sacks into trucks requires precise counting for traceability, yet manual methods are error-prone and often lead to shipment discrepancies. This system automates counting at the conveyor loading end, ensuring reliable per-truck tracking.
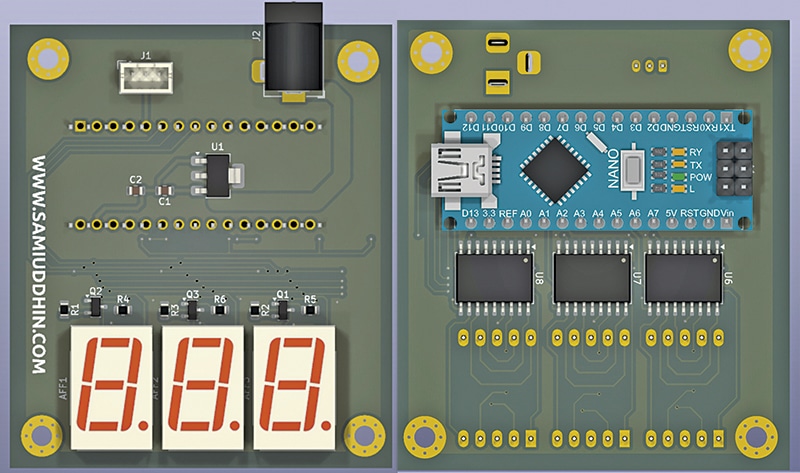
An infrared (IR) proximity sensor with a 3cm to 80cm range interfaces with an Arduino for processing and drives a display that counts objects on the conveyor. Fig. 1 shows the assembled, actual-size PCB (front and back). The components are listed in the Bill of Materials table.
POC Video Tutorial
| Bill Of Materials | |
| Components | Quantity |
| Common anode 7-segment display LTS 6960 (U1-U3) | 3 |
| Arduino Nano (U4) | 1 |
| AMS1117-5.0 LDO regulator (U5) | 1 |
| ULN 2803A Darlington transistor array IC (U6-U8) | 3 |
| IR proximity sensor (U9) with 3-pin connector (J1) | 1+1 |
| Resistor 50Ω (R1-R3) | 3 |
| Resistor 1KΩ (R4-R6) | 3 |
| MMBT5401 (Q1-Q3) | 3 |
| 12V adaptor with DC socket (J2) | 1 |
| Capacitors 10uF, 25V (C1, C2) | 2 |
| Jumper wires | As required |
Circuit and Working
The circuit is built around three common-anode seven-segment displays (U1-U3), an Arduino Nano (U4), an AMS1117-5.0 LDO regulator (U5), three ULN2803A driver ICs (U6-U8), and an IR proximity sensor (U9) connected via a 3-pin header (J1). A 12V adaptor connected through DC socket J2 powers the circuit.
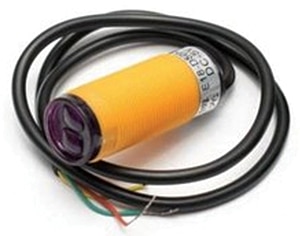
The Arduino Nano controls the counting process and displays the total on the 7-segment modules. Fig. 2 shows the IR proximity sensor used in the system.
The power supply uses an AMS1117-5.0 low-dropout regulator to step down the 12V DC input to a regulated 5V. Capacitors C1 and C2 stabilise the supply and suppress voltage fluctuations. This 5V rail powers the Arduino Nano, the ULN2803A driver ICs, the displays, and the proximity sensor. Fig. 3 shows the circuit diagram of the system.
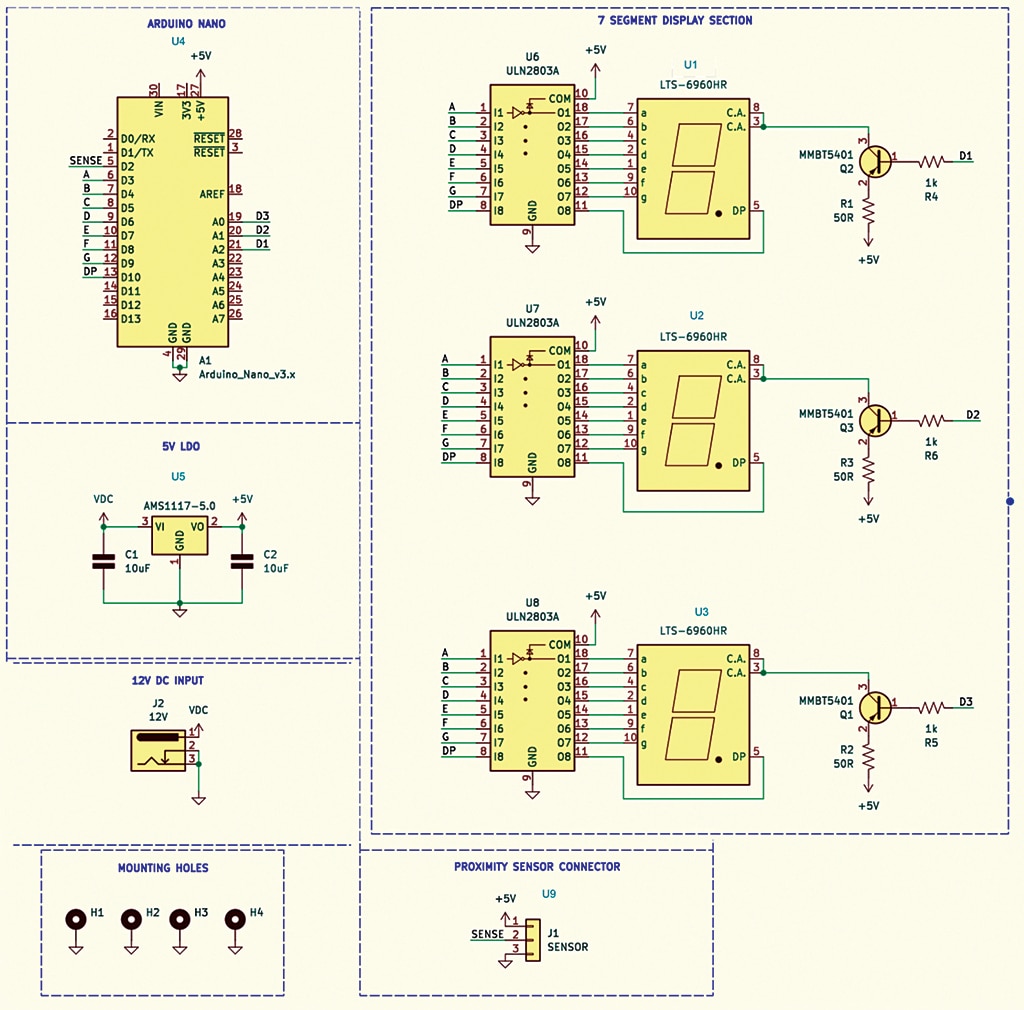
The Arduino generates segment control signals (a to g and the decimal point) along with digit-enable signals for multiplexing. The proximity sensor output connects to digital pin D2, allowing the controller to detect changes and update the display accordingly.

