


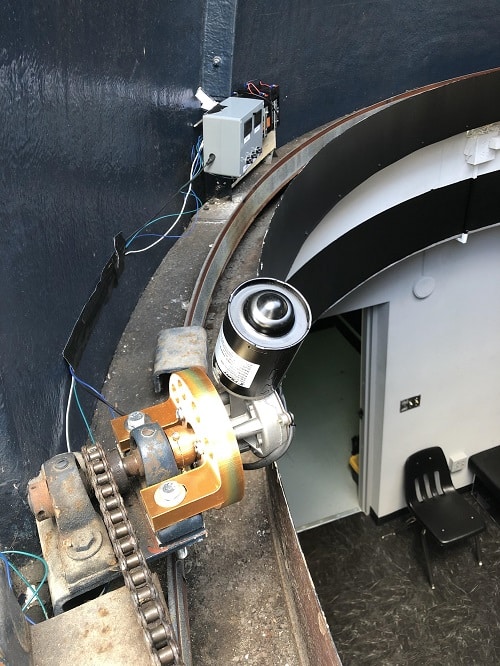
Observatory doors are quite heavy and weigh several kilograms, and hence requires a strong, automated mechanism to move them. This was achieved by employing a commonly used DIY board that consumed only a fraction of household power.
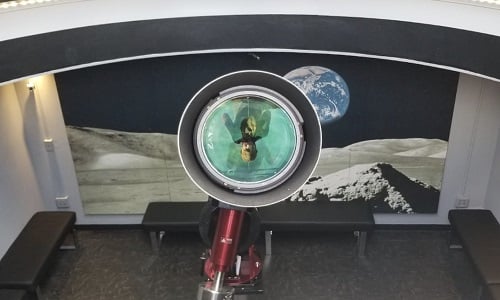
A dome-shaped observatory housing an optical telescope is often built on a high altitude location, where the surrounding air is much clearer as compared to that near the land, and where a good view of the sky can be obtained to accurately record celestial observations – without any atmospheric disturbances.
Just as every house or vehicle has doors for the safety of the person inside, an observatory has sliding doors on the roof that protects the telescope from sunlight, rain, snow or atmospheric dust.
A similar observatory (although not at a great height) is at the South Florida Science Centre, West Palm Beach, Florida, USA. Recently, a new 25cm (10 inches) refractor telescope was installed there. Now, most domes at different observatories have automated doors. However, the one at Florida had doors that required to be open and closed manually. So, to modernize this part of the observatory and make it fully automated, Andres Paris and his brother added a windshield wiper-style DC motor – accomplished with the help of an Arduino Uno.
![]()
Electro-Mechanical Installation
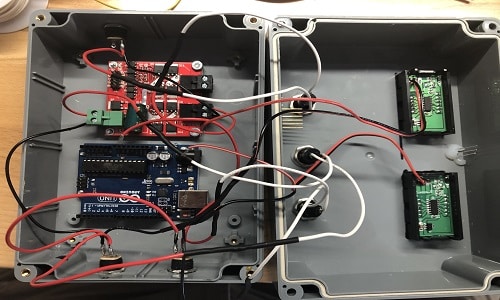
The dome doors were rather heavy, which required a powerful set of motors for seamless operation. So, the brothers installed a high-torque 12V DC motor that operated via an Arduino Uno and a high-current H-Bridge, capable of conducting up to 20A.
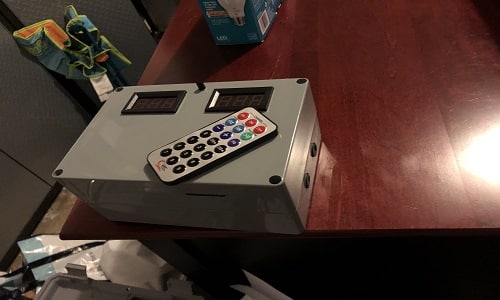
The entire system was regulated via an IR-remote control. Reed switches installed on the doors stop the motor when the doors have been fully opened or closed.
The system cannot be permanently plugged into a wall outlet because the dome rotates when tracking or looking for objects in the sky. Therefore, it had to be made battery operated. For this, two 12V batteries (one for the microcontroller and one for the motor) were installed. To minimise the need for regular charging, these batteries were of high-capacity (5Ah and 12Ah respectively).
Further Enhancements
Although the door is fully functional and performing as intended, plans are to make it even better by installing a battery management system with a trickle charger that is connected to a Qi transmitter-receiver. This will ensure the batteries never have to be manually charged when the dome rotates to its home position to align the 12V Qi transmitter with the receiver.
Demo Video


