


 Bluetooth is a technology that has swept over the music industry. From headsets to speakers, bluetooth has made life easy for music lovers. At the same time, the cost for bluetooth enabled products has also increased. This DIY shows how to create your own Bluetooth speaker and music player(using the SD card module).
Both the bluetooth player and speaker can play audio files. It can also support the SD card module.
Bill Of Materials
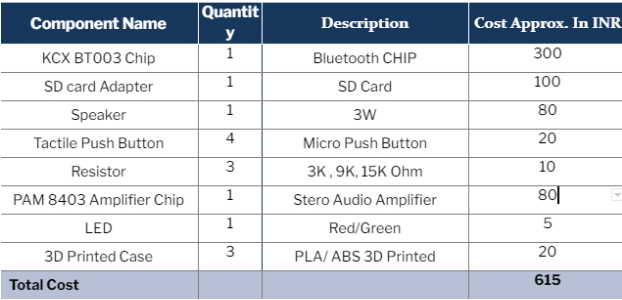

Note:- KCXBT003 Chip is of two types in the market (Rx is Bluetooth receiver and Tx is transmitter). Since a speaker is being made, the Rx Chip is used for the speaker. Having an SD card module is optional. The SD card is skipped here, in the tested design.But its inclusion or exclusion does not affect the project.
Designing
The outer body needs to be designed first, to hold and protect the components. Next the working circuit has to be designed. PCB is optional unless it is a PCB only circuit, then the components can be connected with wires and soldering.
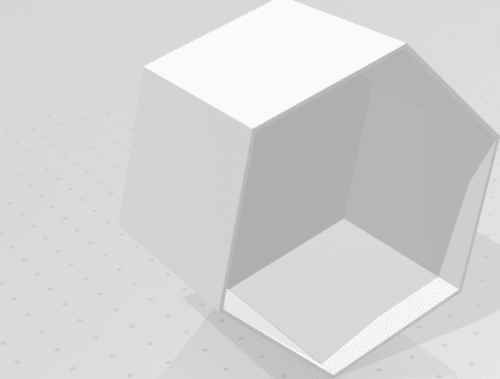
Case Designing
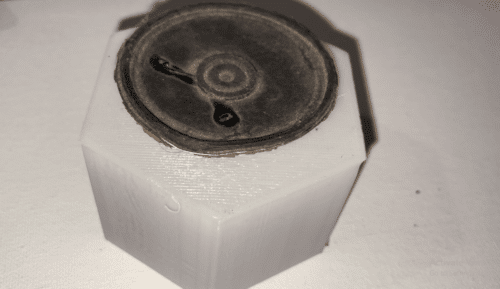
Any design would work, here the design is in the shape of a hexagon having a cavity to place to components.
Circuitry Design
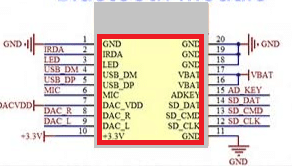
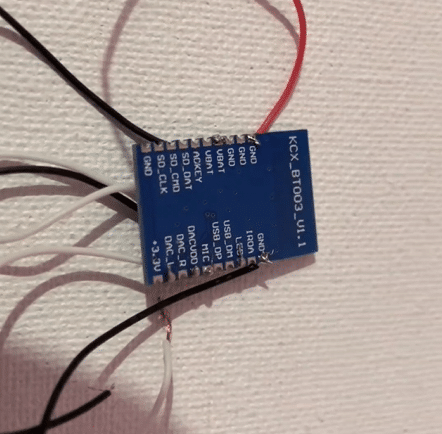
The KCX 0003 Rx module is used for receiving and processing the audio. Figure 4 shows the datasheet for the same. As per the sheet, the DAC pin can be used for receiving audio from the USB. The SD pins can be used for accessing and playing audio from the SD card. The LED pin indicates the power, bluetooth connection and whether or not an audio is playing. The IR pin is for the IR receiver to control the module using an IR remote. Four switches can also be added for ‘play’, ‘pause’ and ‘next song’ buttons. A mic pin for transmitting and using the mic option is also given.
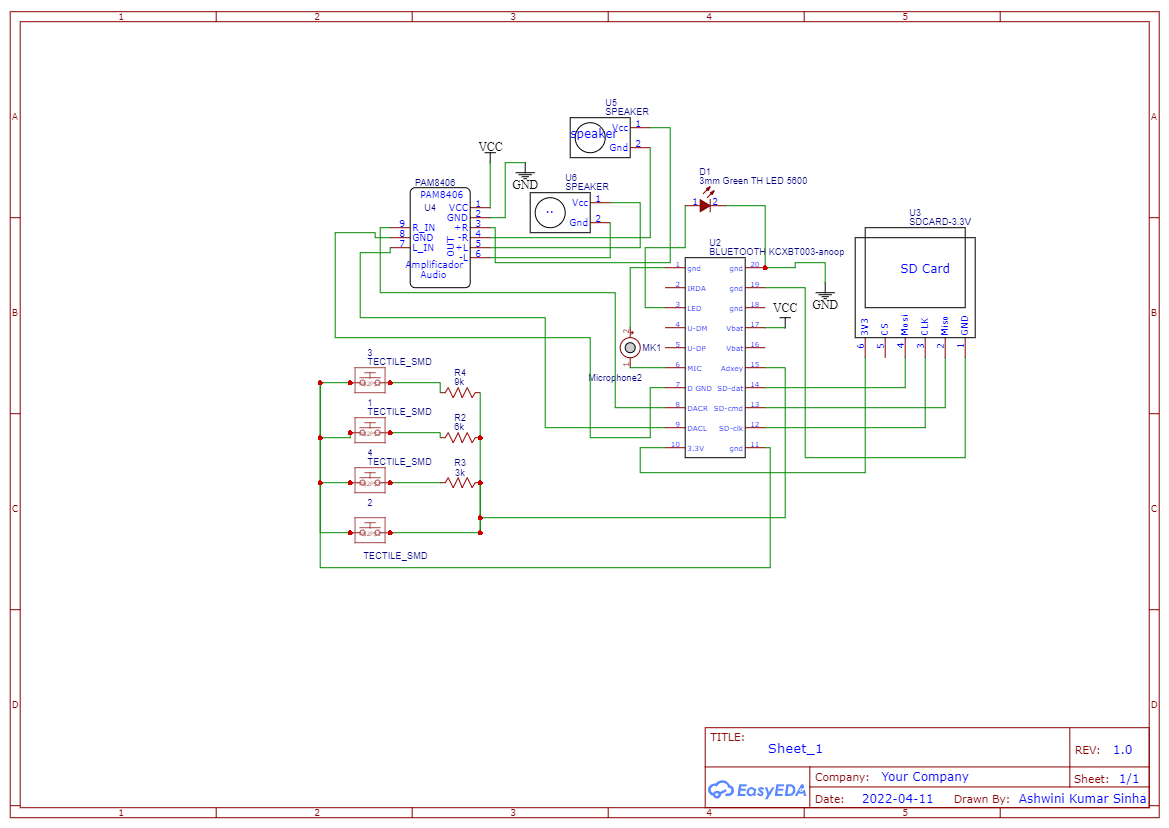
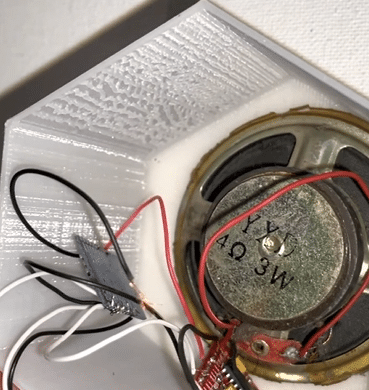
To design the circuit, we first add the SD card module and connect it. The CS pin is connected to the clock line. MOSI and MISO are connected for command, data line and Vcc(3.3V) of the KCX BT CHP and GND(ground) pin with GND. We add an amplifier (PAM 8406) as in figure 5. PAM 8406 has the AUX pin, Lin, Rin and GND. These pins we use for the audio input and connect them with Ldac, Rdac and GND pins respectively. The output of the BT Chip is connected as an input to the PAM 8406 CHIP.
Then we connect the microphone and switches that have a resistance difference of 3K Ohm with the switch. That is switch number 1 will have a zero resistance, switch 2 will have 3K ohm, switch 3 with 6K Ohm and so on. Then KCX BT Chip can be powered with either a battery and charging module or with a 5V DC power supply using Vbat pin. The USB plug is used here, hence it is plugged to a 5V USB adapter(or laptop) to power the speaker as needed.
Note:- You can ask the author for permission from the following link for modification and personal uses. The license is for personal use and without warranty under GPL license Ashwini Kumar Sinha
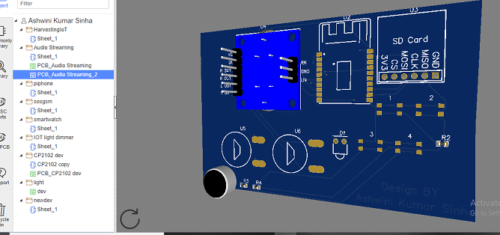
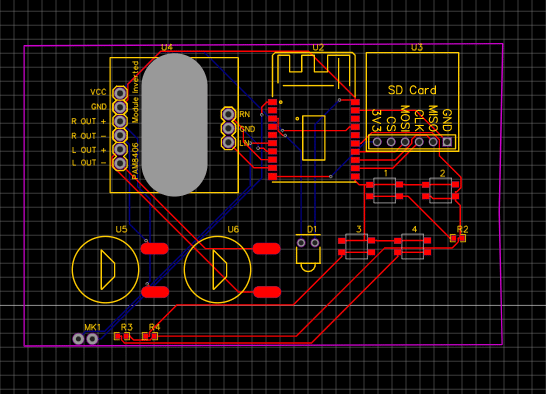
The design can now be converted to PCB with the copper layer being added to it. The PCB can be ordered from any PCB manufacturing services.
Note :- Author has not done the final test of PCB. Permission can be asked for cloning and editing from the author.
Connection
The components have to be connected and soldered according to the circuit diagram(figure 8). The components can then be fixed inside the casing as shown in figures 9,10,11 and 12.


Testing
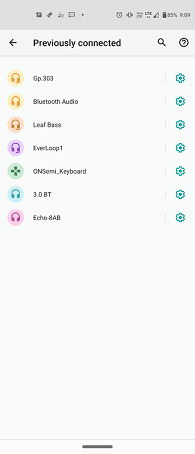
Once fixed, turn on the bluetooth speaker and bluetooth option on the phone. The name of the bluetooth speaker will be ‘AUDIO’. After pairing both the devices, your bluetooth speaker is ready.

Download 3D Printable Design
Awesome
Thnaks
Sir,
Thanks for the interesting project.
The audio amplifier listed in the BOM shows PAM8403. But the diagram and description uses PAM8406. PAM8406 supports Class AB and Class D mode. Which mode is better?