


 It is essential to maintain the speed limit on the roads for safe driving, but most of the time, people ignore it and drive at very high speeds even in speed-restricted areas and road crossings.
To avoid this, the government deploys traffic assistants and officers with doppler radars that can record the speed of vehicles. This equipment enables them to charge fines and take action against people who violate the law.
But deploying the officers with such equipment is quite complicated. It is also a very tiring job for the officers, as speed reading of all the vehicles for 24 hours is not possible.

So we decided to build a vehicle speed detector device with Raspberry Pi.
Here we designed a smart camera with a radar that is automated and will help in maintaining the speed limit and compel people to follow the traffic speed rules. We will integrate the camera with the doppler radar. The radar will continuously take the speed reading.
If it detects very high speed, then the camera captures a picture and a video of that instance of time with the label of the time stamp. This will allow the government to automatically charge a fine and take action based on the data received by the camera about the vehicle.
Bill of Materials

Programming Vehicle Speed Detector
First write a code for the device to read the radar sensor data and convert the data to speed, and then use the camera to capture the picture and video when high speed is detected.
We need to install the latest version of the Python 3 IDE and then install the OpenCV library to process the video and frames from the camera.
Now capture the video and pictures of the high-speed vehicle. To install those modules, open the terminal and then run the following command-
sudo pip3 install opencv
Now write the code.
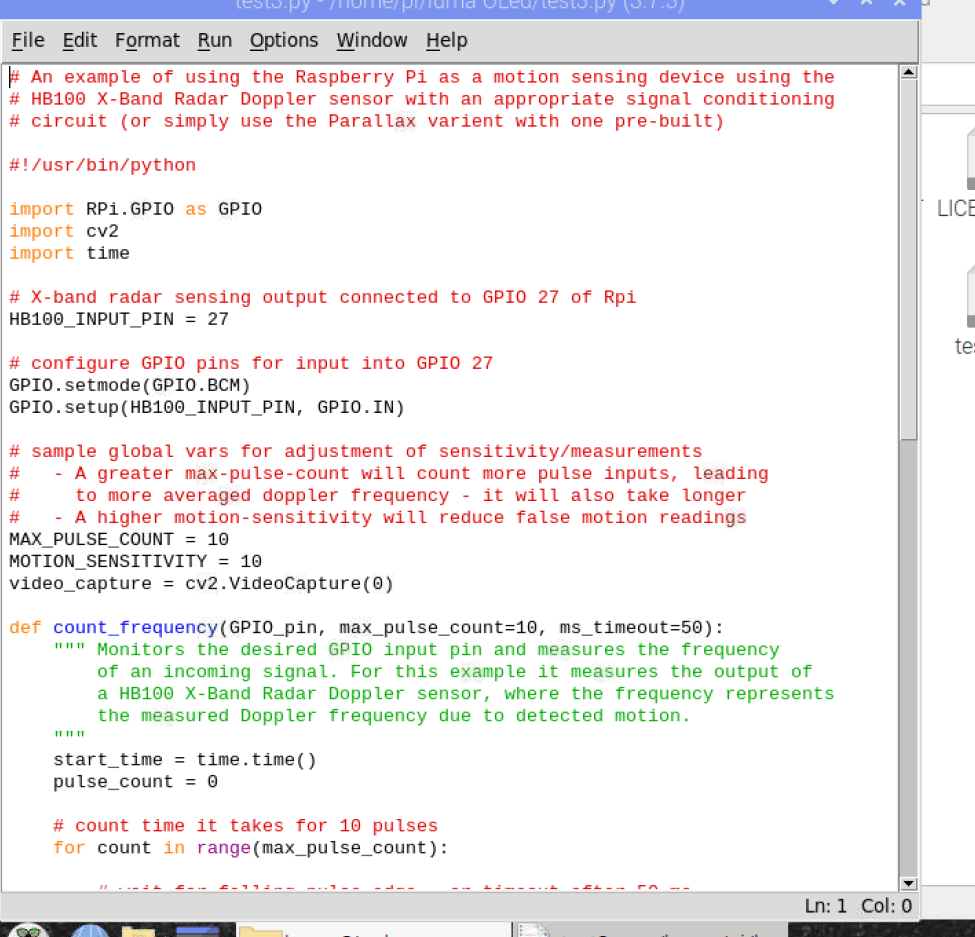
In the first part of the code, we import the libraries for using the GPIO of the Raspberry Pi to take the doppler radar sensor data.
Then we import the OpenCV library to capture the video and save the video frames and then process them with high-speed detection by doppler radar.
Now we import the time library for calculating the time and speed of the vehicle based on the doppler radar signal.
Next, we will devise the GPIO pin number for the doppler radar signal input. Here you can use any free GPIO. I have used pin number 27.
Further, we need to set the GPIO as input and also set the GPIO pin number as board pin number, as we are using the pin numbering as board pin numbering.
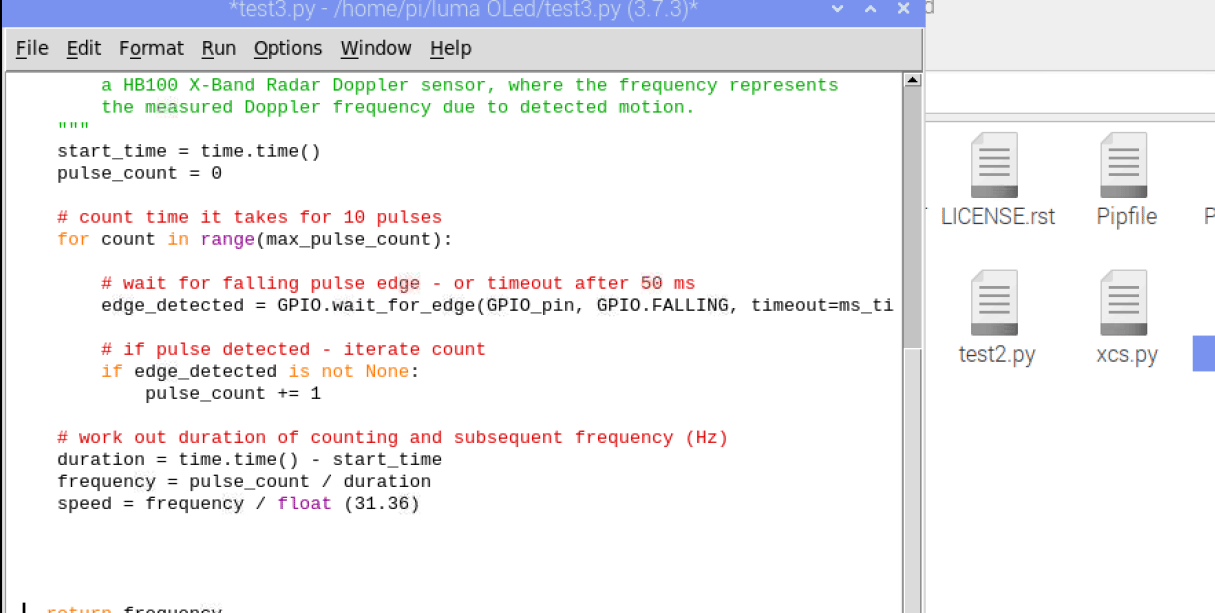
Now we will check the signal of the doppler radar and extract the frequency that changes with proportional to the doppler radar wave.
After that, we convert the frequency to the speed. Here, according to the doppler radar datasheet, the wave speed is 31.36, so we divide the frequency of the radar with 31.36 and we obtain the speed of a moving vehicle.
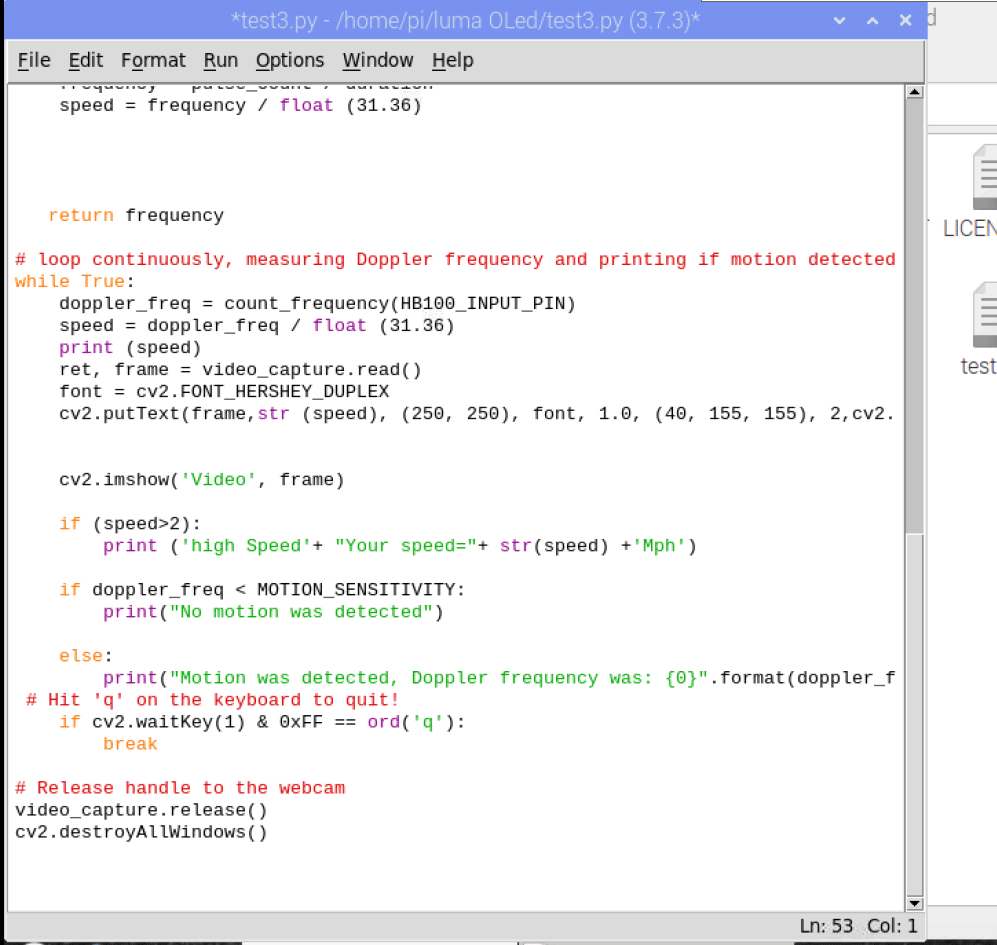
Now we create a while loop where we continuously check the speed of the vehicle. Here you can set any desired speed that you want to limit, and if the vehicle speed is greater than the set speed limit, we will capture the video and save it to a file where the code is saved.
Next, we will display the live video from a camera and then we will overlay the speed of the vehicle on the video using OpenCV on each frame. We can see the live video output from the camera with the detected speed data on the video.
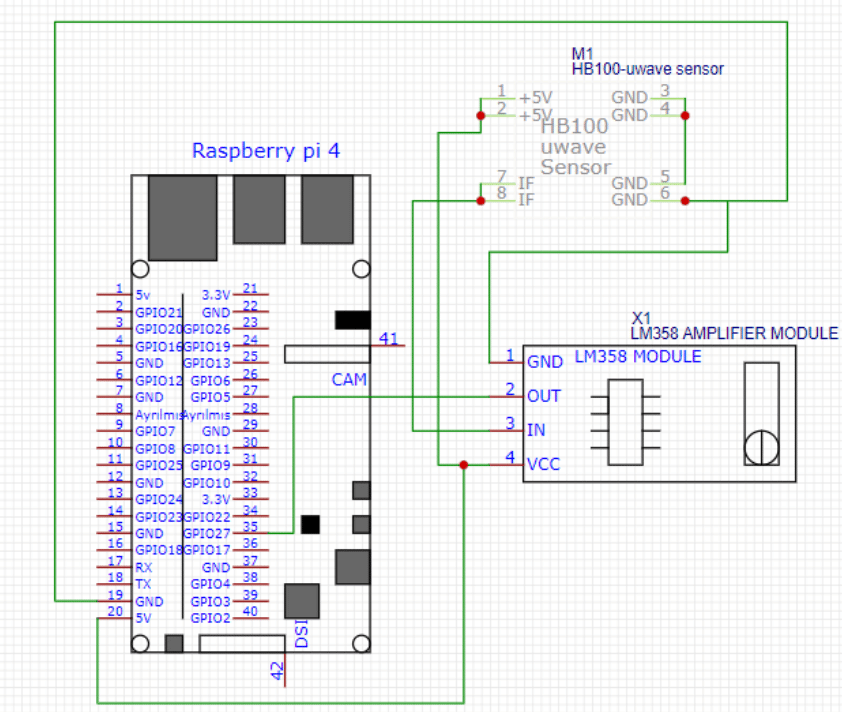
Circuit Diagram
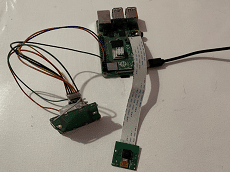
Now we connect the components according to the following circuit diagram.
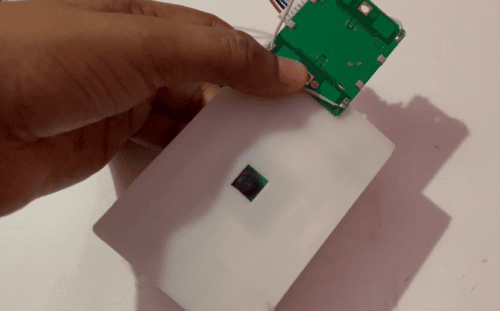
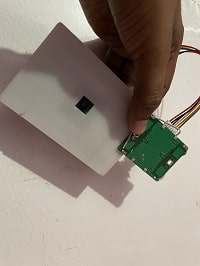
After completing connections, we fix the camera of the Raspberry Pi in any custom-designed case and then the radar over the case. Here I have designed the case for our device with a small hole behind the case for the camera.
Testing:
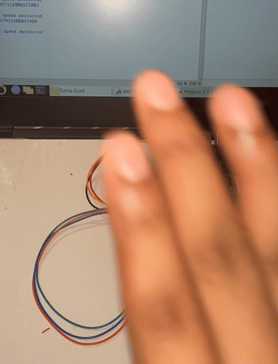
Now power the Raspberry Pi and run the code. Move your hand very fast so the speed is detected and also shown on the camera output video. Now keep the radar near the road. Whenever it detects the speed exceeding the speed, set in the code, it will automatically capture the video and pictures of the high-speed vehicle.
If you have questions/doubts or face any issues while trying your hands on this project, please feel free to ask in the comments below.
is there any link to the HB100 radar you used, i can only find wireless ones and i need one that is compatible with the raspberry pi
Search HB100 doppler radar in any online store you will get. or you can contact [email protected] regarding the kit of project