


 You might have used RGB led light and used it in the room for decoration and other lighting purposes. You might also have used the WiFI-based RGB light changer where you can control the RGB led color over wifi but those RGB led change color at the same time. If you want to turn on one particular LED from 100 or 1000 or lakh of LEDs connected, then you might not be able to do. Same for if you want to change the color of the led connected in 100th rows and want to change the color of any particular led by your choice, you might face a problem.
So here we designed an addressable led light controller using ESP32 so you individually call a particular led and control the brightness and color according to your choice. you can manage all LEDs, particularly led or any individual RGB LEDs connected in between 1000s or lakhs of LEDS with each other.
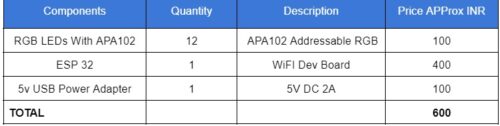
Bill of Materials
Here is the list of all the components needed to build an Addressable RGB LED Controller-

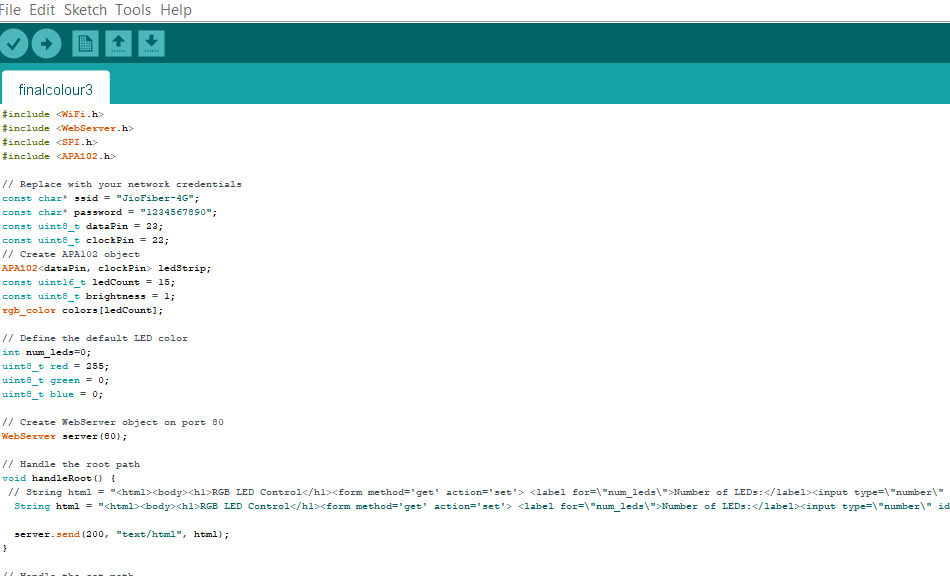
Addressable RGB LED Controller – Programming
Here First we need to install the APA102 library that helps us to establish the connection with LEDs.
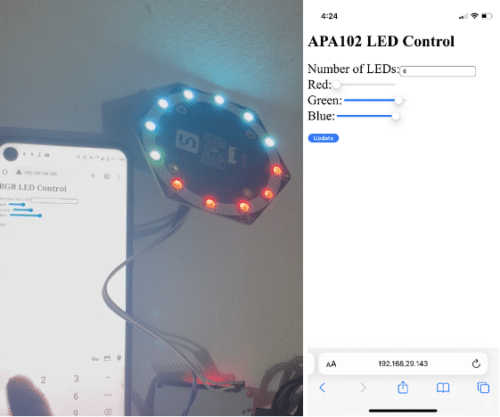
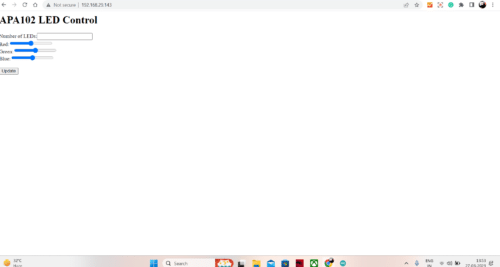
After that, we need to configure the Wi-FI to connect it to our home network, and then we need to create a webpage consisting of 3 sliders, one text entry RGB address entry, and one update button to update the RGB LED to our desired status. (Refer to fig 2).
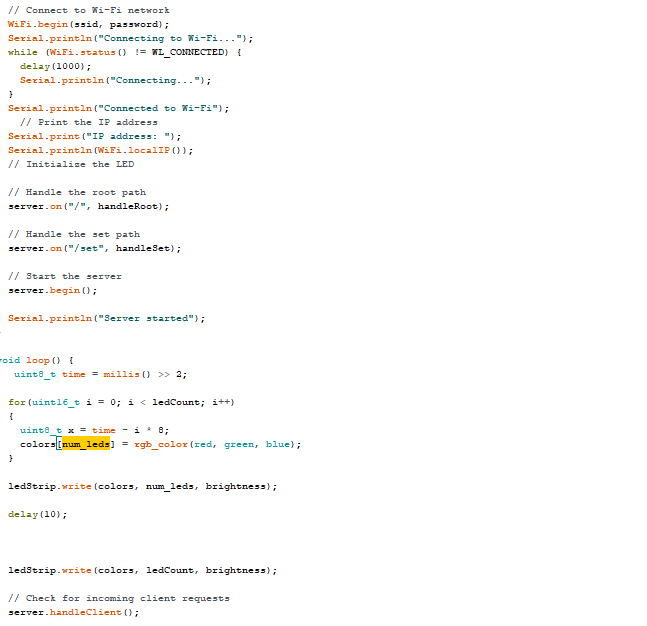
Now we can get the values of RGB to update the led and address for an LED update here. You can either use the number_led to update the whole led up to that address with the entered RGB value or change the RGB value of that particular led that you entered the address of the in-text bar.
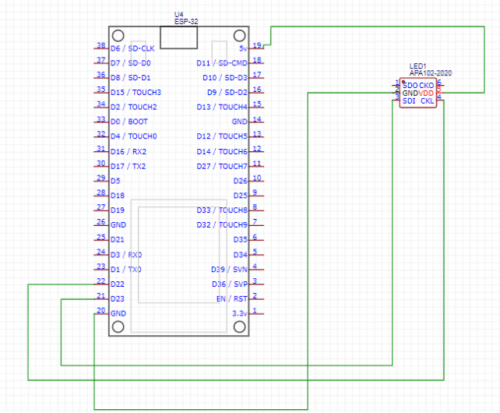
Addressable RGB LED Controller – Circuit Connections
Now connect all the RGB LED wires together no matter its 100, 10000, or lakhs; connect the data line pin of all RGB to the data line pin and clock to clock and VCC to VCC and GND to GND pins of Addressable RGB LED.
Here I have used the 12-circular RGB LED array; you can use circular, rectangular, or long led strips with any number of LEDs. Then connect the LEDS wires according to the following circuit diagram.
Testing

First, connect the ESP32 to USB and then wait to get it to connect with the WiFi network that you set in the code, then open the serial port with the baud rate that you have set in the code.
Here I have used 115200 and it will tell you the IP address; note the IP address.
Now you can open the webpage on any phone or laptop connected to the same WiFi network by searching that IP address in a web browser.
Now enter the address of the RGB LED that you want to control if you want to change the 12th number led in magenta, then enter 12 and then move the RGB sliders and tap on update the 12th number, RGB LED will update with that colour.
Check the more such interesting DIY Electronics Projects.

Works with nodemcu ?
Yes , you only need to change the pin number in code to node mcu pin number