[defineweblang title=”Change Video Language” language=”English,Hindi”]
[getvideolang url= “https://www.youtube.com/embed/OZr0VbEdmBw” language=”English”][/getvideolang]
[getvideolang url= “https://www.youtube.com/embed/nyqnBR0bp_Q” language=”Hindi”][/getvideolang]
[/defineweblang]
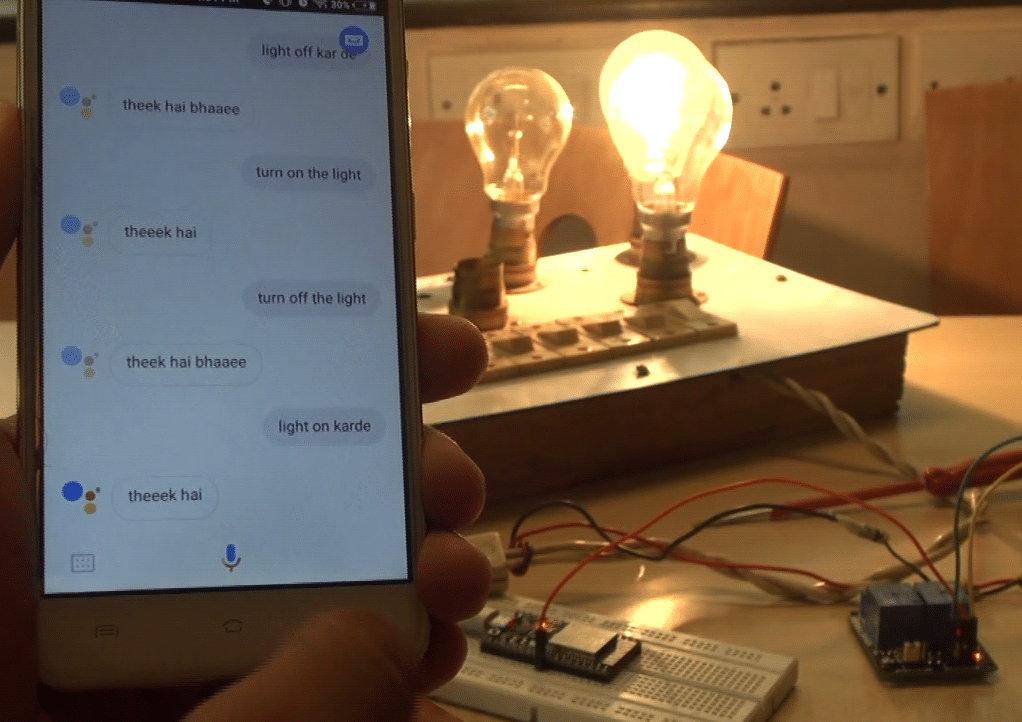
In this project, we will be connecting and controlling our ES32 Wi-Fi based module  from our mobile phone’s Google Assistant Application. The charisma here is that your google assistant will take voice commands in Hindi and perform actions on ESP32. It will then perform actions based on our voice commands. This project is amazing and helpful for those who want to make a Voice operated IoT Home Automation for their parents who are not able to speak English. To make everything work, we will also require Adafruit IO and IFTTT. We will add up everything to work.

Material to get started with this IoT Home Automation Project
- ESP32 (Check the datasheet, if you are using a different version)
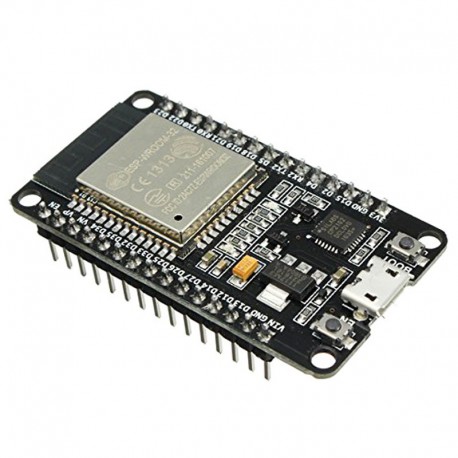
Fig. 2: ESP32 - USB Type C cable to program ESP32 from a laptop or PC (most Android phones use this type of cable).
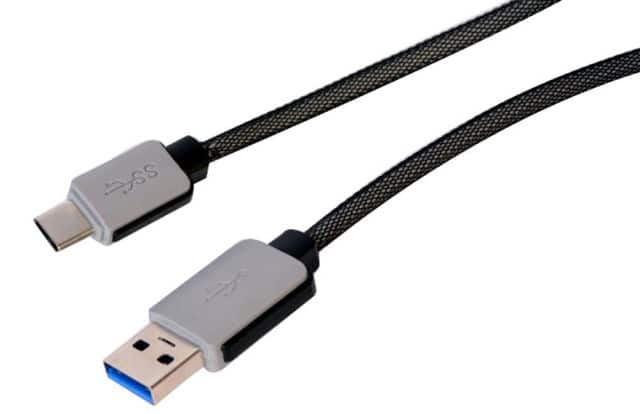
Fig. 3: USB Cable - Relay Module – Relay is a switching Module. In a relay, we can control switching AC or DC appliances digitally by providing input to relay input pins. Here we have used a 2-channel relay operating on a 5 Volts battery.
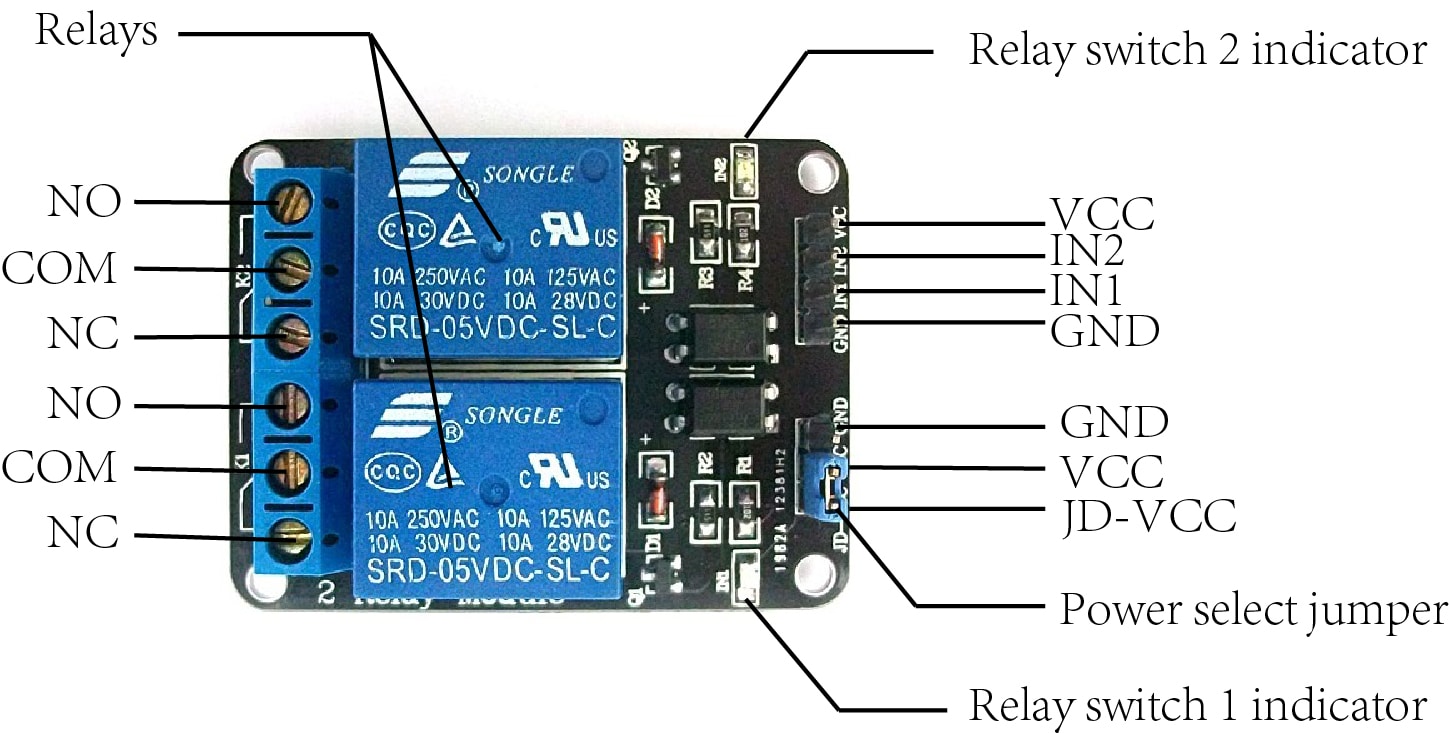
Fig. 4: 2 channel Relay To connect your AC appliance, use the following connection with the Relay Module use the following connection. The Signal pin is IN1/IN2.
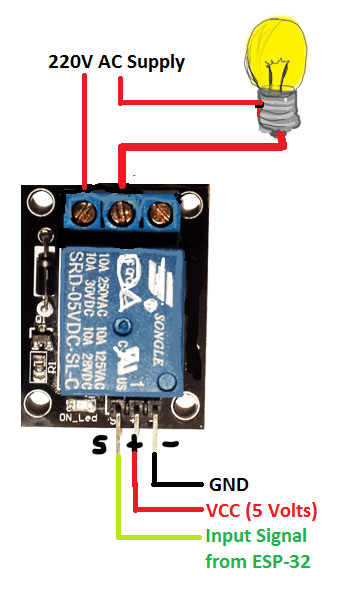
Fig. 5: Relay connection with some wires and breadboard.
Back End Set-up
Set-up with Google Assistant
We must Set up Hindi in Languages option of Google Assistant account. To do this go to Google Assistant App > Settings > Phone > Voice and Speech – Other Voice Settings> Offline Speech Recognition. Now download English(India) and Hindi(Bharat).
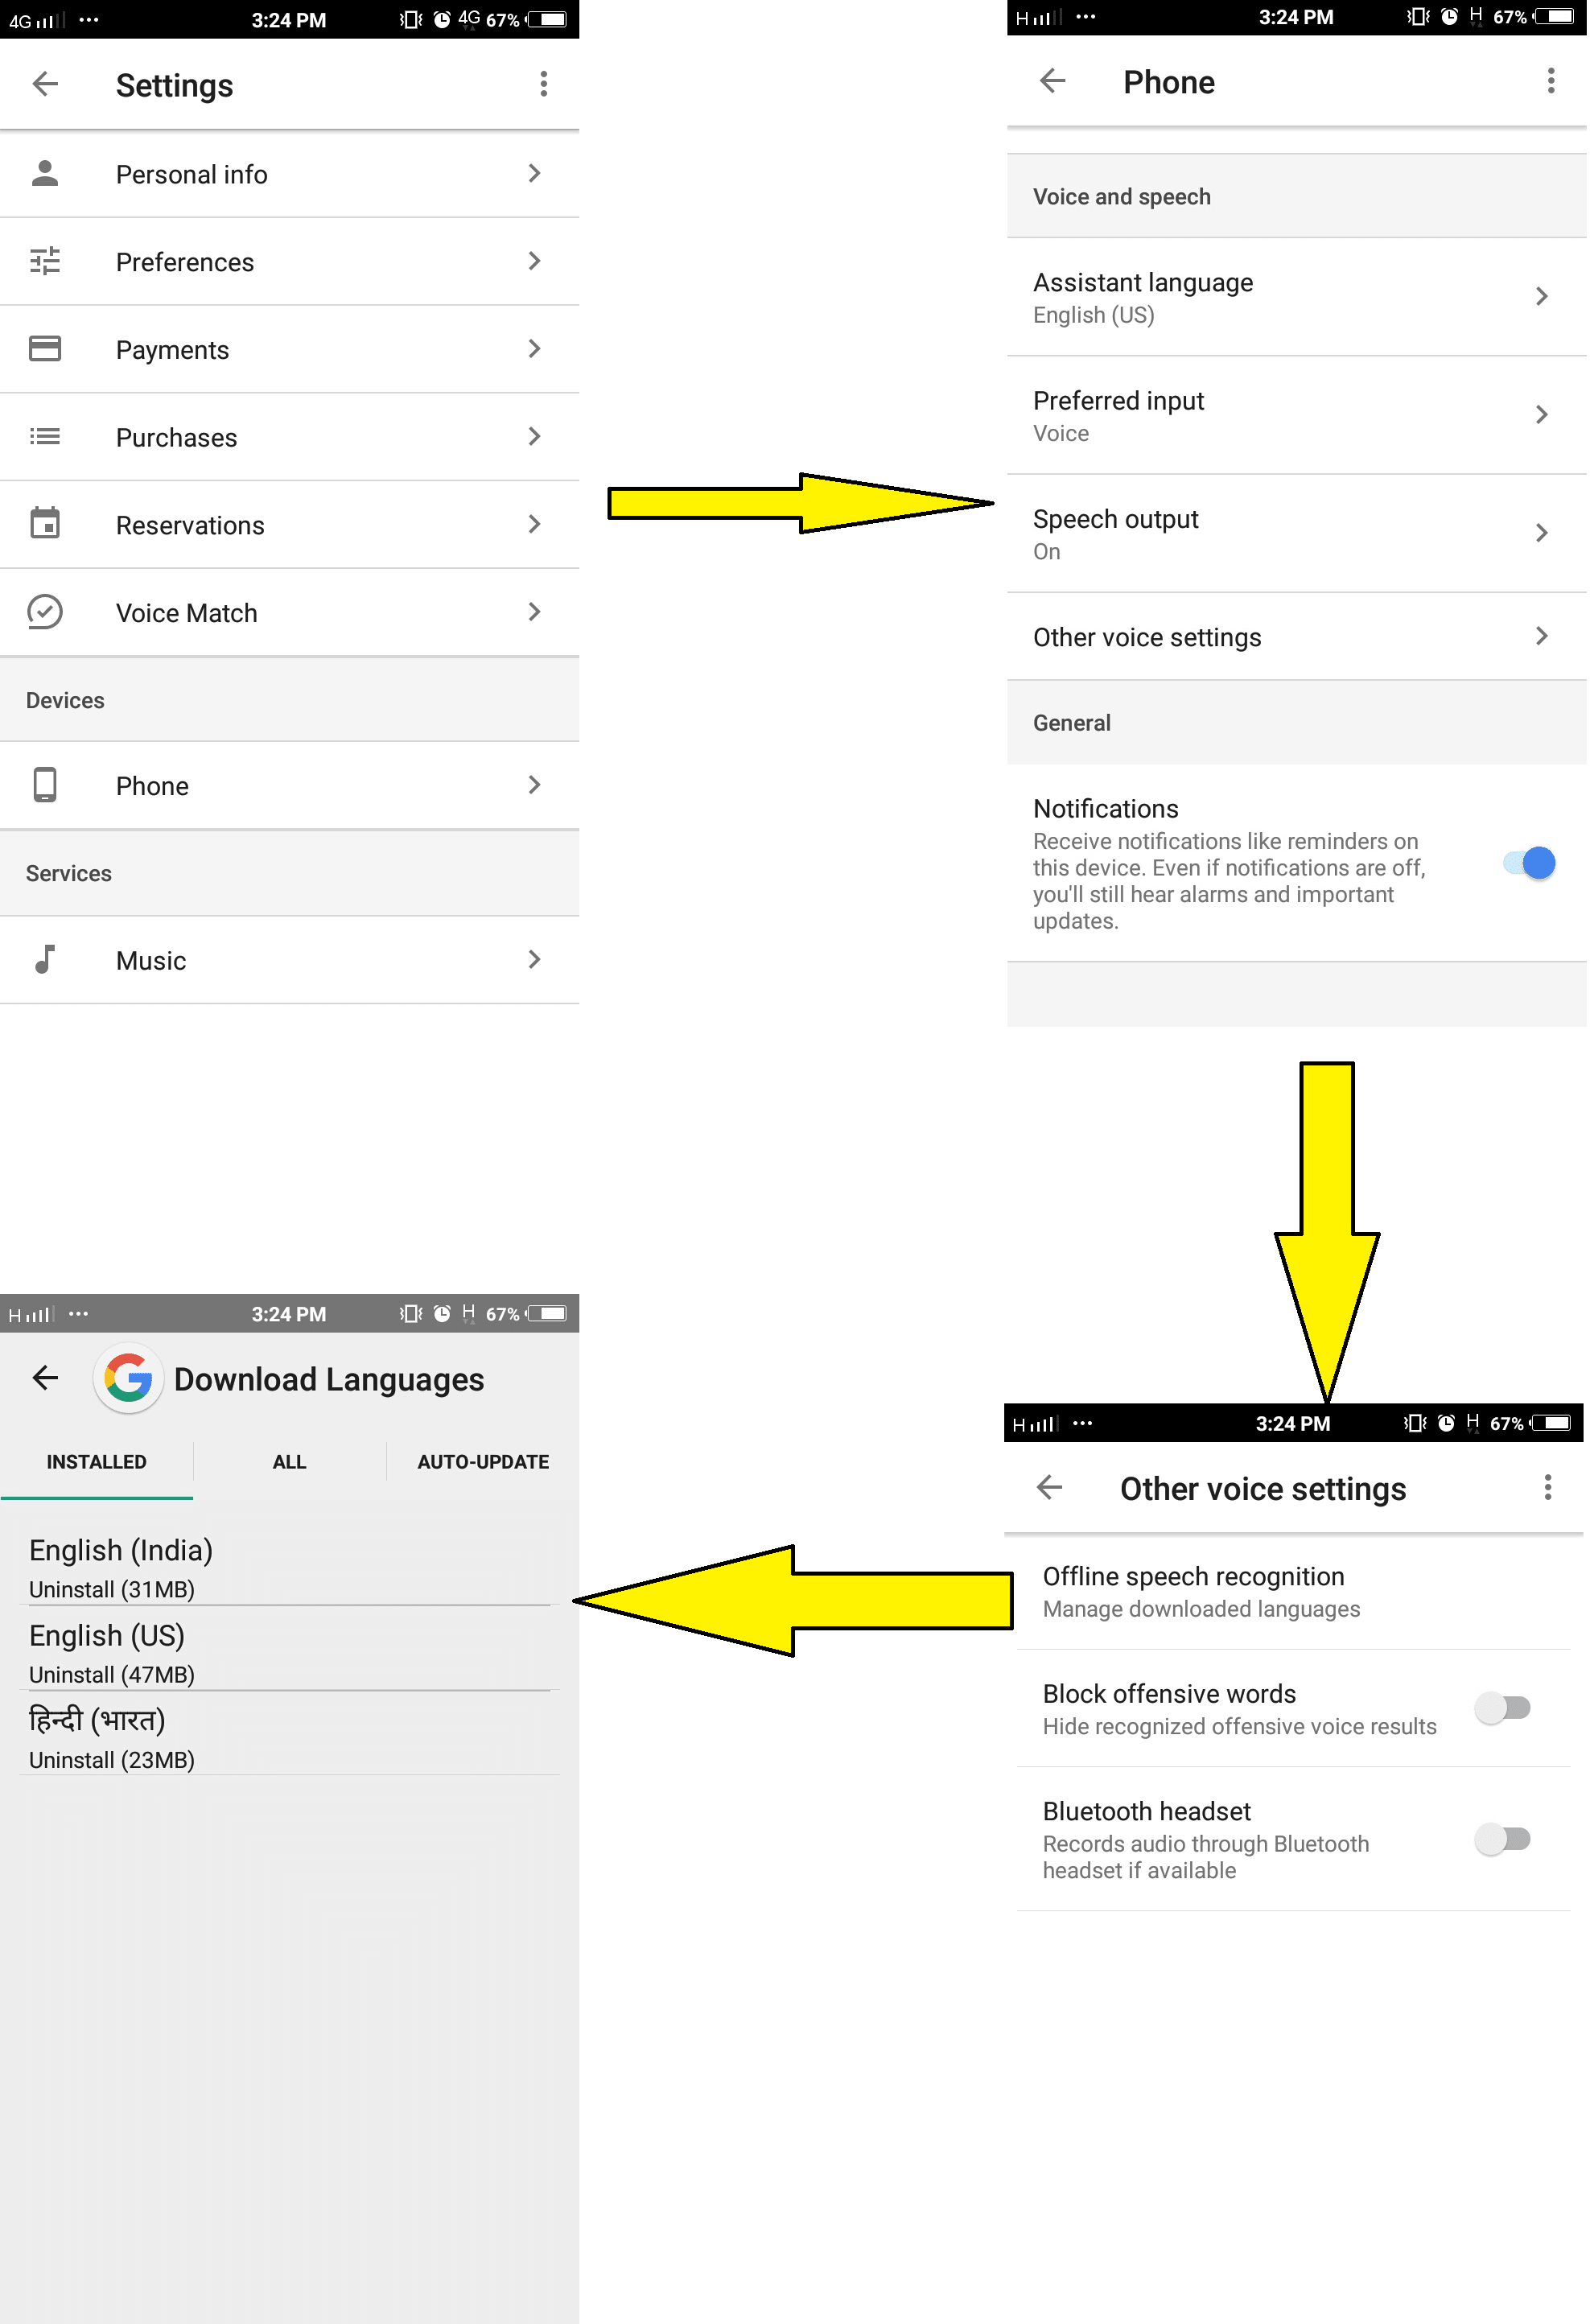
You can download other languages too as per your preference. For further reference, you can check here.
Set-up with Adafruit IO
Go to Adafruit IO and Sign Up or Sign In to your Adafruit IO account.
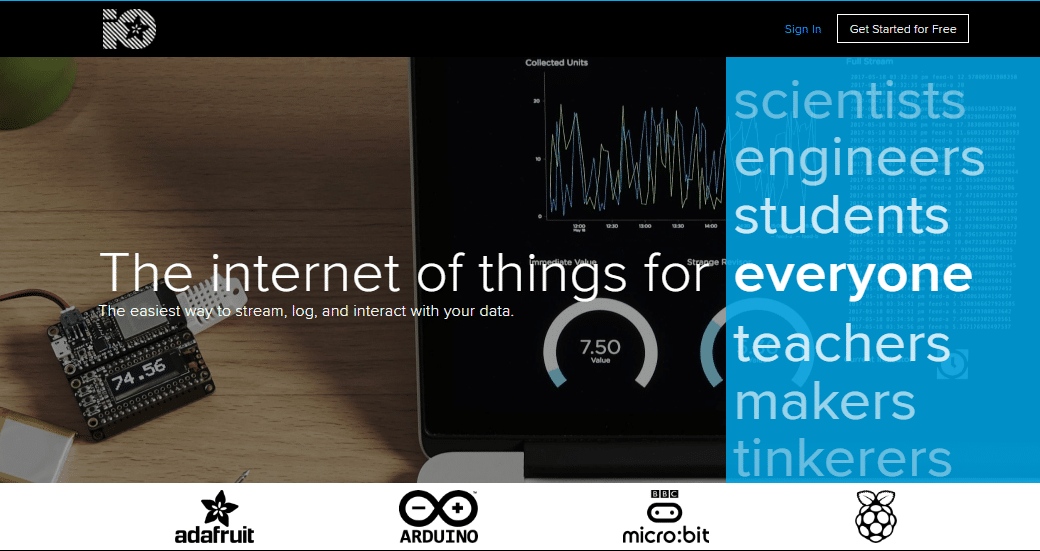
After creating Adafruit, you should be taken to Adafruit Home Screen. Now Select Feeds from hand menu> Click Action and Create a New Feed from the drop-down menu.
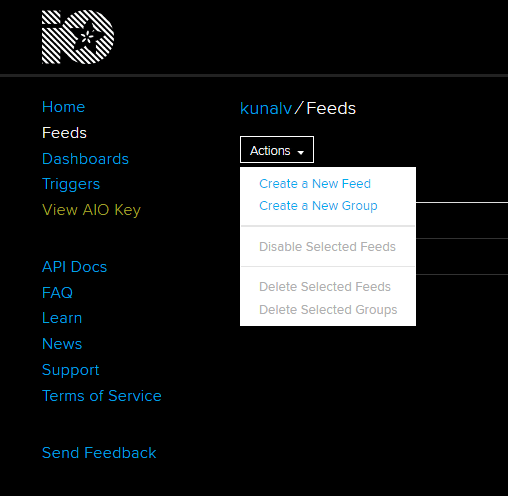
Give this any name you wish, I created “onoff”. Now, Go to Dashboards > Actions > Create a New Dashboard. Similarly name this one also, I named it “LightAutomation”.

And click on Blue “+” on the Top right side of your Dashboard to create a new block. Select “Toggle” Block.
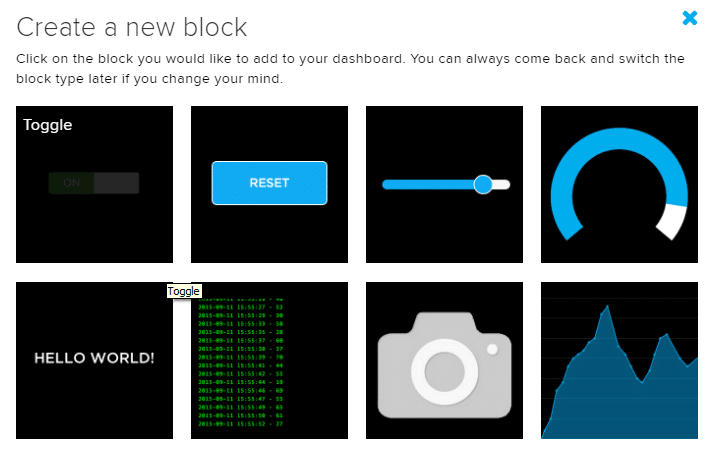
Now, choose your feed and click “Next Step”.
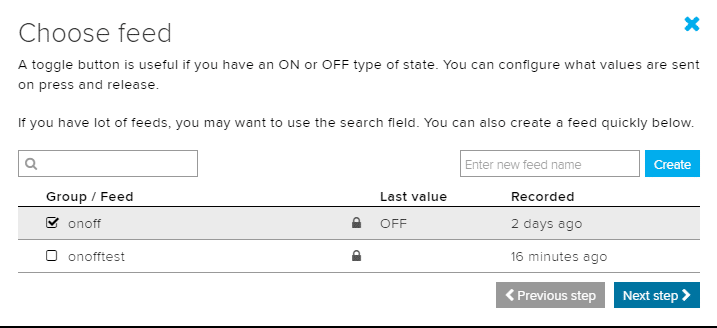
Fill the block settings and “Create the Block”.
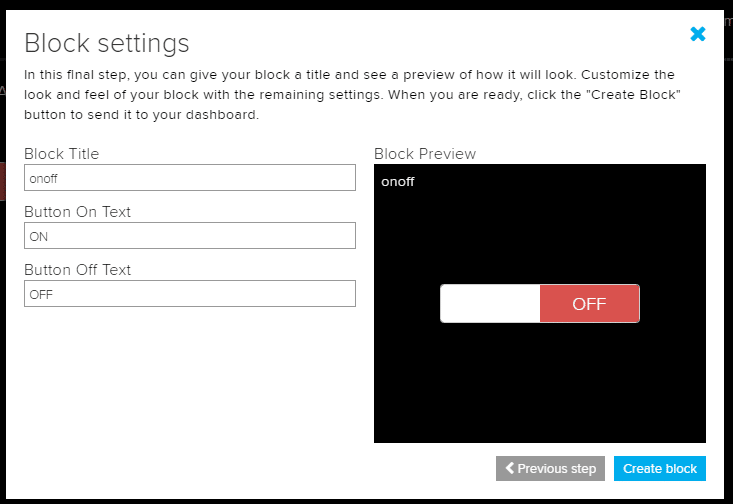
Set-up with IFTTT
Create an account on IFTTT by Signing Up with your same Google Account you are using in your phone. Now go to My Applets > New Applet > Click “ + this “ In Search services tab type Google Assistant and select it. Click “Say a simple phrase” trigger and fill this data with English and Hindi phrases and “Create Trigger”.
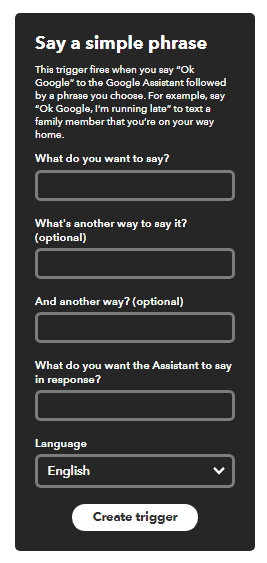
Now, select “+ That” to create actions in the Adafruit IO so that Google Assistant can trigger Adafruit IO.

Here we will select Adafruit as our Action Service.
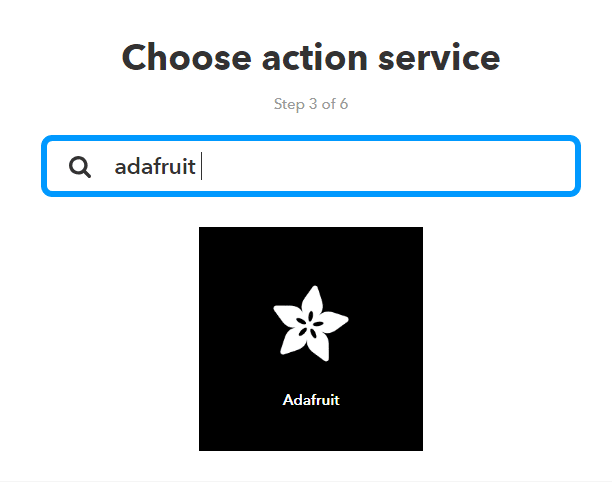
For the very first time, this will ask your Adafruit Login Credentials. Fill your Adafruit IO account details there.
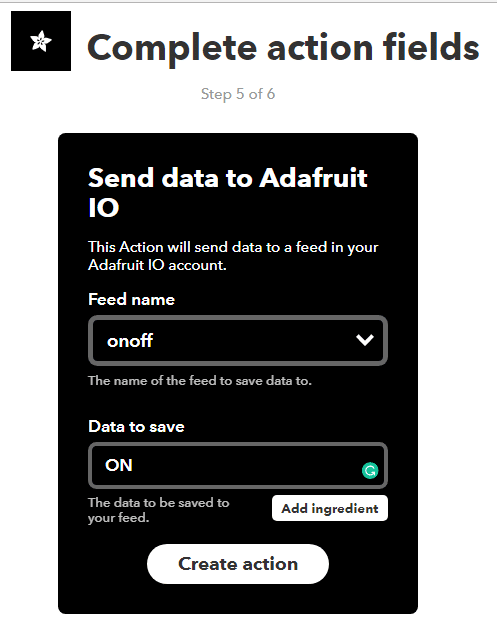
Choose “Send data to Adafruit IO” action and fill the Action field by choosing you “Feed name” and “Data to Save” and “Create Action” and click “Finish”. This data will be the same as filled in Block Settings in Adafruit IO (Fig. 12).
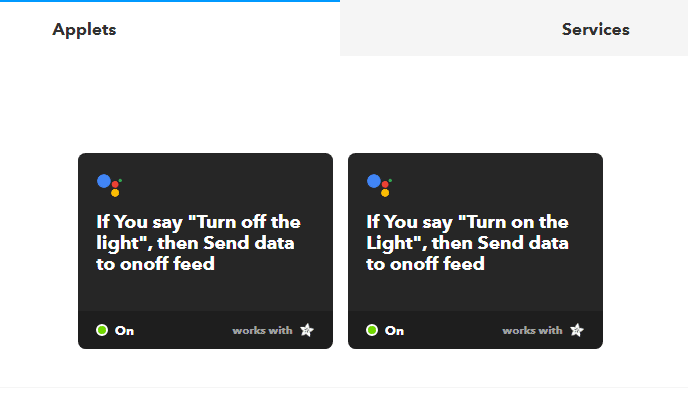
We need to create two such blocks for ON and OFF for the same feed.
Steps for the ESP32 support in Arduino IDE
Ignore this step if you already have the setup of ESP boards in Arduino IDE.
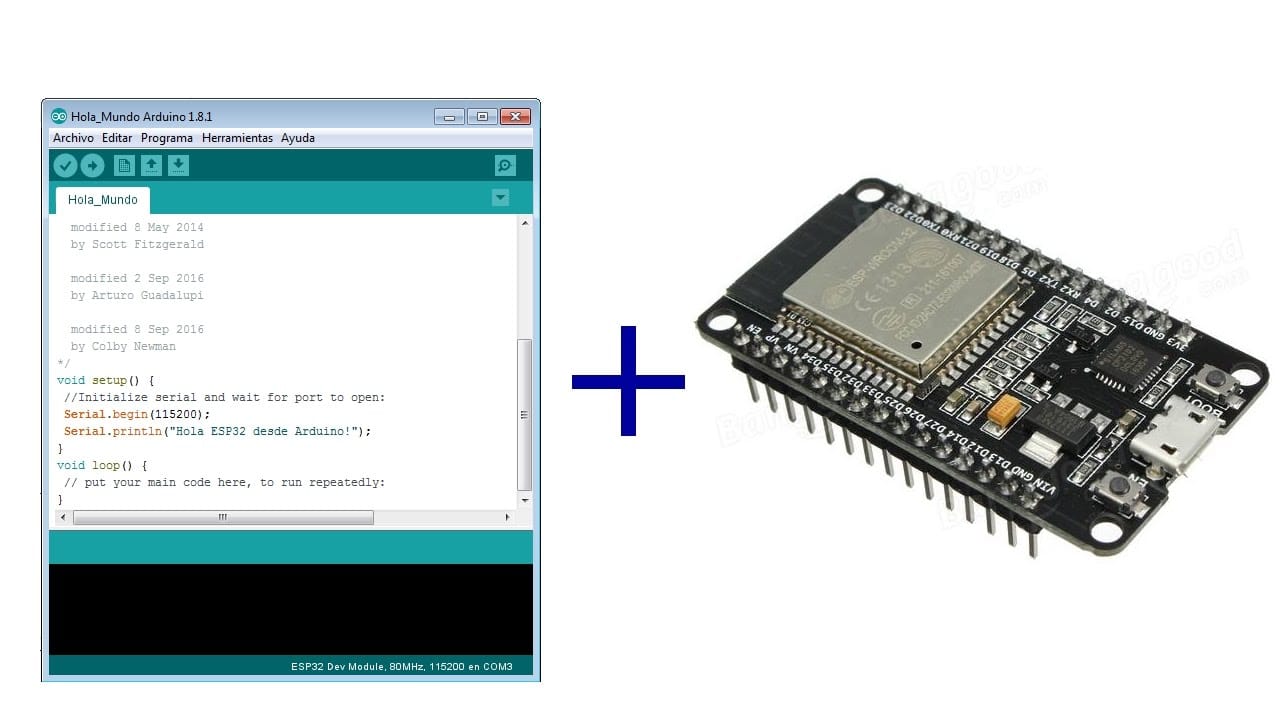
Here to code the ESP32 we need an Integrated Development Environment and we will use Arduino IDE software. Arduino IDE is a cross-platform application. It is written in Java and coded in C/C++ with some special rules. To download the latest Arduino IDE from here. Arduino IDE does not contain support of ESP32 family so to install the ESP-32 Board in Arduino IDE, you can refer here.
Source code for the project
Download the Code from the link below and Open it in Arduino IDE. Let’s understand the code.
Before uploading you need to make some changes in the code. This is the universal set-up for an account.
#include <WiFi.h>
#include “Adafruit_MQTT.h”
#include “Adafruit_MQTT_Client.h”
#define WIFI_SSID “xxxxxx” //Enter your Wi-Fi name in the double qoutes.
#define WIFI_PASS “xxxxxx” //Enter your Wi-Fi password in the double qoutes.
#define MQTT_SERV “io.adafruit.com”
#define MQTT_PORT 1883
#define MQTT_NAME “xxxxxx” //Enter your adafruit.io user name
#define MQTT_PASS “xxxxxx” //Enter your adafruit.io feed active key.
Now we will give our feed name to subscribe to our MQTT Server. For more details on MQTT refer here.
WiFiClient client; //Set up MQTT and WiFi clients
Adafruit_MQTT_Client mqtt(&client, MQTT_SERV, MQTT_PORT, MQTT_NAME, MQTT_PASS);
Adafruit_MQTT_Subscribe onoff = Adafruit_MQTT_Subscribe(&mqtt, MQTT_NAME “/feeds/onoff”); //Set up the feed you’re subscribing to. Here our feed name is onoff
We will subscribe for MQTT in our Void Setup().

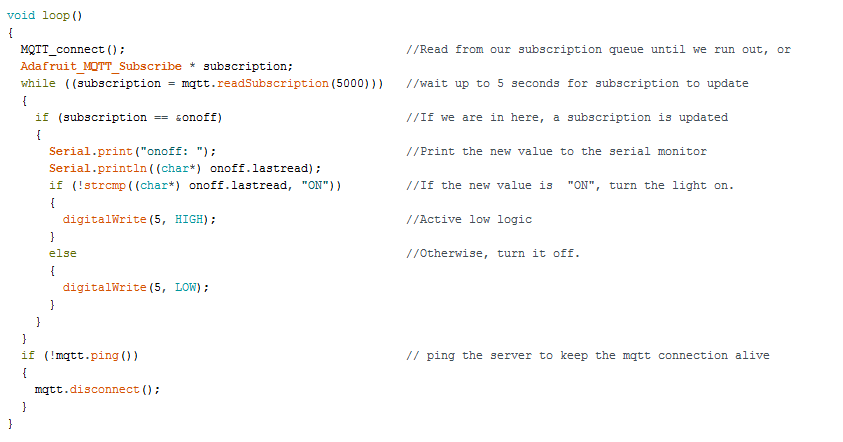
In the Void loop(), we will be subscribing to our MQTT Server at regular intervals and switching the Output Pin 5 of ESP32 accordingly.
Note: Do remember to download the libraries like “Arduino Http Client” and “Adafruit MQTT” from Library Manager of Arduino IDE.
Circuit Diagram for the Home Automation
The connections are very simple. Just connect the ESP32 and Relay pin. Provide additional 5V supply to relay.

Now, power up everything.
Connecting to the Web server of Adafruit IO
After uploading the code, go to Open Tools>Serial Monitor. ESP32 will try to connect to Wi-Fi and display its IP address on Arduino serial monitor.
Make sure that the Wi-Fi router to be connected is already open. Hit this IP address in the browser of the device connected to the same Wi-Fi.
Url: http://192.168.xx.xx (your IP displayed in Arduino serial monitor)
You will be able to see the HTML Web page mentioned in the code. Open your Google Assistant App and start giving the voice commands.
Download the Source Code from here.
You can have these components from kitsNspares.


Can you share some light on what would be the cost of this” IoT Home with Hindi Voice Commands using Google Assistant & ESP32 ” project .
Assuming the software suggested will be opensource .
I need the approx cost of the components listed above.
Thank you
Hi Joan,
This project will cost around 20$
Hey, How can I add more devices to it?
To add more devices, add more switches to your Adafruit Portal in your Dashboard
Hey,I wanted to ask that do we have to use arduino uno (hardware) or is the arduino IDE sufficient
what is that in FIG 5
is this the reverse side of relay or it is a single relay (i am newbie man)
it would would be great it you can put the buying links of the products used.
Finding right one you used on my own is frustrating. I don’t know what a datasheet is.
it’s a nice information for vehicle safety. thanks a lot for share with us.
good information keep it up.
Thank You for your feedback.
hy,
i am connecting my esp32 with hotpot of my mobile.
Also my laptop is connected with esp32.
i use ip which is printed by API :WiFi.localIP();
When i hit ip on laptop i am getting that ip refuse to connect.
What should i do?
Am i missing any steps?
not able to open ip of esp32 from browser.
Use mobile hotspot.
connected it to esp32 and laptop.
Open ip address from laptop.
getting connection refuse error in browser .
Can you please share which version of ESP32 module you used?
Also I am getting error when I upload code also not connect to the hostport
Me sale practicamente todo hasta la parte de” while ((subscription = mqtt.readSubscription(5000))) ”
y por tanto, no puedo realizar las acciones! que puedo hacer o que es lo que estoy haciendo mal???
can i use nodemcu 8266 for this project ?
are u also using arduino board with esp32 ..what is the use of arduino uno in this project
Is it possible to do it for other local language which are not on the google download list?
I want to do it for Bengali. Is it possible?
hi i want to ask if those item our available in the Philippines?
and do you think this can be approve tittle on our thesis project/ capstone project?
you can check the online store for your area