


After the success of the hydel plant telemetry project at less than INR 10K my boss thought why don’t I take up a similar project for the 16 MW solar field! The solar field has a total 16MW PV setup. The setup is about 4550 meter at a crow-line distance from the stage-X service building where I’ve to setup the central desk.
It has a SCADA control system but the system is very old and does not have any OEM support. The engineer is also not able to provide me any analog or digital output for input to my microprocessor. The system has a MODBUS communication system at the inverter level and I thought that in a spare terminal I can tap all the MODBUS communications into one point. So when I talked to the former OEM engineer and he confirmed to my utter dissatisfaction that the system does not have any spare MODBUS slot / card to move out any output to it’s central control room where-from I can upload my data. Also the software is too old now to have any warranty support from them.
As a last resort, I thought I would ask the instrumentation engineer to install python in the SCADA computer to deploy image analytic for collecting data from the same terminal and then the same python will upload data to the UART SS transceiver. It turned out that the terminal is too scary for the incharge engineer to do any experimentation as the OEM support is no more available in case we land up in trouble. There are two computers – one is engineering workstation and the other one is a slave unit. The slave unit is just for displaying the main page.

[ Capture2Text_CLI.exe or Capture2Text.exe is an windows program in which one can set a portion of a screen to capture and then save it in a text file. The program can run independent of the SCADA program such that it will capture a portion of the screen continuously and dump it in a text file which will be processed for data generation and uploading and all will be done at background! ]
But since the computer is not to be touched I had to resort to independent image processing.
Image analytic
As a beginning only three important data is required for uploading – Instant generation [Mega Watt], Total Generation for the day [Mega watt hour], Solar Isolation [Mega watt ]. All these three data are available on the top left quadrant of the screen along with few other data. My object is now pick up these three data out of this atle!
Project
The project comprises of a few sequence of processes – Image capturing, Image formatting for processing , Image analytic for data capturing, Data uploading. And everything is done by two python program in stages. The program does the following
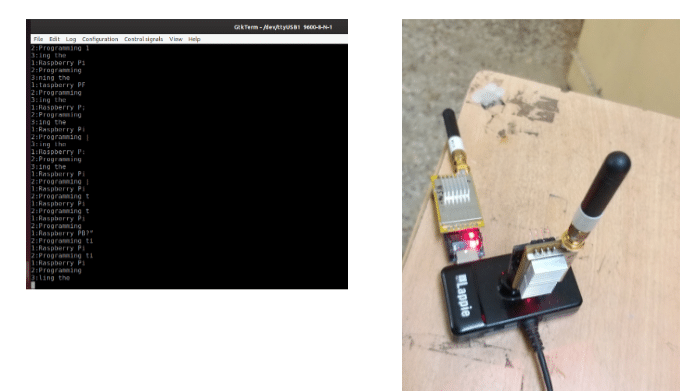
- Takes a good enough picture of the front screen of SCADA using a moderate quality USB camera either in png or jpg format.
- Read the image and analyze the text using EAST text database – pick up the required texts out of the jungle.
- Connect the SS Transceiver and upload for the far end receiver.
That’s it. But to achieve this beside python we need to have few additional software. Our preferred operating system is Linux – Ubuntu. However, the same can be done on Raspberry Pi computer or any windows computer as well having the following software installed.
Python & other associated software
Besides python – 2.7 or 3 install the followings.
$ sudo apt-get update
$ sudo apt-get install imagemagick -y
$ sudo apt-get install python
$ sudo apt-get install python-minimal
$ sudo pip install pillow
$ sudo pip install numpy
$ sudo pip install pytesseract
$ sudo apt-get install tesseract-ocr
$ sudo apt-get install opencv-python
… and a small deep learning model for text detection using the OpenCV’s EAST (Efficient and Accurate Scene Text Detection ) text detector database. OpenCV’s text detector implementation of EAST is quite robust, capable of localizing text even when it’s blurred, reflective, or partially obscured.
The model is capable of running at a near real time at 13 FPS on 720p images with very good detection accuracy. The EAST database can be downloaded from the link.
In Ubuntu 18 or above you may face that ‘snap’ is not allowing to install. In that case you have to abort the prevailing ‘snap’ services. To do that do the following.
$ sudo snap changes
You will get the process IDs of the ‘snap’ services. Note that number and then kill it by the following command.
$ sudo snap abort xyz [snap process ID]
So far so good. Once imagemagick is installed, you will be able to change the size / format of any pictures into any size and formats. Please check that once. Just take any picture in your drive and try the following.
$ convert test5.jpg /home/somnath/test4.png
$ convert test5.jpg -resize 600×400\> image.jpg
Check the test4.png or image.jpg. If they are not there earlier, they will be created or overwritten otherwise.
Software
first we will deploy python & opencv for taking image through the camera and then analyze the image to pick up the character using pytesseract. We will then use a small machine learning model in line with pyimagesearch.com by Mr Ardian to zoom upon the text of ours. Once the text is picked up, we will transfer & transmit them through the UART transceiver connected to the same computer and the process continues.
take_image_cv_cont.py
text_read.py
take_image_cv.py is the camera program to check focus of the camera.
Download Source Folder
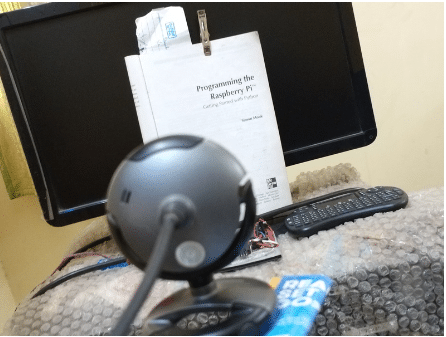
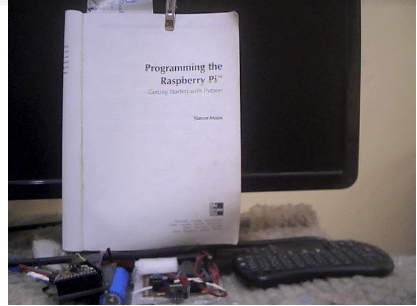
Prototype pictures
BOM
02 numbers UART 858* MHz transceivers
One computer with python enabled and additional opensource softwares.
Actual deployment
During actual deployment we found that for cheap quality camera, the lighting creates an issue. What becomes clear during day hours becomes unclear during night time. However,with good quality camera the problem was overcame. Nonetheless. Our requirement was during day hours only [solar PV generation] therefore, with a cheap camera our work continued till a good quality camera was installed by our IT department. First we ran it from a desktop PC later we planned to move to a Raspberry Pi computer. The software remains the same.