


 In these times of Covid-19, thermal screening has become essential for checking one’s body temperature before allowing entry to premises like an office. However, it is a tiring process as it involves measuring the body temperature of all the people, one at a time. At the same time, those who carry out thermal screening have to stand for long hours every day to check each and every person. This takes a lot of time and effort.
So, we have built a facial recognition cum thermal screening system that can do this job effortlessly. The device recognises the face of each person and does thermal screening to detect their body temperature. If a person is found to have a high temperature, the system warns the person not to enter and instead automatically notifies that person to take a Covid-19 test. If the body temperature is found to be okay, entry is allowed after proper sanitisation.
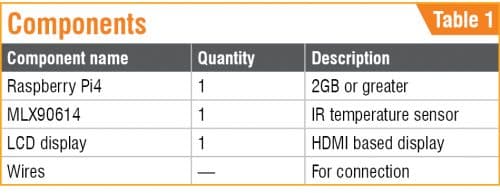
Table 1 lists the components that are required for the project.
Prerequisite
Make sure that your Raspberry Pi (Rpi) board has the latest Raspbian installed. It generally comes pre-installed with Python3 but if you do not find it, install the latest Python environment and IDE as well.
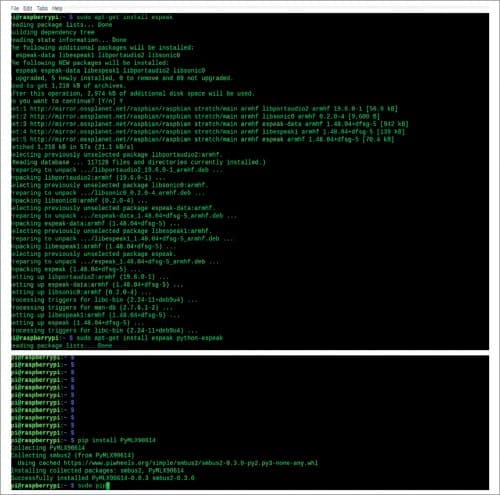
Open the Linux terminal and install the following libraries using the command given below (see Fig. 1):
sudo pip3 install face-recognition
sudo apt-get install espeak
sudo apt-get install espeak python-espeak
sudo pip3 install opencv2

Coding
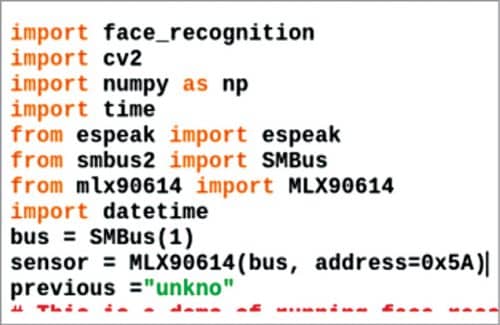
After installing the libraries, open the Python IDE and start writing the code by importing the following libraries to it:
Espeak
To announce the temperature and name of the detected face.
Face_recoginition
To recognise the face.
Date and time
To add the date and time of a person entering an area and later store the information in the database.
Opencv
To capture the video and process it frame-by-frame for facial recognition.
Next, set the image file name of each person we want to be recognised. Of course, we need to create an array having the list of names and images of all identified people. The names and images need to be in the same order. If we do not have an image of a person in the database, it is considered as unknown.
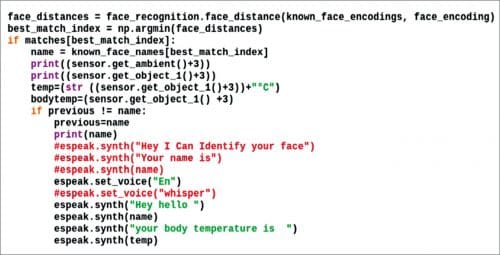
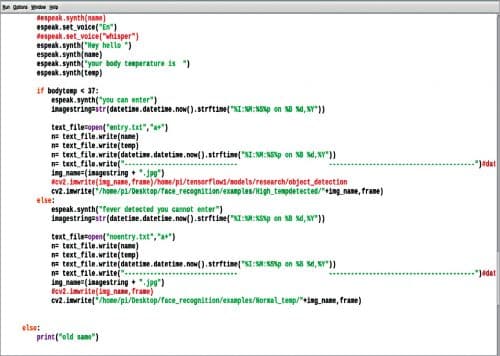
The video frame will be processed in the while loop, which will recognise the name of the person and then match it with the respective face that was detected. If it is different, it will use the MLX90614 sensor to measure the temperature of the person. Thereafter, using espeak, the name and temperature of that person will be announced.
The if() statements that we had written check whether the temperature is greater than 37 degrees Celsius or not. If the temperature detected is greater, the system tells the person not to enter the area. It also captures the person’s image and temperature and saves the information in a database folder with a time stamp.
If a person’s temperature is found to be less than 37 (or say, up to 37) degrees Celsius, the system allows the person to enter after proper sanitisation. The person’s image is also saved in a separate database folder, which includes name and temperature along with time stamp.
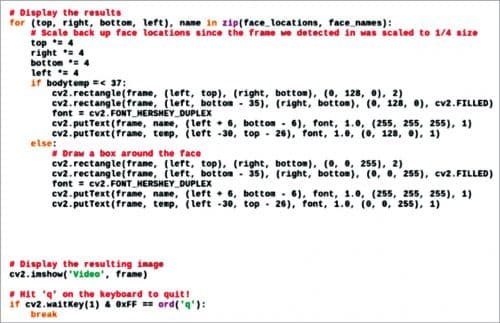
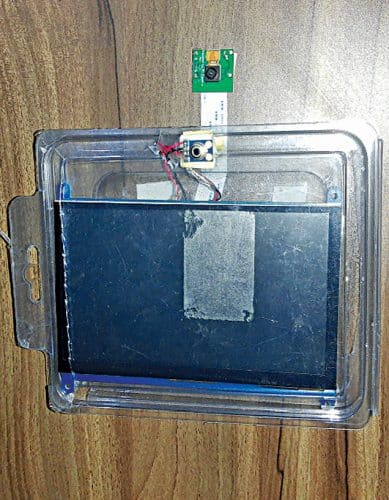
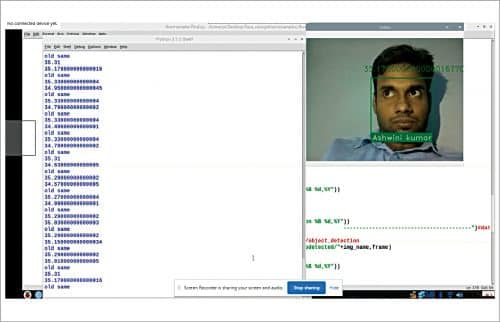
Fig. 6 shows the code for the image (taken from the captured video) along with the name and temperature. The outline of the rectangular frame showing the name and image will change its colour depending on the detected temperature (red=high temperature, green=low temperature).
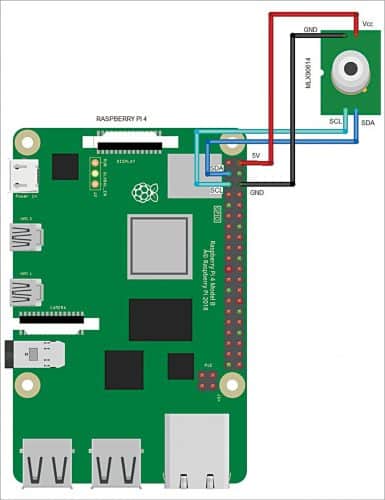
Connection
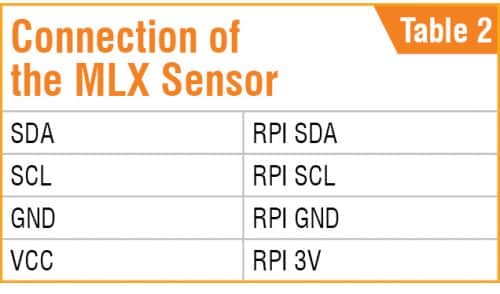
After coding, connect the MLX sensor as shown in Table 2. Connection diagram of MLX90614 with RPI is shown in Fig. 8. Connect the camera, HDMI display, and sensor as shown in the author’s prototype (Fig. 7).
Testing
After setup, power the Raspberry Pi and mount the device on a wall or the entry door. Rerun the code and wait for a few seconds. It will show the temperature and face of the person standing at the entrance in front of the camera. If the person is detected to have a high temperature/fever, the device will warn the person not to enter.
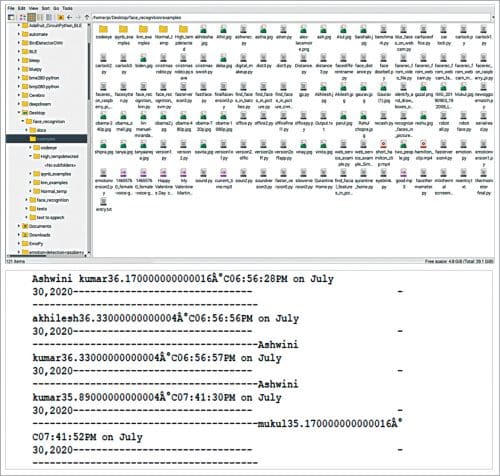
We can check the database for information about each person who goes through the thermal screening process. For specific database, open the entry.txt and no_entry.txt text files stored under Examples folder as shown in Fig. 10. The database in text format is shown at the bottom in Fig. 10.
Download Source Code
Ashwini Kumar Sinha is a tech journalist at EFY-i
Please note: If you are unable to download the source code, please try to open the page in incognito mode and retry or temporarily turn off the antivirus before downloading.

Hi Mr. Ashwini Kumar Shinha do you have any Viber or telegram account that you use I am an aspiring engineer and want to ask some guidance about a certain project where building. Hope my comment will be notice. I’m also a huge fan or your works. Do you have a youtube channel?.
Thnaks for such nice feedback, You can always contact e on wats app for help and guidance in project 7061350809. I also have telegram account on same number. Yes , you can meet me live on youtube channel on Friday here is link of youtube channel . https://www.youtube.com/user/efyeb/videos
Thnaks for such nice feedback, You can always contact e on wats app for help and guidance in project 7061350809. I also have telegram account on same number. Yes , you can meet me live on youtube channel on Friday here is link of youtube channel . https://www.youtube.com/user/efyeb/videos