


WordPress is a PHP and MySQL based open source blogging platform and content management system. It is a popular blogging system and includes features like threaded comments, galleries, revision histories, trash, custom post types, thousands of themes, widgets and plug-ins. This article describes the setting up of a WordPress web server setup on Raspberry Pi.
Apache web server installation
Apache, a web server application notable for playing a key role in the initial growth of the World Wide Web, is used to serve web pages. Follow the procedure given below to install it on Raspberry Pi.
1. Install apache2 package by executing the following command (also see Fig. 1):


$ sudo apt-get install apache2 –y
2. After this installation, Apache sever will be running. Thereafter you can start or stop it by running the following commands (also see Figs 2 and 3):
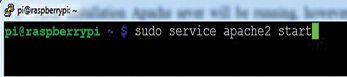

$ sudo service apache2 start
$ sudo service apache2 stop
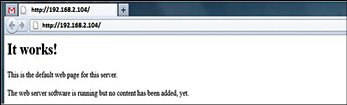
3. Apache server by default creates a test HTML file in web folder. This can be served when http://localhost/ is browsed on the Raspberry Pi or http://192.168.2.104 (IP address of the Raspberry Pi in our case, but can be different in your case) from any other computer on the network.
Browse the default web page and you will see the message shown in Fig. 4 appear on the screen.
4. Change the default web page as per your requirement. The default web page is an HTML file on the file system and is located at /var/www/index.html. Execute the following command on terminal to navigate and have a look on the file:
$ cd /var/www
$ ls -al
You will see the following:
total 12
drwxr-xr-x 2 root root 4096 Mar 2
03:15 .
drwxr-xr-x 12 root root 4096 Mar 2
03:15 ..
-rw-r–r– 1 root root 177 Mar 2
03:16 index.html
This shows that there is one file called index.html in /var/www/. The ‘.’ (dot) at the end of line 2 refers to the directory itself/var/www/ and the ‘..’ at the end of line 3 refers to the parent directory /var/.
Meaning of each column in the previous file is:
1. File or directory permissions
2. Number of files in the directory (1 in case of a file)
3. User who owns directory or file
4. Group which owns the directory or file
5. File size
6. Date and time of last modification
In order to edit the directory and file, you should log in as root user. Edit the index.html file using either of the following commands.
$ sudo chown pi: index.html
$ sudo nano index.html
Try editing/changing this file and refreshing the browser to see the web page changes.
Next step is to install PHP and MYSQL, which are used to create your own site and publish your own content dynamically, without knowing how to program those pages.
PHP installation
Install PHP by executing the following command (also see Fig. 5):

$ sudo apt-get install php5 libap
ache-mod-php5 php5-intl php5-mcrypt
php5-curl php5-sqlite
To check whether PHP has been installed properly, move index.html file to index.php using following command (also see Fig. 6):

$ sudo mv index.html index.php
Now edit the file:
$ sudo nano index.php
Put following text in index.php after opening the nano editor:
Save and then refresh the browser. You should see ‘hello world’ on your browser. This is served by the PHP and is not dynamic. So let us try something dynamic like displaying date and time by giving following command:
Or you can show the PHP info by giving following command:
Installing MYSQL database management system
Execute the following command to install MSQL (also see Fig. 7):

$ sudo apt-get install mysql-
server mysql-client php5-mysql
Enter the password of your choice for the top-level MSQL user, who will be managing MSQL but is not root user of the Raspberry Pi operating system. Stop and start the apache2 server.
WordPress download
Download WordPress by running wget command on the terminal. You can find the latest version at wordpress.org/latest.tar.gz and wordpress.org/latest.zip
Download the WordPress to /var/www/ location. You will have to empty the folder first. Now change the ownership of this folder to the Pi user using following command:
$ cd /var/www
$ chown pi:
$ rm *
$ wget http://wordpress.org/
latest.
tar.gz
Or you can download it directly from the link mentioned below:
http://wordpress.org/latest.
tar.gz
Extract the tarball using following command:
$ tar xzf wordpress-3.9.1.tar.gz
Move the contents of folder to the current directory.
$ sudo mv wordpress/*
Remove the folder (which is now empty) and tarball to tidy up.
$ sudo rm -rf wordpress-3.9.1.tar.gz
To see the content of the WordPress project, run the ls or tree-L1 command. You will see the project as given below. It is the source of a default WordPress installation.
├── index.php
├── license.txt
├── readme.html
├── wp-activate.php
├── wp-admin
├── wp-blog-header.php
├── wp-comments-post.php
├── wp-config-sample.php
├── wp-content
├── wp-cron.php
├── wp-includes
├── wp-links-opml.php
├── wp-load.php
├── wp-login.php
├── wp-mail.php
├── wp-settings.php
├── wp-signup.php
├── wp-trackback.php
└── xmlrpc.php
The files for editing to customise installation is in the ‘wp-content’ folder.
Setting up WordPress database
To set up WordPress site, you will require a database such as MYSQL.
Run the mysql command in the terminal and provide the login credentials (username is ‘root’ and password is ‘password’) as given below:
$ mysql -uroot –ppassword
Create the database that the WordPress installation will use:
$ mysql> create database wordpress;
Do not miss the semi-colon at the end of the statement. After creating the database, you should see the following message:
Query OK, 1 row affected (0.00 sec)
Exit MySQL using Ctrl + D keys.
WordPress configuration
To access the Raspberry Pi in the browser, navigate to http://192.168.2.104 (IP address of your Raspberry Pi). In case you do not know the IP, check it by running the command hostname–I on the terminal.
You should see the error page; this is good! Click the button marked as ‘Create a Configuration File’ followed by ‘Let’s go!’ button on the next page.
Now, fill basic site information as mentioned below:
Database Name: wordpress
User Name: root
Password:
Database Host: localhost
Table Prefix: wp_
Upon successful database connection, you will get the contents of your wp-config.php file as shown in Fig. 8.
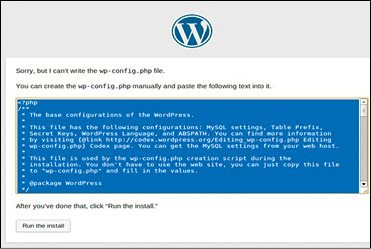
Copy this text then return to the Pi terminal and open the nano editor by running the command nano wp-config.php. Paste the copied text into the blank wp-config.php file. Save this file and exit the nano editor. Then come back to Fig. 8 and hit ‘Run the install’ button.
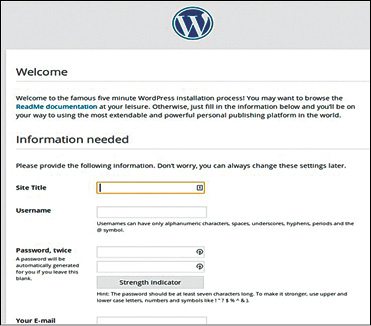
You should see a ‘Welcome’ screen as shown in Fig. 9. Fill in the required information shown in this window.
Now, you will get your web page on the screen. The web page with customised theme is shown in Fig. 10.

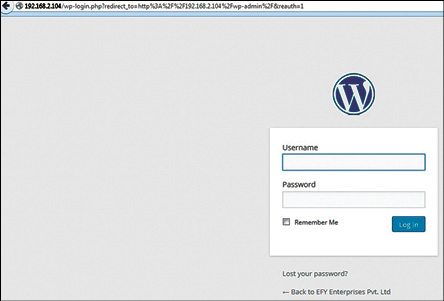
If you want to do some changes in your web page, write the IP address on the address bar as given below (also shown in Fig. 11):

192.168.2.104/wp-admin
A window will open on the screen for entering your username and password as shown in Fig. 12. Fill the information, give a title to your site and create username and password.
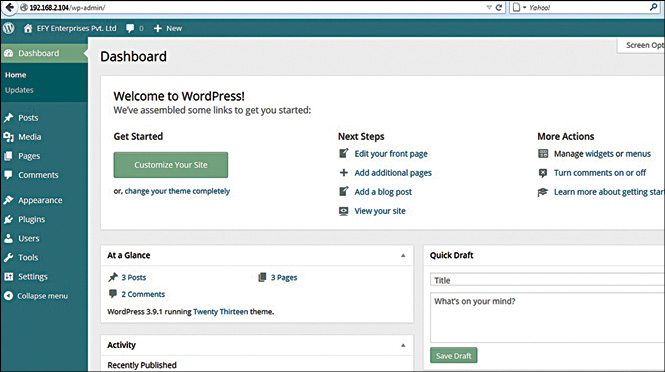
You can make changes in your web page from the admin web page as shown in Fig. 13.
The author is working as assistant manager at Samtel Avionics Ltd

hello!,I love your writing very a lot! percentage we keep up a correspondence extra about your post on AOL?
I need a specialist in this area to solve my problem.
May be that is you! Having a look forward to look you.
Kindly elaborate your query.