


 At some point, we all must have have come across news of car theft, be it in the television/newspaper or in the neighborhood. It might have occurred with some of us as well. Despite installing hi-tech security devices, thieves somehow manage to find ways to get access to your car and steal it. So, I have decided to make a prototype of a security system for automobiles which is highly efficient and fool-proof. You can also implement this security system for banks, lockers and homes where you will be protected from unauthorized access.
How it works?
- Connect the smart lock of your car using Bluetooth.
- Then enter the password of your car.
- After that, a camera captures a small video of you in order to recognize your face.
- Then it asks for your fingerprint. If correct, you’ll be able to access your car, otherwise it will turn off the ignition of the car and send an alert message to its owner.
What we are going to build?
For making a 3-step car authentication smart lock, we will build a face recognition system and a biometric password so that only the authorized person gets access to the car.
Bill of materials
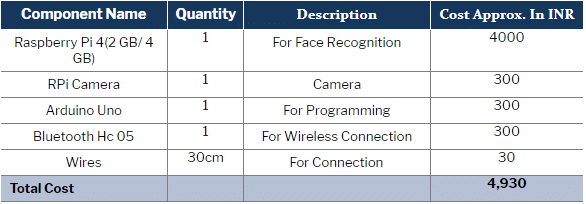
Coding
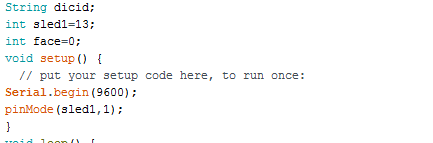
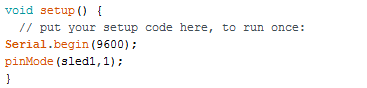
We will write an Arduino code that will enable communication between our Android app and Raspberry Pi and will thus check the lock authentication. To do so, first create variables that store the password, face detected value (1 for true and 0 for false) and pin number of the relay that controls ignition of our car. Next, we create a setup function for setting the baud rate for Bluetooth communication. Here we have used the baud rate = 9600 (default). (Refer Fig 1, Fig 2).
Now, we create a loop function for cross-checking the password that has been entered into the app with the one written in our code. If both the passwords match, then it will call another function called “check”. The check function will basically ask Raspberry Pi for the face recognition output. (Refer Fig 3, 4)


Now we have done with our Arduino coding. Next, open the Raspberry Pi desktop window and write a Python script for face recognition.
For Face recognition:
Install dlib, pillow, cv2 and face_recognition Python modules into your Raspberry Pi. Follow the process of installation as per the instructions given in PyPl library index.
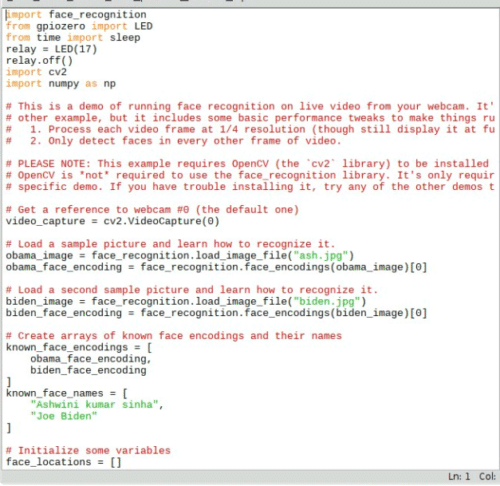
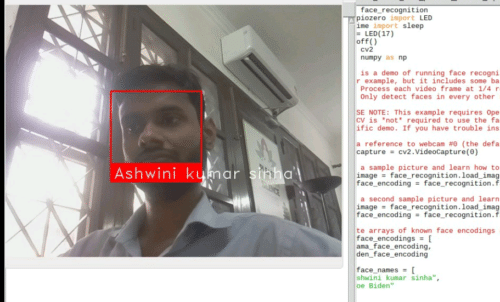
After completing the installation process, open the Python IDE and begin writing the Python script for face recognition. Make sure to include all the required modules such as face_recognition, gpiozero, cv2, numpy.
After that, paste the images of all the people who have been approved to drive your car (where you have written the script). Make sure to write the image names into the code. (Refer Fig 5.)
Now download the code and run on Raspberry Pi for face detection.
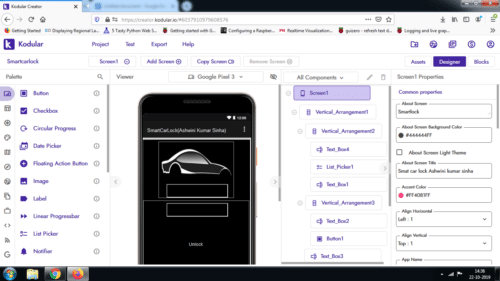
Making the app
Now open Kodular (go to www.kodular.io) and sign in. To make the UI of the app, add below given virtual components. (Refer Fig 6.)
- 4 Text_Boxes
- 1 Bluetooth_Client (select Connectivity -> Bluetooth Client)
- 1 List_Picker (select User Interface->List Picker)
- 1 Texting (select Social ->Texting)
- 1 Clock (select Sensors->Clock)
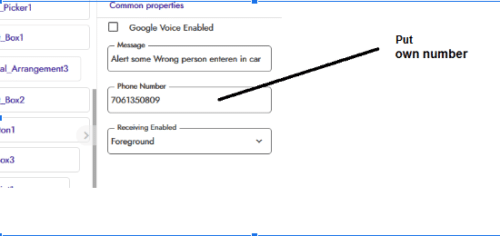
Now click on Texting and enter the phone number with the desired text message. (Refer Fig 7.)
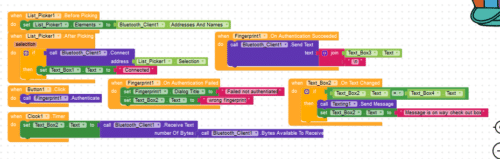
Programming the app
For programming, go to Blocks and join the code blocks as shown. (Refer Fig 8.)
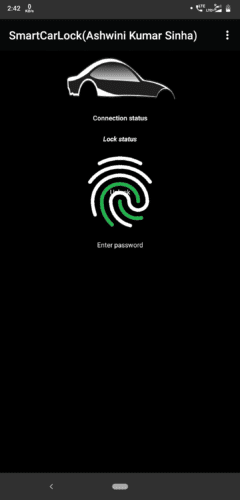
And finally, export the APK to your computer and then install it into your Android phone. The final app will appear like this. (Refer Fig 9.)
Connection
Connect the components as follows:
Arduino RX——————-HC 05 TX
Arduino TX——————-HC 05 RX
Arduino 5v ——————-HC 05 VCC
Arduino GND—————-GND
Arduino A0——————–Raspberry GPIO Face pin Out
Arduino Pin 13—————Relay

Testing the app
To test our prototype, open the app and turn on the Bluetooth of your phone. If app asks for access to text messages, then allow that. Now power the Raspberry Pi and run the carface.py script. When this script runs, the camera detects your face and opens it in a new window. If the camera detects the correct face, it will then send a verification signal to Arduino. (Refer Fig 11.)
Next, connect the car with the app by tapping on the car icon.
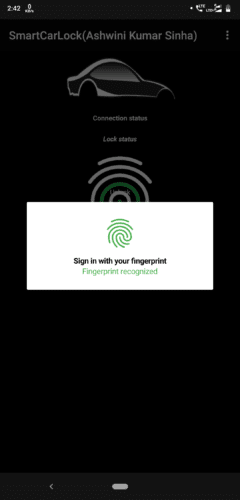
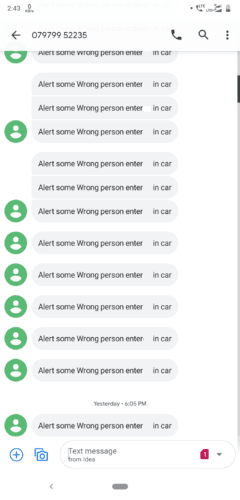
Now, select Bluetooth HC 05 and after successful connection, enter the password and your fingerprint by tapping the fingerprint icon. If Arduino detects all process to be correct, then it triggers the relay which then sets the car ignition to ON. If incorrect password/ fingerprint/ face is detected, then the car ignition is set OFF and the app sends an alert message to the owner to inform about the unauthorised access. (Refer Fig 12,13,14)

I think this is awesome innovation. I am level 300 computer engineering student in Ghana and I hope to be part of this moving wold no sooner.
Thanks a lot.
nice idea brother
Hello bro can u help me in doing this project.
Hi Bharath, how can I help you?
What did u use as your
Display
Bro.. Did you use rasbian os on your raspberry pi
Amazing! Bro, I just can not wait to start a similar project for my own (and for my car). But at the first step, i need to learn how program the arduino. Do you have any suggestions for me?
Yes, You can start learning from basic small Arduino projects on Electronicsfor.com and if you need help in understanding you can reach me in comments section or whatsapp me on 7061350809
can you please share the paper or report sir