


 Arduino board requires a USB cable connected to a laptop/PC or an external AC/DC adaptor for power supply. If you want a portable Arduino-based project, you need a battery for power supply. 9V PP3 is a popular battery and easily available in nearby general stores. So, we are going to make a DIY 9V battery adaptor for Arduino, as explained in this article. It works great for Arduino boards, development boards, evaluation boards, and more.
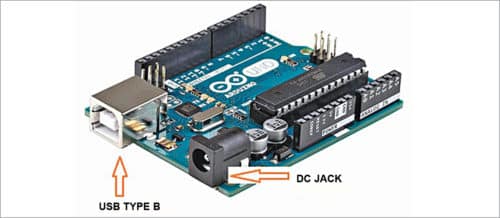
Normally, a DC jack/socket is provided on the Arduino board for external power adaptor, as shown in Fig. 1. Our project is to make a 9V battery adaptor plug to be used at DC jack/socket on the Arduino board.
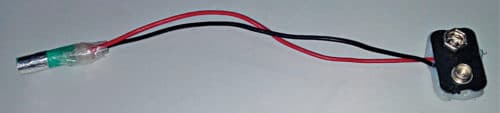
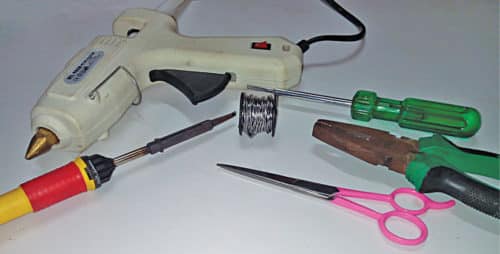
This DIY 9V battery power adaptor is built using a drinking straw, aluminium foil, and snap connector, as shown in Fig. 2. The battery snap connector/clip may be taken from a dead 9V battery. The tools used for the project are shown in Fig. 3.

The following materials are required for this project:
- Plastic drinking straw
- Aluminium foil
- Pliers or screwdriver
- 9V PP3 battery
- Hook-up wires
- Glue gun
- Super glue
- Transparent tape
- Solder and soldering wire
- Scissors
Making a 2.1mm power plug
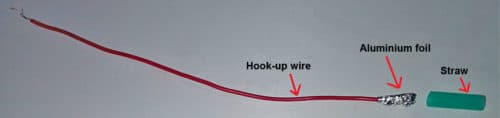
First, cut a 2cm long plastic straw from a drinking straw using a pair of scissors. Next, take two hook-up wires—red for positive wire and black for negative wire, each should be 10cm in length. Peel off some portion of the red wire’s insulation cover from one of its ends, exposing around 1cm copper wire. Wrap a small piece of aluminium foil on the copper wire, as shown in Fig. 4. Place it inside the drinking straw and fix it using a glue gun.
Next, fix the black wire (after removing around 1cm insulation from its end) on the outer part of the straw using a transparent tape (Fig. 5). Make sure that some of the metallic/copper portion of the black wire is not covered with tape. To make it more rigid, fix the black wire on the straw using super glue.
Making a battery clip (snap connector)
It’s a good idea to use the snap connector from a dead 9V battery. This can be done by dismantling a dead 9V battery and then taking out the top and bottom parts of it, as shown in Fig. 6. You can dismantle the battery using pliers or screwdrivers. The dismantled parts of a 9V battery are shown in Fig. 7.
Connect the red and black wires on the snap connector, as shown in Fig. 8, by soldering at the appropriate positive and negative contacts. Paste the bottom portion on the snap connector using glue, as shown on the right side of Fig. 8.
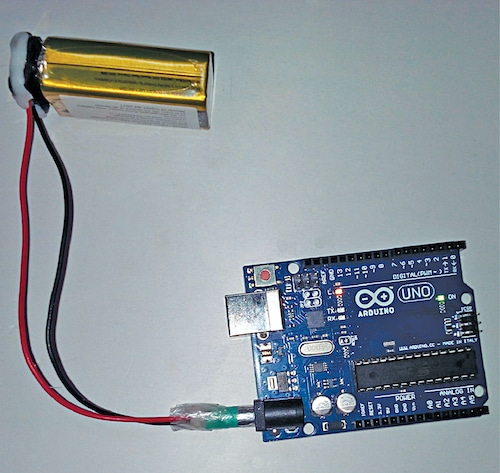
You have successfully made a 9V adaptor for the Arduino board. Check continuity before connecting it to Arduino. Now, you can use your DIY 9V adaptor to power the Arduino board, as shown in Fig. 9.
Check more such tested Arduino projects.
Amal Mathew is an electronics hobbyist