Have you ever thought of controlling things with just your thoughts? Well, it is now possible!
The idea for this IoT project came while working on the BioSecure project wherein a unique pattern was created using a brain controlled EEG and EMG signals to act as a unique password. This led to the development of a machine learning (ML) model that understood brain signals and thereby created unique patterns using our thoughts. For example, when thinking in a particular language, the ML model is able to read those thoughts and translate them.
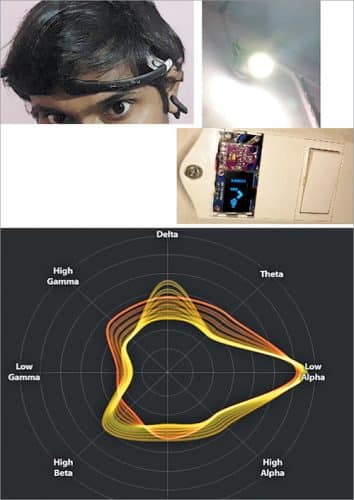
To achieve this, the brain data corresponding to the level of mental attention needs to be obtained using an EEG sensor. This level is then given a threshold value. When the attention level goes above this threshold value, lights or other IoT connected appliances (that were thought of) switch on/off.

This project does not end here. The journey of discovery will continue, which will later evolve into a brain-computer interface (BCI) and might become the world’s first thoughts translator that uses an ML model.
Sounds highly interesting and quite futuristic as well? If so, let us start the project by shopping for the components mentioned under Bill of Material.
Prerequisite
There are various EEG sensors such as OpenBCI and NeuroSky MindWave available in the market. For this project, the NeuroSky MindWave Mobile 2 EEG sensor is being used.

Install Bluez driver into the Raspberry Pi. But if you have the latest version of the Raspbian OS, there is no need to do so as the driver and relevant software are pre-installed.
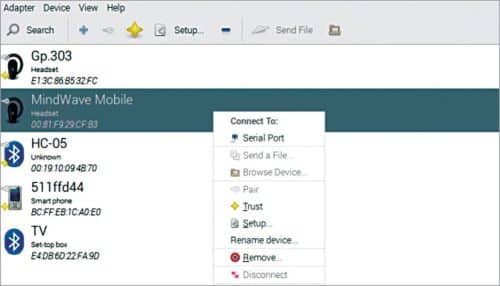
Open the Bluetooth devices in Settings and pair the EEG sensor via Bluetooth with the Raspberry Pi. On successful connection with serial ports, a message with the serial port name will be displayed. Note it down.