


An oximeter is an essential tool for both doctors and individuals, enabling daily health monitoring by measuring blood oxygen levels, pulse, and heart rate.
With the compact 3cm IndusBoard, you can easily build a portable oximeter that delivers quick and accurate readings of heart rate and oxygen saturation.
While the code can be adapted for other ESP boards and chips, the IndusBoard’s compact size makes it ideal for portable applications.
Bill of Materials
The components required to make this pulse oximeter project are listed below-
| Components | Description | Quantity | Price |
| IndusBoard | Dev Board | 1 | 1000 |
| USB Type C | Adapter | 1 | 100 |
| MAX30100 | Sensor | 1 | 200 |
| OLED Display | SSD1306 | 1 | 300 |
Smallest Pulse Oximeter – Code
First, install the required libraries in the Arduino IDE. To do this, open the Library Manager from the Tools menu and search for the following libraries: “Adafruit GFX”, “Oak OLED”, and “MAX30100”. Install each of these libraries.
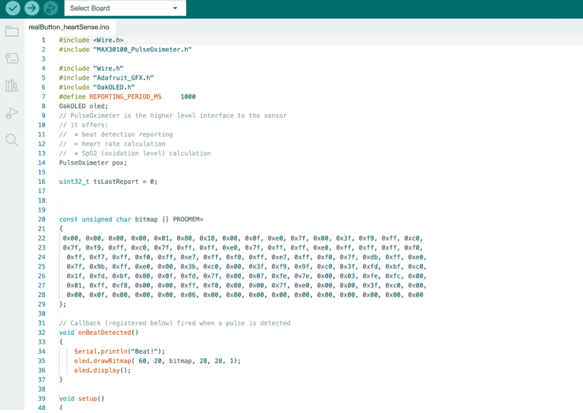
Once the libraries are installed, you can begin coding. Start by including the necessary libraries in your code.
Next, add a short bitmap code that displays a heart symbol. This heart bitmap logo will be displayed on the OLED whenever a heartbeat is detected (Refer to Fig. 3).
Then, create the setup function to initialize the required components. In this function, set the Bluetooth baud rate along with other configurations for the project (Refer to Fig. 2).
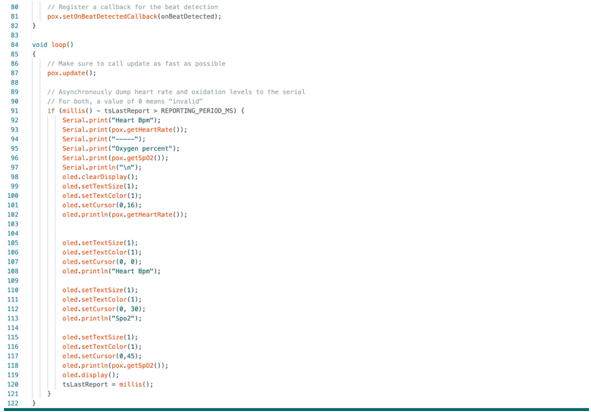
Then we will create a loop function that updates the readings of the sensor and displays those readings on the OLED screen.
DIY Pulse Oximeter – Circuit Connection
The IndusBoard is equipped with two I2C ports, enabling simultaneous interfacing of multiple sensors, OLEDs, and other I2C modules. For the IndusBoard, I2C pins can be configured for either hardware I2C or software I2C. GPIO pins 8 and 9 are set up for hardware I2C.
To connect the components:
- Connect the SCL and SDA pins of both the OLED and the MAX30100 sensor to the SCL and SDA pins of the IndusBoard.
- Power the MAX30100 sensor using the 3V and GND pins of the IndusBoard.
- Power the OLED using the 5V and GND pins of the IndusBoard.
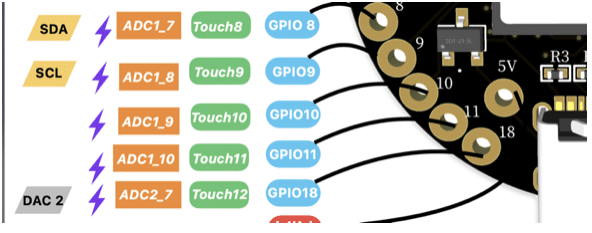
| IndusBoard | MAX30100 | OLED |
| 8 | SDA | SDA |
| 9 | SCL | SCL |
| 3V | VIn | – |
| GND | GND | GND |
| 5V | VCC |
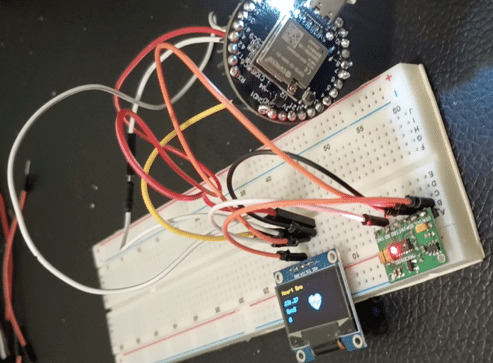
Testing Pulse Oximeter
Power the IndusBoard using a USB connection or a 5V battery connected to the GND and 5V pins.
Place your finger on the MAX30100 sensor to measure your blood oxygen percentage and pulse rate.
The readings will be displayed on the OLED screen, accompanied by a blinking heart symbol that syncs with your heartbeat.
Ensure the code is correctly uploaded to the IndusBoard and verify that all connections are secure for proper functionality.
