


 This is a very simple digital distance meter, which you can add to your water-level indicator circuit to show water level in a tank, or use it for a school/college project. The author’s prototype is shown in Fig. 1.
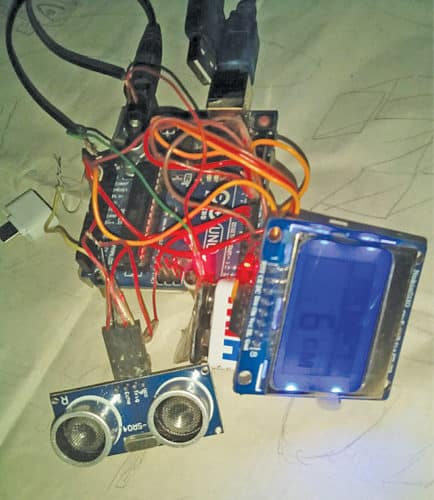
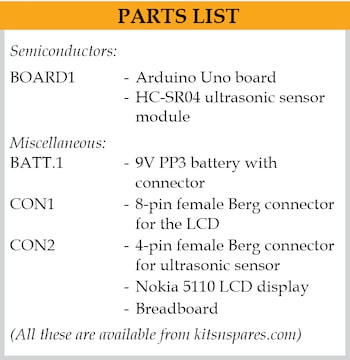
Circuit diagram of the digital distance meter is shown in Fig. 2. It is built around Arduino Uno board, HC-SR04 ultrasonic sensor, Nokia 5110 LCD and 9V battery for power supply.

Construction and testing
Connect the LCD, ultrasonic sensor and battery to the Arduino board as per circuit diagram. To test:
- Download and install Arduino IDE from www.arduino.cc/en/Main/Software
- Download the ultrasonic library from this link, and Nokia 5110 LCD library from this link.
- Extract the libraries, and copy and paste them into Libraries folder of Arduino IDE.
- Connect Arduino to PC/laptop using USB cable. Open the source code (distance_meter.ino) from Arduino IDE. Select the proper board and COM port under Tools menu. Compile and upload the code to Arduino.
- Fix the sensor properly on the breadboard and point it towards the wall or large object whose distance you would like to measure. When HC-SR04 sensor detects the ultrasonic waves bouncing back from the object, you will get the distance between the sensor and the object on the LCD as well as on the serial monitor of Arduino IDE in centimetres.
To make it stand-alone, you can use a battery as shown in Fig. 2.
 Download Source Folder: click here
Ashwini Kumar Sinha is an electronics hobbyist and tech journalist at EFYi
- Advertisement -

Thanks for the suggestions. Here I found all the material for this project
You are most welcome.