


 For most people solving sudoku puzzles is not a particularly simple task. A novice may take many hours to finish a straightforward sudoku puzzle. Because of this, we wondered if it was possible to create a robot that could simply by looking at a sudoku problem, regardless of how difficult it was, solve it within a few seconds?
Here, we look at how to create such straightforward sudoku solver robot, that, based on our voice commands, can quickly solve any sudoku puzzle for us. Also, it will show us the whole procedure of solving the puzzle. The robot can also talk and exhibit its own expressions to make it even more interesting.

| Bill of Material | |
| Components | Quantity |
| Raspberry Pi 4 B/Raspberry Pi 3 B+ (Raspberry Pi 4 recommended) | 1 |
| Raspberry Pi camera module V2 | 1 |
| Raspberry Pi touch-screen display | 1 |
| 5W speaker | 1 |
| LED | 1 |
| 5V, 2A power adaptor | 1 |
| USB microphone | 1 |
| Jumper wires, female – female | 40 |
| A robot toy body/case | 1 |
Before proceeding with this robot’s design, you need to understand the rules of sudoko. So, let’s go through the rules before building the robot to solve the puzzles for us.
As shown in Fig. 1, a 9×9 grid is used to play sudoku. There are nine large squares in all, each having a 3×3 grid of small boxes. You need to fill all the small boxes with numbers 1 through 9, without repeating any number in any of the rows or columns. In each sudoku puzzle, some of the boxes are already filled with the numbers.
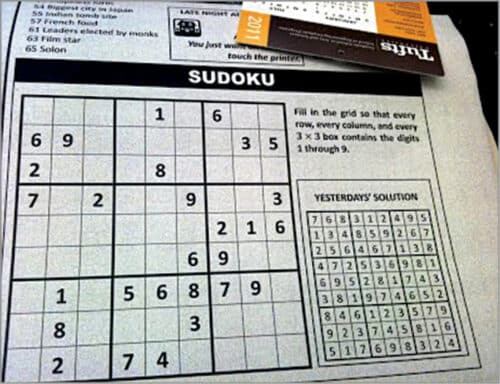
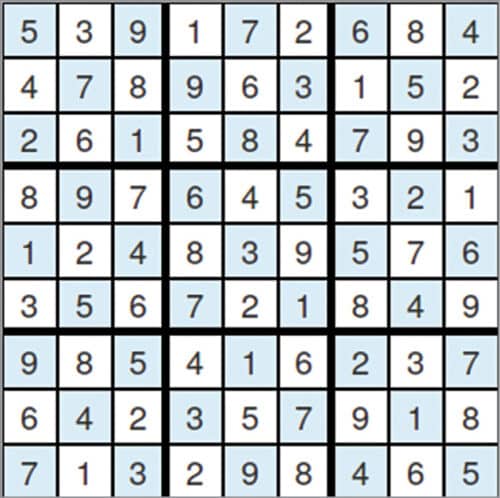
Understanding a problem’s input-output relationship is necessary before it can be solved. In this case, the image of a sudoku puzzle printed on any white paper or a digital sudoku puzzle on any screen will serve as our input and captured by our robot. It can be the picture of a sudoku puzzle from a newspaper that is shown in Fig. 1. The solved puzzle will be shown on our robot’s screen as the output, as shown in Fig. 2.
Before building the robot, we need to decide its features and understand how it would work. As soon as the robot is switched on, it gets ready to accept the voice command and indicates its readiness through the glowing LED indicator on top of its head. The LED glows when the robot is ready and listening; it switches off while processing the voice command.
When the robot is asked to introduce itself and to solve a sudoku, it switches on camera. The robot looks for the puzzle and on finding it solves it automatically. It automatically creates the code for all these functions. It is that simple!
Assembly
Now, all you have to do is to assemble the components and get the robot ready for programming. First, insert the SD loaded with latest Raspbian OS and connect the camera module to Raspberry Pi camera port and the speaker to Raspberry Pi Aux port.
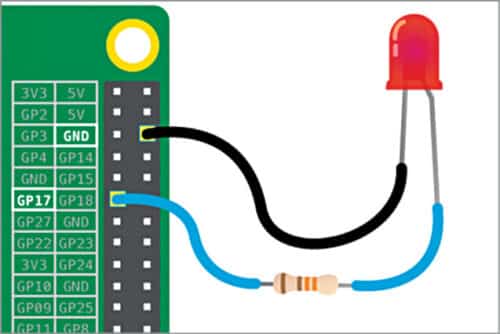
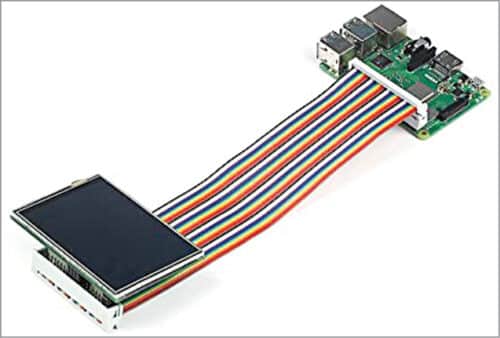
Connect the LED to any of the GPIO pins of Raspberry Pi (connected with the GPIO pin 17 in prototype, as shown in Fig. 3). Next, connect the female-to-female jumper wire connector to Raspberry Pi and the LCD display, aligning the pin from first pin of Raspberry Pi to first pin of LCD display, and so on, as shown in Fig. 4.
Setting up Raspberry Pi for coding
For programming, connect the Raspberry Pi with a large display through HDMI, or simply use SSH. After getting access to the Pi, install the required drivers for the Raspberry Pi screen (details available in the touch-screen’s manual). Then enable the camera using raspi-config. Next, set Audio Output to 3.5mm Jack, using raspi-config or Settings.

Now connect the Raspberry Pi to Wi-Fi so that it can be controlled without the large display also. After this, set up the mic and test it. In this step, editing of the file /home/pi/.asoundrc would be required.
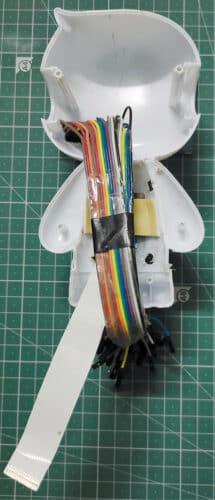
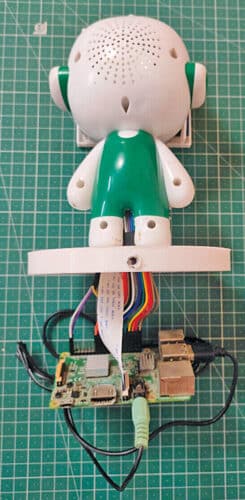
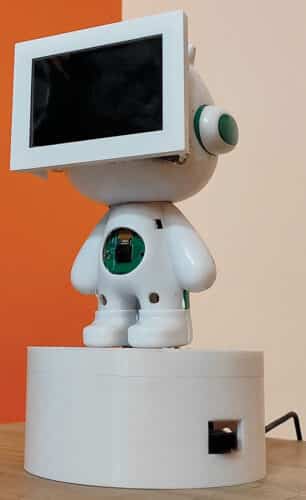
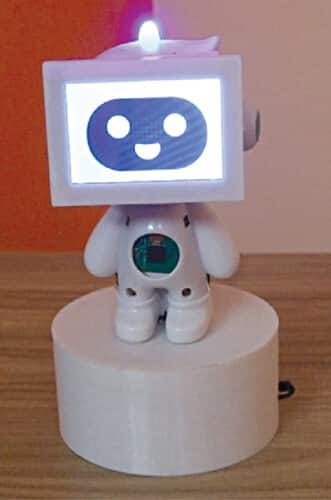
After doing the basic setup in Raspberry Pi, fit the components in a toy robot body. You can design your own customised robot body and 3D print it or you can buy and use a readymade robot’s body of your choice. For the prototype, an old toy robot’s body was used and the components fitted as shown in Fig. 5 through Fig. 8. The finished robot can be seen in Fig. 8.
Programming the robot
Python3 programming language may be used to program the robot. To make the coding simple and straightforward, all actions of the robot—like speech recognition, face animation, and sudoku solving—are performed using a single Python code. Thus, there are many threads in the code, which have been controlled using global flags. The values of the global flags change based on the voice commands given by the user.
The following Python libraries need to be installed in Raspberry Pi for this project using the command:
sudo pip3 install liberary_name
OpenCV: Used for image processing based tasks
Numpy: Used for working with arrays
Pytesseract: User for optical character recognition
Pygame: Used to create GUIs
Speech Recognition: Used for speech recognition
Imutils: Used to capture video
For the robot to solve sudoku puzzles, we need some sort of algorithm. Backtracking is used in this situation as it is particularly effective for such applications. The following is a straightforward backtracking strategy for solving a sudoku puzzle:
Find row, col of an unassigned cell
If there is none, return true
For digits from 1 to 9
a) If there is no conflict for digit at row, col assign digit to row, col and recursively try fill in rest of grid
b) If recursion successful, return true
c) Else, remove digit and try another
If all digits have been tried and nothing worked, return false
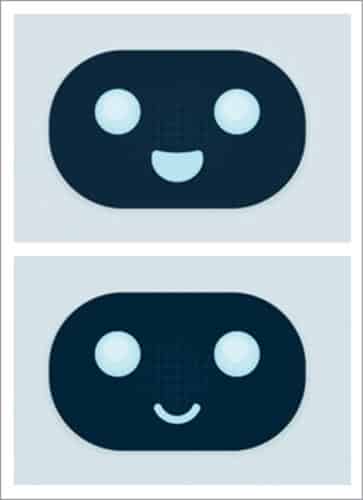
First, create the code for face expressions of the talking robot, then the code for talking and speech recognition. Next, create the code for capturing the sudoku picture and processing the image for solving the puzzle. So, the code is created for all of these and saved. The image file for the simple face animation looks as shown in Fig. 9.
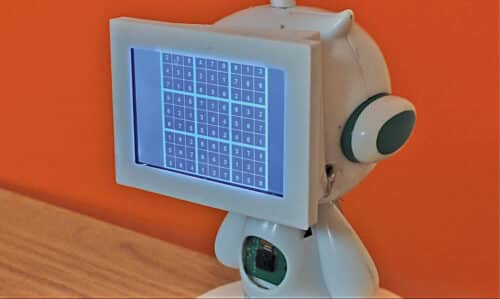
Now that the robot is ready, it may be switched on and asked to give its intro before solving the puzzle. To solve sudoku, put the puzzle in front of it and say “capture.” The robot will capture the sudoku puzzle’s image and start solving it, as shown in Fig. 10 and Fig. 11.
Though this robot can only solve sudoku puzzles for now but, due to its powerful processing unit, many other computer-vision based tasks can also be performed using it. So, in future, you may see this robot performing some more interesting and cool things.
Download source code
Arijit Das, Co-Founder of Aeonix Research and Innovations

cool & well documented