


 This small-size programmable camera can start taking pictures when motion is detected and transmit real-time videos. It can be hidden easily for espionage work due to its tiny size.
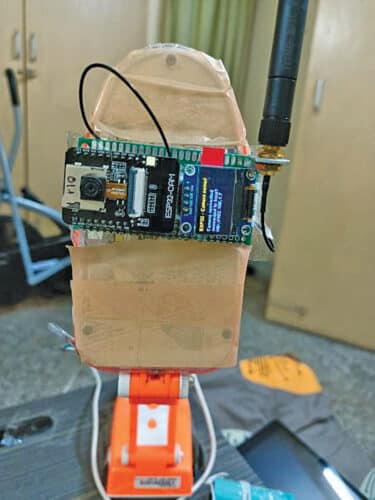
The webserver camera can be designed in two versions. The first version described here can send real-time video over Wi-Fi. The author’s prototype is shown in Fig. 1.

Next, open Board Manager, search ESP32 and install the board to Arduino IDE. After installing the latest Arduino IDE and selecting board for ESP32, if you go to “file→example→ esp32→camera→webserver” you will see the ESP32 webcam project, which is already available there.
Upload the code to ESP32 cam and search the address of ESP32 cam in the web browser. You can see the live video from ESP32 cam.
Adding OLED display
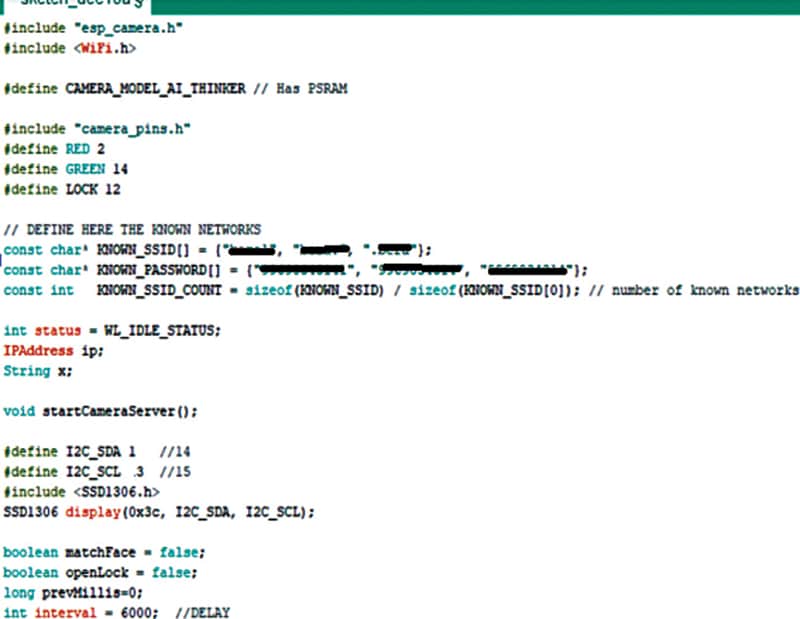
In the original code of ESP cam there was no multiplicity of Wi-Fi network choices and there was no way to know the IP address of the webcam, unless it was connected to a PC to see the serial terminal output. So, you can modify the code and add the code for the ESP32 to automatically connect to the best available Wi-Fi among all the networks in range.
To modify, you need to replace the Wi-Fi SSID network names in the list and their passwords with your own Wi-Fi network’s name and password. Then add the OLED display library in that. Next, get the IP address in the setup function and add the code line to display the IP address on the OLED display. The source code snippet is shown in Fig. 2.
| Bill of Material | ||
| Components | Quantity | Description |
| ESP32 with camera | 1 | ESP32 cam |
| OLED display (24.4mm) | 1 | SSD1306 |
| USB-to-Serial FTDI chip | 1 | USB programmer |
| Battery/5V DC adaptor | 1 | Power supply |
| LM11173.3 | 1 | Voltage regulator |
| Diode | 1 | 1N4007 |
| Capacitor C1 | 1 | 100µF, 10V |
Circuit and working

