


 What will you choose – Rs 5000 equipment or the same device built by you at a lower cost?
Be it for home automation or Industrial IoT, smart campus or smart office, a WiFi repeater/extender is highly essential for covering large areas with a robust internet network. But WiFi repeaters are expensive and consume a lot of power. Setting it up is a lengthy process, which requires considerable effort.
So today, you will learn to build a WiFi repeater that costs only Rs 150 and also has security options along with mesh for long-range connectivity. Even if a single WiFi repeater fails, others in the mesh network will automatically take over and manage the network connections.

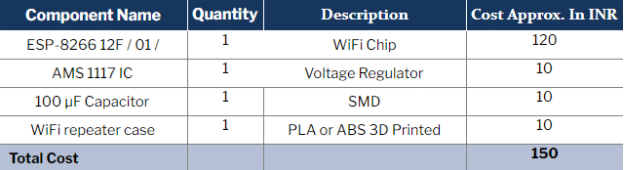
So let’s start the project by collecting the following components.
Bill Of Material
Designing
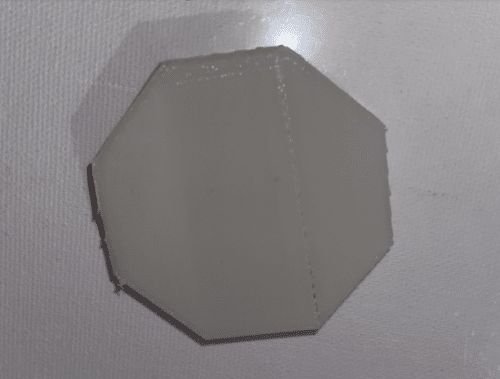
You can use any custom enclosure for the WIFi repeater. The prototype WiFi repeater is small and thin enough to easily stick on a wall. You can even add a rechargeable circuit.
Design and 3D print the enclosure as shown in the below diagram.

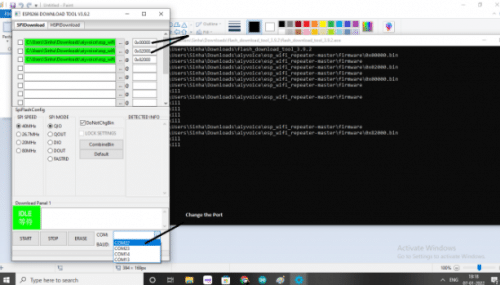
Next, upload the WiFi repeater firmware onto the ESP 8266 12F or ESP 32 chips using a tool specified by ESP for program uploading purposes. You can download it from the official link of ESP https://www.espressif.com/en/support/download/other-tools.

To download the WiFi repeater firmware for ESP, go to the firmware folder and open three files with .bin extensions in the ESP tool.
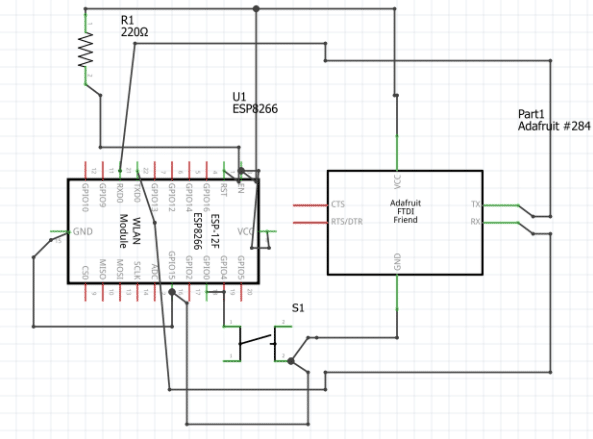
Also, set the EEPROM address from being the same as the firmware name like 0X0000, OX020000 etc, to something else that resembles the file name. Now, connect the ESP 8266 12F chip with an FTDI programmer as shown in the connection diagram. After this, connect it to the USB port of the laptop. Make sure to set the port and erase the ESP before uploading the firmware on the ESP WiFi chip.
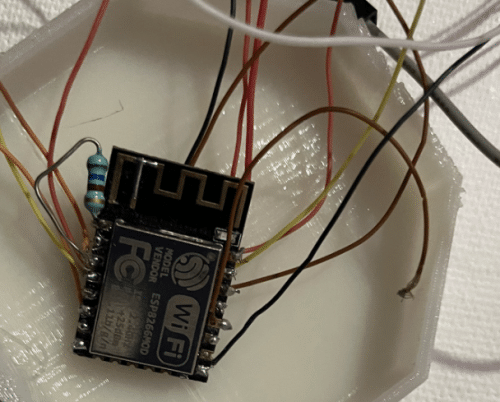
After uploading the firmware, connect a voltage regulator to provide a power supply of 3.3V to the ESP and assemble all the components.

Testing
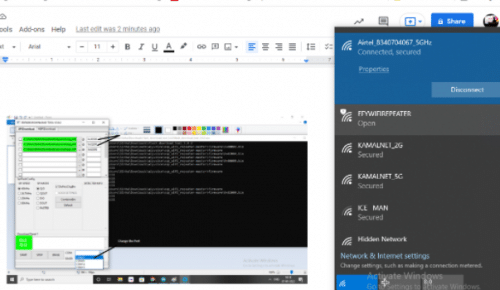
Cover the WiFi repeater enclosure and power it using any phone charger adaptor. Now open your laptop and connect to the WiFi network that appears in the WiFi setting.
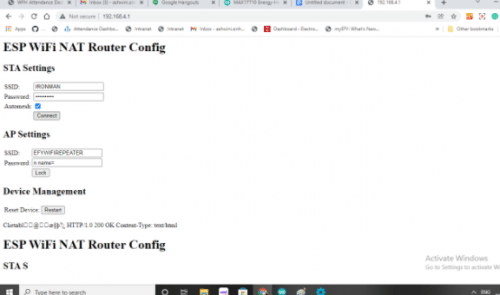
After this, open 192.168.4.1 and connect the ESP to that WiFi router for which you want the ESP to become a repeater. Upon entering the router SSID and password, you will get an option for making a mesh repeater or not. Select as per your choice. Then set the name of the WiFi repeater and if you wish, set the password as well.
Then, click the “Connect” option on the UI below the NAT and SSID password options. Now you are ready to use the WiFi repeater and extend the WiFi range. You can add many more such repeaters to convert your home into a WiFi campus or office. Now connect any device with the WiFi repeater SSID and test its speed on your phone or laptop. Here, I set the WiFi repeater name as EFYWIFIREPEATER to which I connected my laptop. You can change the repeater SSID that needs to be displayed on the WiFi network. I chose to use my WiFi repeater over the EFYWIFIREPEATER.
Congrats!! You successfully made a low-cost WiFi repeater. You can even add a battery to it and make it portable or fix the repeater on any place or wall to enjoy the network coverage.

i made it working fine thank you efy
You are most welcome.