


 One of the problems with a voice-controlled smart home automation system is the language barrier. Most of the existing home automation systems support only a few languages, including English.
In this DIY project, we are going to make an Internet of Things (IoT) home automation system that allows you to control your home devices with voice commands in your preferred language like Hindi, Bengali, Marathi, and so on.
It uses Google Assistant to control smart devices at home and also supports all the languages supported by Google Assistant. We will also make an Android app for a smart touch control system.

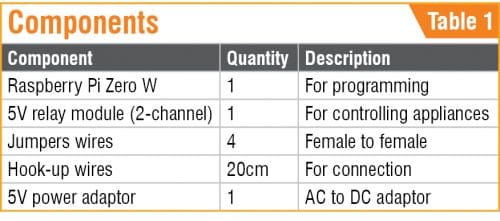
Let’s first start the voice command control project. The components required for the project are listed in Table 1.

The first thing is to set up an Apache server in Raspberry Pi. For that, open the terminal window and run the following command:
sudo apt-get install
apache2 -y
After successful installation of the server, check it by typing the IP address of your Raspberry Pi in any web browser. If the server is working fine, you will get the Apache page in the web browser.
Now, use your Apache server to process PHP files. For this, you need to have the latest version of the PHP module for Apache. To get this version, run this command:
sudo apt-get install php libapache2-mod-
php -y
Next, create a PHP file to control the GPIO of Raspberry Pi. To do so, open the terminal in Raspberry Pi and go to its HTML directory using the command, as shown in Fig. 1.
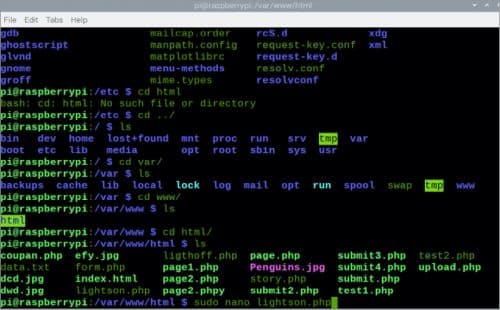
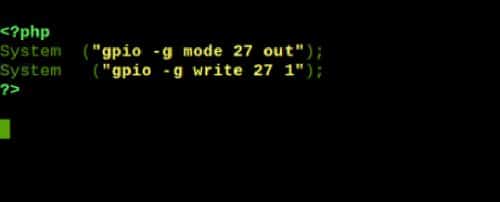
Next, create a PHP file to turn off the lights by using ‘sudo nano lightsoff.php’ command and write the following piece of code:
Then, press Ctrl+X to save and exit from the editor.
After this, create a lightson.php file as given below for turning on the light.
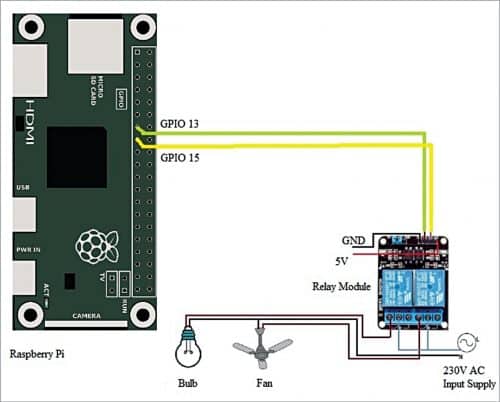
Repeat the same process for controlling other GPIO of Raspberry Pi. We have added GPIO 13 and 15 for controlling a light bulb and fan, respectively.
Setting Google Assistant
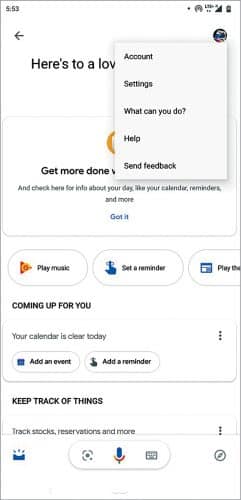
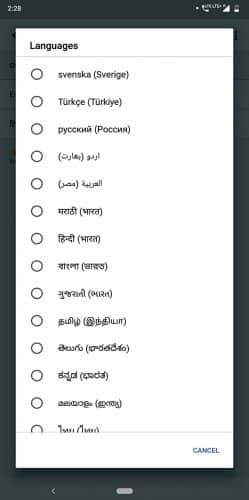
Now, configure Google Assistant for voice command in your preferred language on an Android phone. First, open the language settings of Google Assistant and select the language of your choice. Tap on Google, go to More>Settings>Google Assistant>Assistant>Languages. These steps may be slightly different depending on your device.
You can open settings on the Android phone as shown in Fig. 3. You can choose your preferred language as shown in Fig. 4.
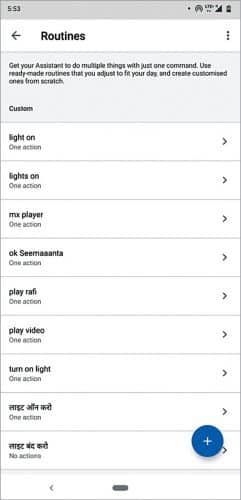
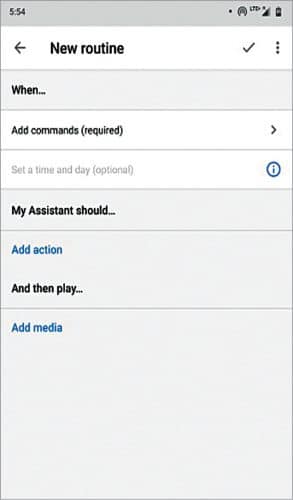
Next, select the ‘Routines’ option from Google Assistant. You will get the ‘+ Add a routine’ button from Routines (Fig. 5). Click on it and set the voice command that you want to create (Fig. 6). For example, if you want to control lights, you can set the voice commands in your preferred language to turn on the light bulb. When you give a voice command, the system will search for a Raspberry Pi IP address such as 192.168…….. or PHP file name lightsoff.php.
Now, connect the components as shown in Fig. 7 and Table 2. Enclose the circuit in a suitable box as shown in Fig. 8.


Android app development
We can also create our own app to control the light and fan. Let’s make the app using Android Studio IDE. You can download Android Studio from https://developer.android.com/studio.
Open Android Studio and create a new project with the bottom navigation bar.
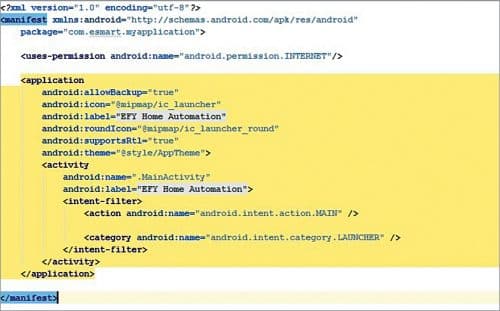
First of all, set the permission in the code (Fig. 9) to access the Internet because we are going to use Wi-Fi to control the GPIO of Raspberry Pi.
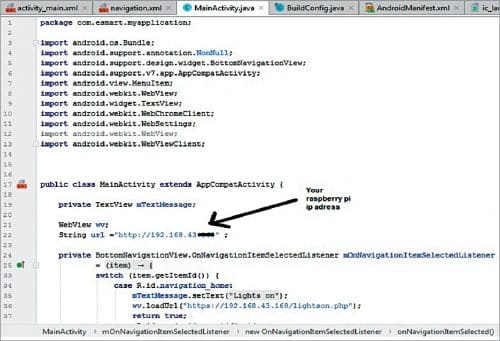
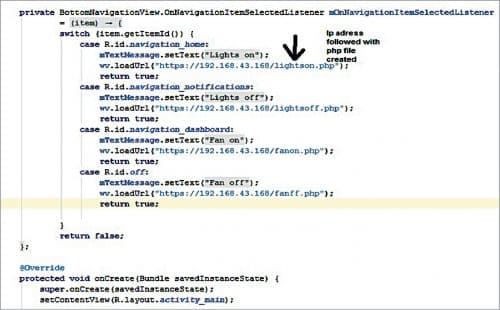
Then go to Mainactivity.java and create WebView and String variables as shown in Fig. 10. After that, set the URL for Raspberry Pi as shown in Fig. 11.
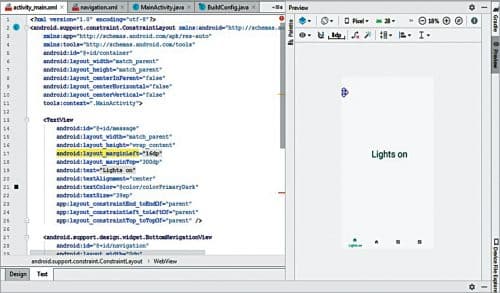
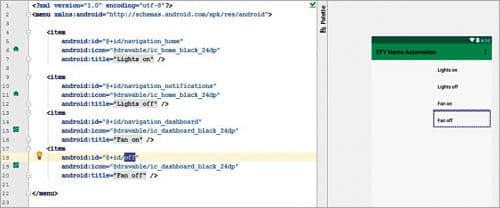
Next, create a layout of the app as shown in Fig. 12. Save the project with a suitable name, say HomeAutomation.apk. Install this .apk file on your Android phone.
Testing
Power the Raspberry Pi with 5V DC. Then connect Raspberry Pi and your phone to your Wi-Fi network, or a phone’s hotspot. Then say ‘Hey Google’ followed by the voice command that you have set in your preferred language. For example, say ‘Hey Google light on kar do.’ The system will turn on the light.
You can also control the light and fan with the Home Automation app you have just created. Open the app and press the icon in the navigation to turn the light on or off. Similarly, you can control the fan as well from the app.
Download Source Code: click here
Ashwini Kumar Sinha is an electronics hobbyist and tech journalist at EFYi
