


This is the second part of the project and here we are going to design Lidar-based Lane Detection System using Raspberry Pi.
In the previous part, we designed the LIDAR-based surrounding mapping and Anti-collision system for our ADAS system. Now we will carry forward the design for the detection of cars and road lanes for the ADAS system.
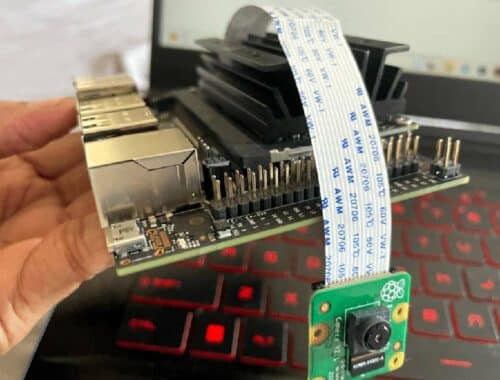
In the previous design, we used the Raspberry Pi. However, for the latest version, you have the option to switch to an Automotive grade Single Board Computer (SBC) or Nvidia Jetson. If you’re building it for learning purposes, you can still use the Raspberry Pi. Along with the components needed for the previous project, you will also need to gather a few more components listed in the bill of materials.

Bill of Materials
| Components | Quantity | Description | Price Approx INR |
| Nvidia Jetson/Raspberry | 1 | 4GB Ram | 10,000 |
| Webcam/Raspberry Pi cam | 1 | For night vision /5 to 10 MP | 1000 |
| SD card | 1 | 32/64 GB | 1000 |
| HDMI 7 INCH Display | 1 | HDMI Display | 3000 |
| Total | 15,000 |
NOTE:- You can also use a Raspberry Pi with 2GB or 4GB of ram. I am using here the NVIDIA Jetson just for the Automotive grade requirements.
Live DIY Video Tutorial In English:
Live DIY Video Tutorial In Tamil:
Connection
For the vehicle get the 5V 4 amps power output from the vehicle. If masking for testing only, then you can power the NVIDIA JETSON with 5V 2A USB cables.

Now we need to connect the camera to NVIDIA JETSON. Here you can either use a ribbon cable-based CSI camera or any USB camera.
Next, connect the Nvidia jetson with the HDMI display and power that display with USB power. And for lidar connection, you can refer to the previous article on this series of ADAS designs.
Lane Detection System – Code
I assumed you have already prepared the NVIDIA Jetson with OS and Python environment; if not, then do that using the instruction at the following link.
Now first we need to install OpenCV for processing the image needed in our ADAS system. using the linex terminal and then we install the number processing the numbers
Now after installing the modules, we are ready to code.
sudo pip3 install opencv
sudo pip3 install numpy
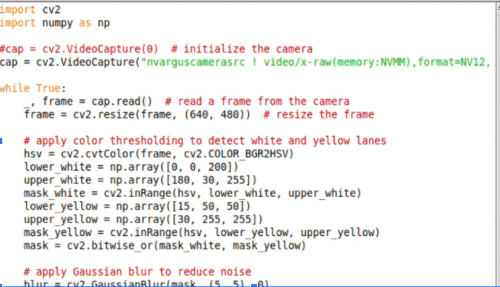
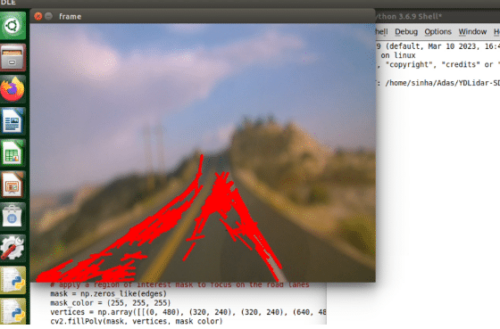
First, we import the numpy and OpenCV, then we set the camera for making the video frame using OpenCV, then we create the loop function for processing the video frames and then detect the edges, land pedestrians, and cars.
Now we display the processed frame in a loop on the HDMI display we have connected to.
Combining the Anti-collision System and Lane Detection System for ADAS
As we already have made the code to use lidar to map surroundings and view the map in real-time and alert the driver when any obstacle comes very closer to the car to avoid accidents.
So now combining both codes with running at the same time shows the LIDAR map and Lane detection video on HDMI display attached to the car dashboard.
import subprocess
subprocess.run(python3 script1.py & python3 script2, sell = True)
To do that, we use the Python subprocess and create another code that runs both Python scripts simultaneously.
Lane Detection System Testing
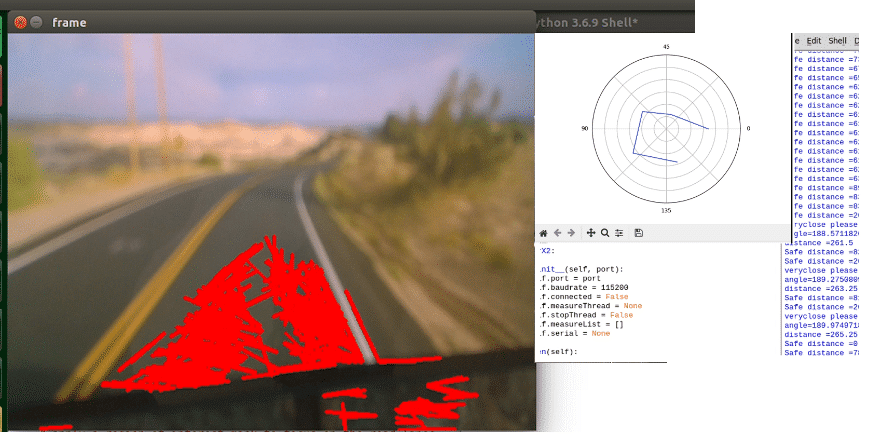
Now after connecting the LIDAR, CAMERA, and Powering the Nvidia Jetson, we run the ADAS Python script, and now we can see the output on the HDMI screen.
You can build this electronics project for your college or for your personal use. You can also check other interesting DIY electronics projects.
