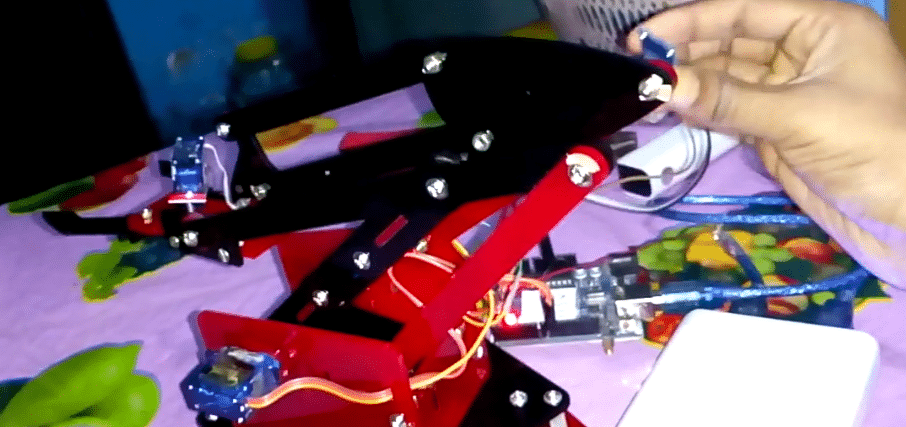
 A lot of work nowadays such as welding, screwing and painting is performed by robotic arms. However, certain jobs require high-precision for which a human hand is needed along with the autonomous robot. Therefore I have developed an HMI type of robotic arm, using which robots can follow and copy the movements of human action. This enables control of several robotic arms by a single human at a large scale.
Bill of Materials
To start the project, collect the following components:

Construction
Screw and assemble the robot arm kit by fitting the servo motor to the base. Next, connect the servo with the two robotic arm joints for up and down motion in the forward direction.

Coding
Install the following libraries and include them in the code:
- Servo
- Arduino MPU6050
These respectively allow the servo motors to be controlled and capture data from the MPU6050 sensor attached to a human’s hand for obtaining the desired motion.
While the Arduino IDE comes preinstalled with the Servo library, the Arduino MPU6050 needs to be installed manually. To do so, go to Sketch → Library Manager → enter Arduino Mpu6050 in the search option → Install
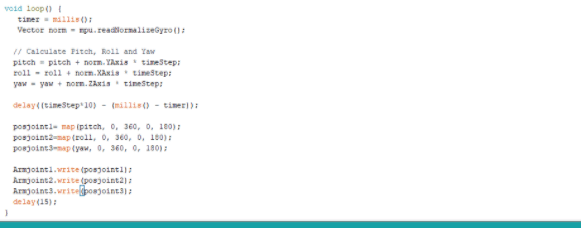
After including the libraries in the code, create a few variables to store the data obtained from the MPU6050 sensor and the servo motor.
Next, create a setup function for initialising I2C communication with the sensor. Also set the pins for the servo motors.
Then create a loop function to map the sensor movement values with the servo angle movement range. After that, drive each joint of servo to the exact same position of the mapped value for servo angle.


Connection
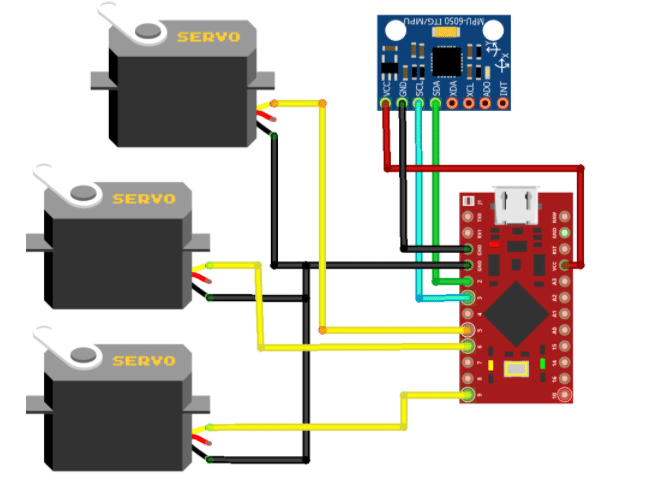
Connect the components as shown in the circuit diagram given below and power the servos with an external 5V battery. Also connect the servo signal pin and the MPU sensor to Arduino.

Testing
After connecting and powering the servos with a 5V battery, place the MPU sensor in your palm and move it to simultaneously move the robotic arm. For the robotic arm to move upwards, move your palm up. Similarly, repeat the procedure for downward motion.
With such a kind of human machine interface, robots can perform intricate tasks.


Sir please give the robotic arm link.
You can buy it from kits and spares
https://www.kitsnspares.com/
What kind of DIY kit is it?
you can buy any servo motor DIY kit