


 This project is a IoT based data logger system that displays temperature and humidity on ThingSpeak.com using WeMos D1 R2 board. You can add more data to the project—up to eight data per channel.
WeMos board
WeMos D1 R2 board looks and works almost like Arduino Uno, as shown in Fig. 1.
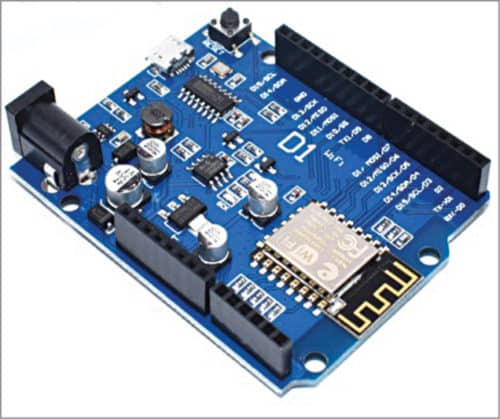
It is an ESP8266 development board programmable via Arduino IDE. The board is based on a 32-bit processor, having 160MHz clock speed and 4Mb flash memory. It is 17 times faster than Arduino Uno. WeMos works on 3.3V, while Arduino Uno works on 3.3V to 5V.
In this project, we set WeMos to operate at the lowest possible power mode when inactive. In active mode, it takes 70mA to 80mA current from a 3.7V lithium-ion cell. It draws about 14mA during sleep mode for 15 to 20 seconds between consecutive uploads. It draws 8mA for three minutes during pause periods.
ThingSpeak IoT platform
ThingSpeak.com is an open source Internet of Things (IoT) application and API to store and retrieve data from things using HTTP protocol over the Internet via LAN. ThingSpeak enables creation of sensor-logging applications, location-tracking applications and a social network of things with status updates. This means, if you can send data from your sensors to ThingSpeak at regular intervals, it will create, store and display data in a trend automatically. It also has Maths modelling inbuilt in the form of MATLAB documentation, which you can use for free.
Getting started with ThingSpeak
Create account and set up channel. The first thing you need to do is to open an account and a channel on ThingSpeak.com. For that, you need an email account. ThingSpeak.com will send a confirmation email to your email address. Click on the link in the email to validate your account, and the account will be opened. Now, you can create as many channels as you want.
Once you create a channel, you will get three ThingSpeak identities: channel ID, write API key and read API key. Note these down as you will require these later. Meanwhile, assign a name to each data field in the channels, such as temperature, humidity and voltage.
Channel ID in this example is 279012, as shown in Fig. 2.
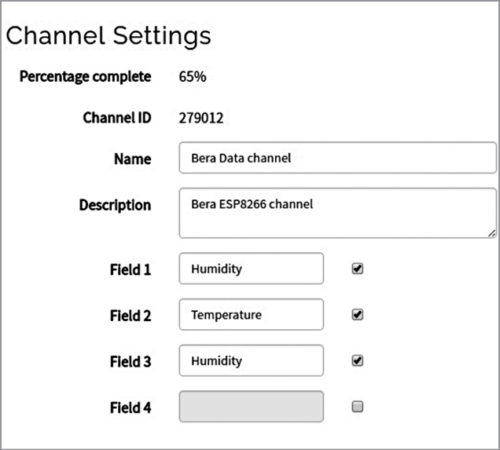
This channel ID will be different in your case.
Eight data per channel
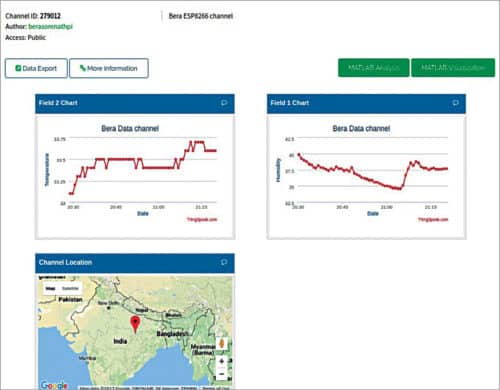
Each channel can take eight data fields from different devices. That means, using ThingSpeak API you can upload eight data per channel, which will eventually be gathered, logged and put into a trend data by ThingSpeak, as shown in Fig. 3.
Installation of ESP8266 board
First, install Arduino 1.6.4, or latest version, from Arduino website. Start Arduino and install ESP8266 support file from Arduino IDE’s board manager.
Next, open Preferences and enter the following URL under Additional Board Manager URLs (Fig. 4): http://arduino.esp8266.com/package_esp8266com_index.json
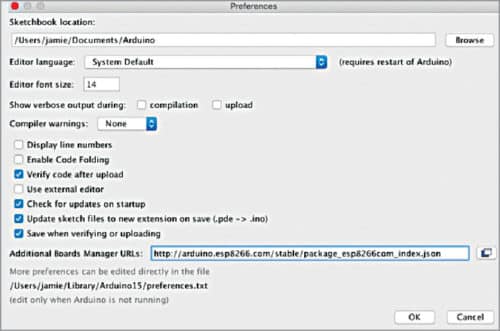
You can add multiple URLs, separating these with commas.
Open Boards Manager from Tools>Board menu and install esp8266 platform. Do not forget to select your ESP8266 board from Tools>Board menu after installation. The board used here is WeMos D1 R2. Go to Tools>Boards and find WeMos D1 R2 board from the drop-down list.
Circuit diagram
The circuit diagram of the IoT-based data logger is shown in Fig. 5.
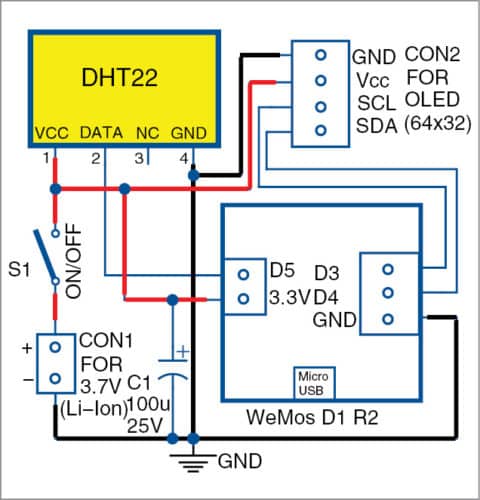
It consists of DHT22 sensor, WeMos D1 R1 board, OLED display and 3.7V lithium-ion cell (CON1). A simple DHT22 sensor is used here to upload temperature and humidity data to ThingSpeak.com channel. Six more data fields can be added, for which you will need to add six more sensors to the circuit.
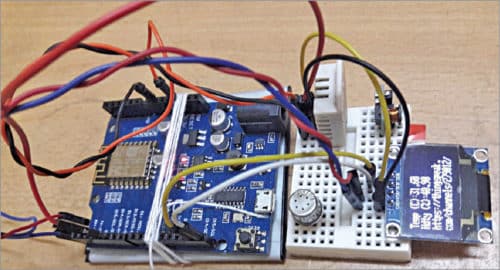
For viewing these data, an optional OLED display (64×32) can be attached to the project at connector CON2. If you want to run on battery, remove the OLED for longer operation, as it consumes about 40mA current. The author’s prototype is shown in Fig. 6. (OLED display section was not tested at EFY Lab.)
Software
The source code/sketch (IoT_datalogger.ino) is used for transferring the data to ThingSpeak.com channel. The code is broadly divided into different parts. The first part includes relevant headers to create instances of Wi-Fi, DHT and ThingSpeak.com
Next, the program captures temperature and humidity data, and after a delay of 15 seconds each transfers the data to ThingSpeak.com. Fifteen seconds is the minimum gap required by ThingSpeak.com for filling in successive channels.
Once WeMoS board is installed in Arduino IDE, compile the sketch and upload it to WeMos board. If the circuit connections and channel setup on ThingSpeak are correct, you will see the data as shown in Fig. 3.
If you declare a channel public, it will have a URL. Anyone can click that URL to view the channel; else, you have to log on to that channel to see the output.
Download the source folder here: click here
Somnath Bera is an avid user of open source software. Professionally, he is a thermal power expert and works as additional general manager at NTPC Ltd.
