


Nowadays, everyone’s main concern is the safety of pets and kids when we are not around them. This concern keeps us constantly worried when we travel for holidays, go to work or visit shops. We wish to monitor our home and get updates about the kids and pets whenever we want without bothering them.
One of the solutions is smart AI cameras, but these AI cameras do not give us real-time pictures of kids while we are in another country, and if they had this function, it would be very expensive due to server costs. To overcome this hurdle, we can design a smart camera that can chat with us, and we can get a real-time picture of our home, kids, pets, garden, and garage wherever we want without any cost.
This camera can chat with us, reply to our messages, give us updates, and configure our home on our telegram. We receive all these services for free, and the hardware costs only Rs. 330/-. Now we will design a smart camera with a collection of the following components:

Bill of Materials:
| Components | Quantity | Description | Price Approx INR |
| ESP32 CAM | 1 | WiFi Cam Dev Board | 350 |
| FTDI Programmer | 1 | FTDI module | 150 |
| 3.3V Power Adapter | 1 | DC Power source | 100 |
| Wires | 4 | Thin wires | 50 |
| Total | 600 |
Preparing Chat Bot
Initially, we have to create an AI BOT to make our AI camera chat with us, respond to us, and review our messages. This AI BOT receives the message, processes that message, and responds to us instead of a human being.
Also Check: AI BoT using ML
For this, we can create BOT in any messaging app like WhatsApp, Telegram, or any other messaging app. For now, we are preparing a Telegram chatbot as it’s open source, simple, easy, and free to use. First, we need to go to Botfather in Telegram and then we need to create a new chatbot. You will be able to see the instructions on the Telegram website to create a new bot and get the API token.
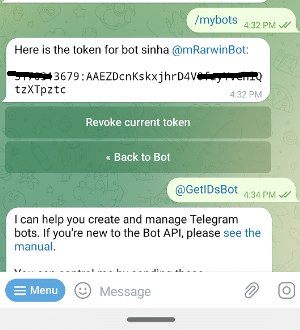
Now, after creating the new bot, get the API token. This API token helps us with getting the message, reviving the message, and responding using the BOT using our Telegram channel. After receiving the API token, save the API token as we need it in the next part of coding. Next, start the BOT by searching for the BOT name you have just created.
My bot’s name is Darwin. Hence, I will search for Darwin and then start my bot with the command /start. (Refer to 3 and 4).
Chat Bot Coding
Now, open the Arduino IDE and then go to the board’s manager and install the ESP32 board. If you have already installed and prepared the Arduino IDE for programming the ESP32, then you can skip this step.
Otherwise, follow the steps on the ESP official website on how to set up the Arduino IDE for ESP32. Next, after the installation of the ESP32 board, open the library manager and then search for the ASSYN Telegram library.
We need to install this library to get and connect the ESP32 cam board with Telegram. After installing this library, we are ready to code.
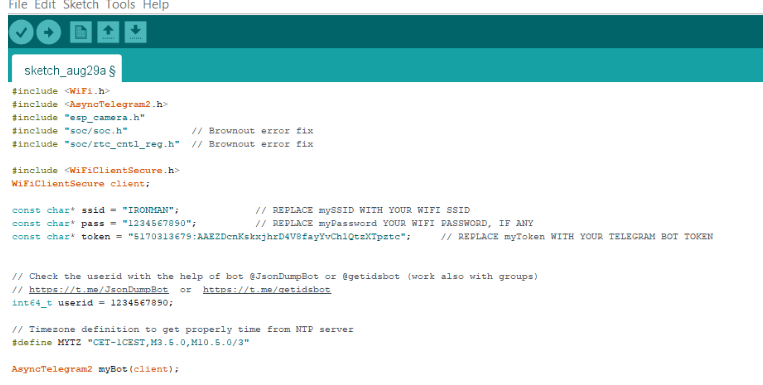
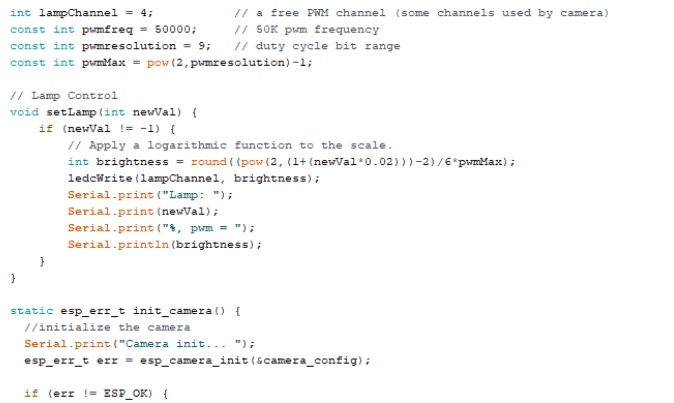
Now in code, first we need to initialize the Async Telegram library, then we need to set the SSID and password of the WiFi network of the home or place where we want to set up our smart cam. Next, we set the BOT API token of the Telegram chatbot that we prepared earlier in the code.
Now, we set up the ESP board type and pin definitions for camera configurations. After that, we will create the setup function. Here, we start the serial communication with a baud rate of 115200 for serial debugging and checking the code. Now, we will set the inbuilt LED flashlight brightness for the camera.
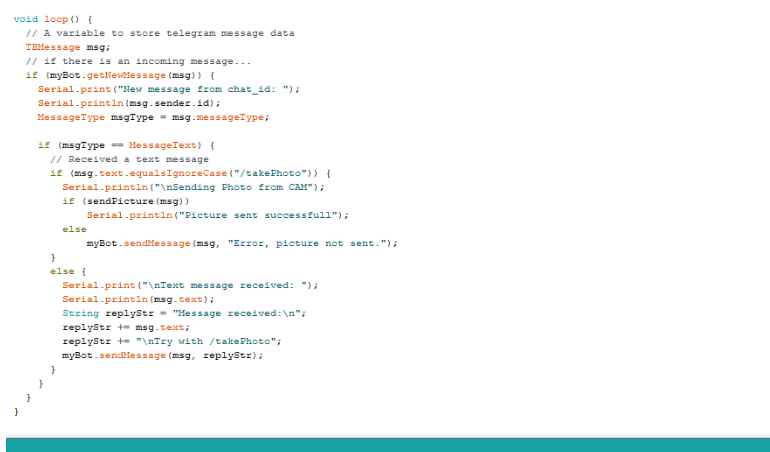
Next, we will create a loop function where we will check the incoming message of the bot and then process the message. If the message is received, take a picture, then we ask ESP 32 Cam to take a picture and send it back to the sender using the chatbot that we have created as a reply.
We can also add different functions to our chatbot camera, like checking the room temperature, checking the fan/light status, or turning those on and off, and we can do all these things using the AI bot that we have created.
Chat BoT Connection
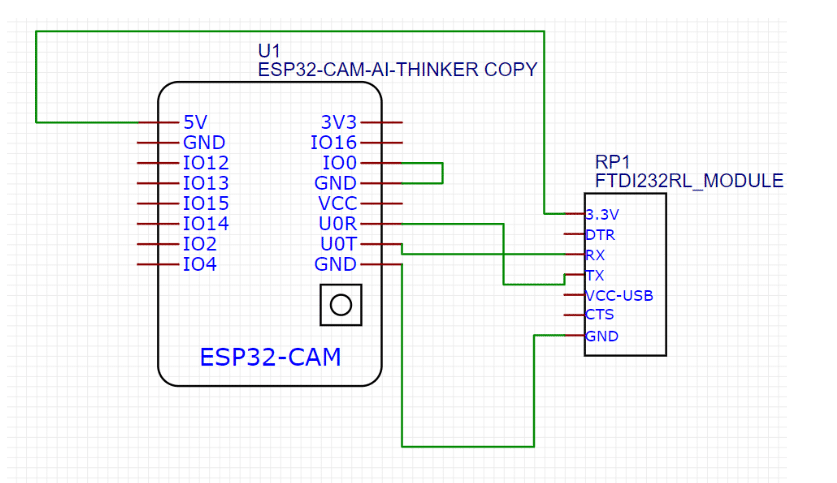
Now, connect the ESP32 camera. According to the following circuit diagram, connect the FTDI to the PC and select the right port and bar in the Arduino IDE and upload the code.
For programming the ESP32 cam, we have put the ESP32 cam in programming mode by connecting GPI 0 to GND, as you can see in the connection diagram. After uploading the code, we need to connect the GND and GPIO pins and power the ESP, 5V pin with 5V VCC, and GND pin with GND of the power adapter.
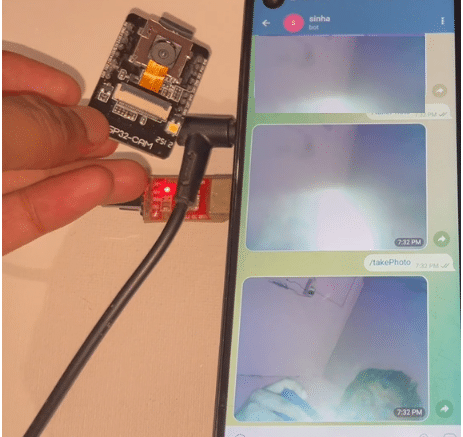
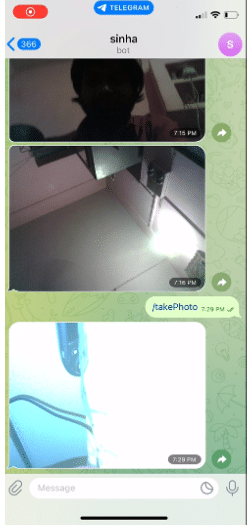
Testing
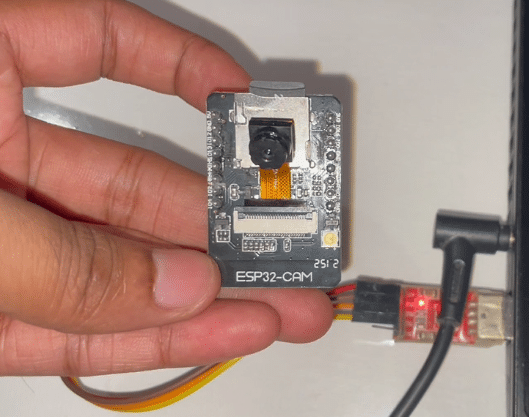
Now, power the ESP32 Camera BOT and wait till it connects to the network, and then send a message to take a picture to the telegram BOT. The telegram bot replies to you with a message and takes a real-time pic and sends it to you on telegram.
Hence, you successfully designed your AI camera that can chat with you.