


 “AI BoT that works as an assistant for employees, AI that works instead of you when you are busy”
With the rapid advancement of technology and AI, concerns have arisen regarding the potential replacement of humans by AI in various industries. Tasks such as data analysis, coding, and others are now being performed by AI systems, raising the question of whether AI can truly replace humans and serve as employees within companies.
In light of these considerations, our aim today is to develop an AI system that can assist us in our tasks and automate our operating systems. We are currently in the process of exploring the feasibility of a future where AI can take over tasks and work on our behalf. To initiate our project, we will begin by assembling the following components.

Bill of Materials
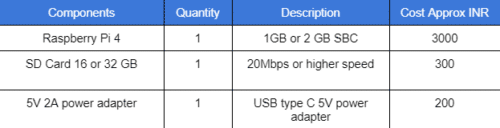
Raspberry Pi based AI BoT
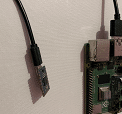
First, we need to set up the raspberry pi with the latest Raspbian OS after that we enable the VN and get the raspberry pi desktop on the PC. If you have an HDMI monitor, then you do not need to do this.
Next, we need to install the Python modules and library that help us in automating the OS, and the task we set to this.
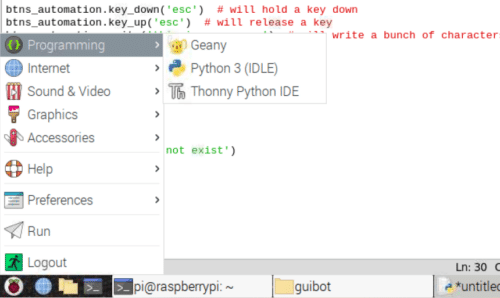
We also need to install the latest Python and its IDE as you installed the latest OS on Raspberry Pi; so it comes pre-installed, if it is not pre-installed, then install the Python and its IDE first.
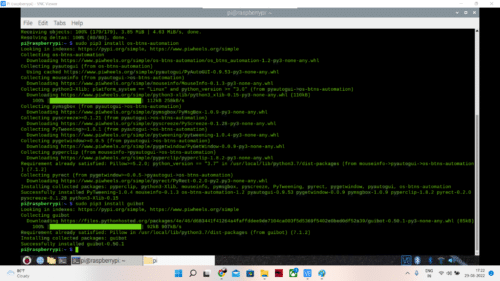
Next, open the terminal and install the Python modules and library using the following commands.
sudo pip3 install dlib
sudo pip3 install opencv
sudo pipe install guibot
sudo pip3 install os-buttons-automations
sudo pip3 gui-automations
Preparing AI Bot
For automaking the various task and the work you want your AI bot to automate, you need to make the custom code.
Here is the simple process of how to make the AI bot and automate my own task. So here my task is to download a certain source code, then write the code in Thony IDE and test that code; after that upload the code to my microcontroller.
Here I made an AI bot that automates this task and does this work instead of me. You follow a similar process as an example and make your own AI bot that does work instead of you.
You can make your bot to do monitor the EMAILS reply to the emails schedule the emails to send, fix appointments with clients, or proe[prate and upload the various code to chip or test your various code find the errors, and give the list to you there are various task that you can program your bot to do and work in place of you.
Here we make the bot that downloads the code, then uploads and runs that code and tests the code, and uploads the code in my microcontroller.
Suppose you work as a firmware engineer and need to test firmware and then need to upload the firmware to over 100 to 1000 microcontrollers or chips. In this case, your bot does this task instead of you. Your bot opens the IDE, tests the firmware, and uploads the firmware to 100s of a microcontroller connected to the system one by one so the bot does the task instead of an employee.
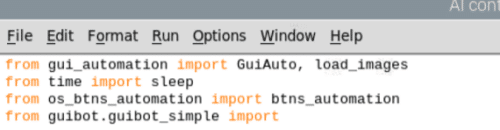
So here for BOT coding, first we need to import all the modules we installed earlier
We now require visual representations of the steps involved in performing the task. This will enable our AI bot to utilize image processing techniques to learn, identify, and recognize the specific actions and locations necessary to accomplish the task. In this particular scenario, our task entails downloading a code, writing it in THoney IDE, running and testing the code, and subsequently uploading it to a microcontroller.
To achieve this, we need to capture images of various icons and elements. First, we will capture the icon for the web browser, followed by the search icon and the URL required for code download. Additionally, we will capture icons for the THoney IDE, the run code function, and the upload feature, and save all these images in the same folder where the code is stored.
So after importing the library, we create the code that will find the browser icon on GUI then after finding the browser icon on GUI, our code makes us click on that icon to open the browser then our code searches for the download link of the code.
Next, we create the code that searches for the start menu icon to open the start menu, then code once finds this icon, looks for programming and the icon and after finding that on GUI it opens that HONEY IDE and creates the code for the microcontroller to upload.

Now our code search for a run and upload icon to upload the code to the microcontroller
Testing
Now our bot is ready whenever you run the code, it performs the code; making, testing, and uploading parts automatically without your need and it can upload the code as many microcontrollers as you want to upload. So your AI bot works instead of you and uploads the code to microcontrollers without you and does your task.