


Maixduino [AI] Powerd automatic doorman
For entering & exiting control room there are two glass swing doors – one outer door and one inner door. When somebody approaches the door either from inside or from outside, both the door opens one after another and allows the visitor to enter or exit. The entrapped air in between the doors used as insulation medium for AC inside.
The sensor which is nothing but an IR proximity sensor works perfectly OK. However, if someone just passes by the door without even bothering or looking at the door, the door opens to the utter disturbance of the insiders. Because the outside of the control room, houses the mighty steam turbines and a huge noise pours in unjustifiably.
Even a passer by on a huge corridor whose destination is different & does not want to enter through this door will cause opening of these doors. The solution of the proximity sensor itself is the very cause of this unwanted problem.

The automatic proximity sensors used everywhere behaves like the above ones.
A better solution – The Maixduino [AI] powered automatic doorman- modified
The same door opens only when a man approaches the glass door & faces towards the door. The Maixduino powered by a camera and AI determines whether it’s a human being or not. if it senses, its a person then it waits till it reaches within 250 centimeter. Once it reaches within 250 cm, the door opens otherwise not.
If the man just passes by the door without looking at it, the doors will not open at all.
Unless someone moves towards the door and reaches within 250 cm the door will never open !
Two GPIOs powered relays are used to fire the gate opening mechanisms. The gate opening can be further be tailor made as per the field requirements.
BOM
- Maixduino MCU with Camera & LCD screen – INR 4149
- Relay 05 Volt – 02 nos – INR 150
- BC545 Transistor – 02 nos – INR 20
- Power supply 5V, 3Amp – INR 300
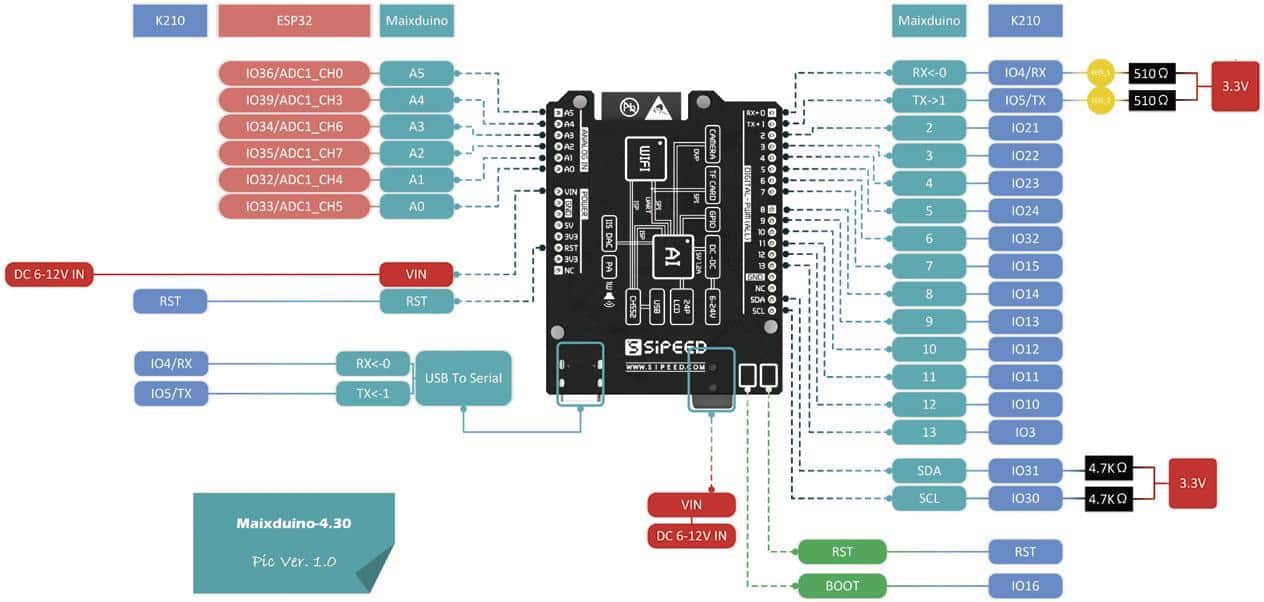
Pinup diagram of Maixduino
Project detail
Maixpy facedetect classifier is available in *.kfpkg name. [* is the name of the model] These are highly efficient fast acting YOLO [You Only Look Once Version2] classifier model. Each scene is passed through the model & the output is checked against defined classifiers. Since YOLO v2 is very fast, it immediately identifies the human face in the scene and draws a box around the face. The width & height of the encompassing box is compared linearly against the various distances from the camera and a linear model [y = mx +c ] is assessed. Thence from width of the object box the distance is defined.
| Distance in Centimeter | Image box width in Pixel |
| 50 | 81 |
| 85 | 67 |
| 100 | 47 |
| 120 | 30 |
| 250 | 24 |
| 300 | 19 |
| [Between 100 to 300 ; Distance = -7.142 * width + 435.71] | |
Once the distance is within 250 cm the GPIO fires and the gate opens or closes.
The classification model used is facedetect.kpfg. In Maixpy inside the micropython program, the *.kpfg model is loaded by calling the register number inside the kpu library – kpu stands for knowledge processing unit : task = kpu.load(0x300000)
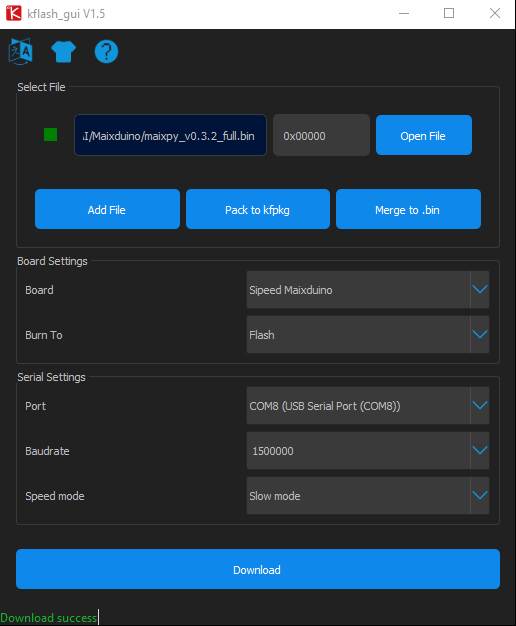
Kflash_gui is the GUI utility through which you can upload binary files to Maixpy. Below is the gui when it loads up.
Uploading
First connect the Maixpy device with the USB port of your laptop. Load kflash_gui and then connect the device by selecting the right serial port with which the Maixpy device gets connected. If the micro python is not already installed then it is time to install it first. Select the file maixpy_v0.6.2_75_g973361c0d.bin file and press the ‘Download’ button of kflash_gui. In a few seconds the micropython version 0.6.2 will be installed on the device.
Next select the facedetect.kpfg file and press the download button again. This will install the facedetect.kpfg model onto the device. The registered number 0x300000 can be changed by entering the changed value into “flash-list.json” file of the facedetect.kpfg model. There are latest versions of micropython is available for Maixpy but with bigger [bin] file size, the classifier model does not get loaded properly. Which you may have to check on your own.
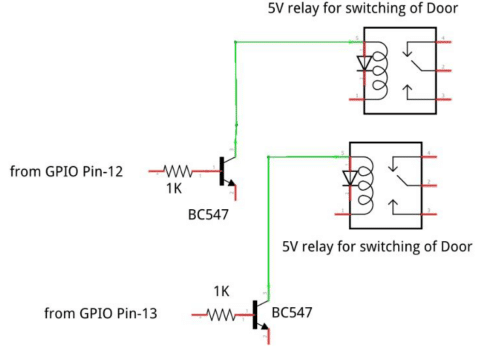
Two GPIO pins [GPIO pin no 13 & 12] are used to trigger the gate mechanism. They can be latched to a 5V relay using a BC547 switching transistor whose base will be connected to GPIO pin like this. The emitters are connected to ground. The other end of the relays are connected to +5 volt. However, this whole setup along with resistor, switching transistor, diode and relay is available in one package where one has just to provide voltage and GPIO input.
Uploading of project: Maixpyide is required to be installed in the computer. After installing it, connect the device by pressing the connect button on left bottom screen [chain symbol]. Go to file and open the python program
 [doorman_mod1.py] in the ide window. Press the play button [bottom left screen] – complete guide to maixpyide is available here
To transfer the program to the Maixpyide at boot level so that every time the Maixpy is powered on, this program will auto play…Go to ‘tools’ , select ‘transfer file to board’ – This command will transfer the file to the Maixpy and rename it as boot.py. This will make the program to autoplay every time the Maixpy is powered on.
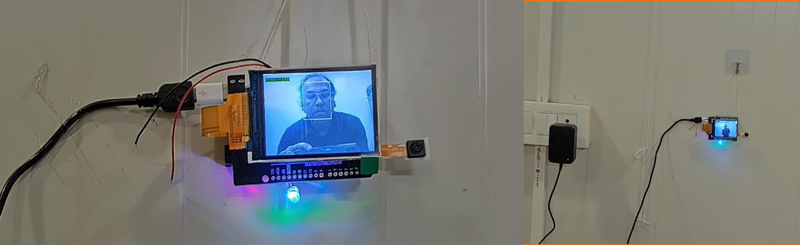
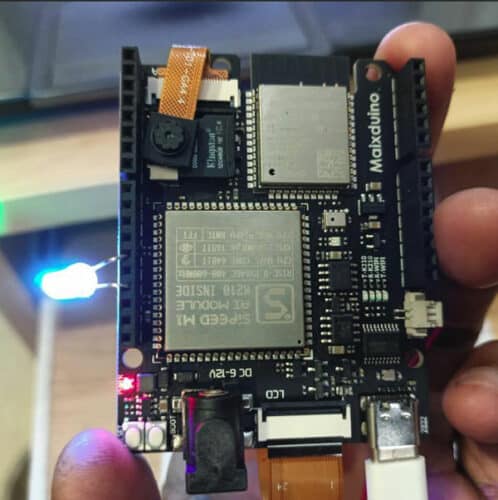
Prototype
Aftermath
AI powered face detection is nothing new today. Using a powerful computer and camera this can be done easily. However, getting it done on a standalone 5V powered Maixpy microcontroller with above idea, shows that AI is not getting limited to only powerful computers, even it is spreading at Microcomputer levels as well!
At the time of writing this project, this AI powered automatic doorman is being installed in one of our control room doors.