


At times, during multitasking, you would have wished to have more than two hands attached to your body, which you could control using your mind—just like you control your natural hands. However, considering it unrealistic and only belonging to sci-fi movies, you would have immediately dismissed the idea.
What if I tell you that it can actually be done? With the help of brain waves, you can now control any prosthetic or robotic hand. Imagine operating several of such artificial body parts with your thoughts. Isn’t it amazing?
By adding pneumatic actuators, you can even provide extra power to lift heavy loads without pushing any buttons. All you need is brainpower. Thanks to AI, the possibilities do not end here. You can apply your brainpower in various other ways and explore further.

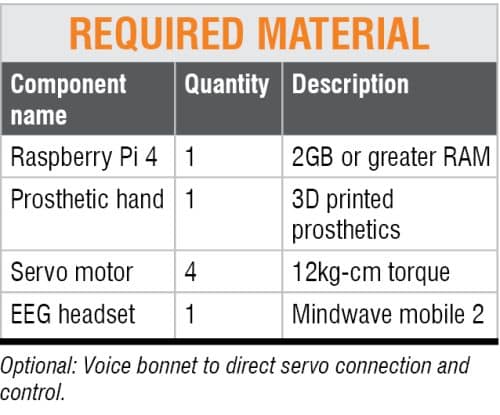
All this sounds so cool! You would be eager to know more. So, without further ado, let us begin the awesome journey of building this project by collecting the following materials.
Full Video Explanation:
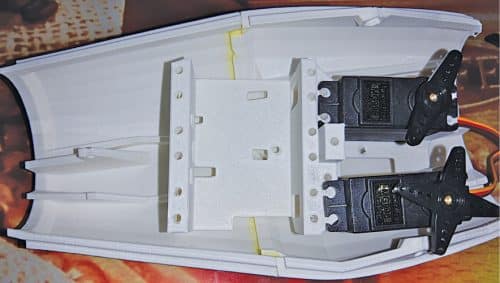
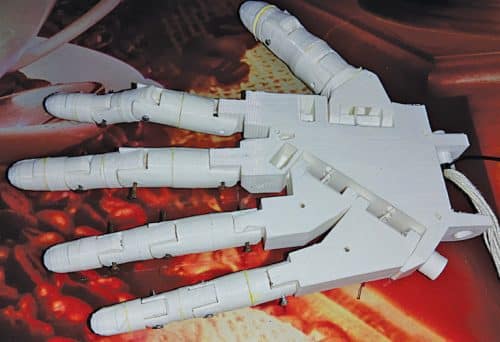
Assembly of prosthetic hand
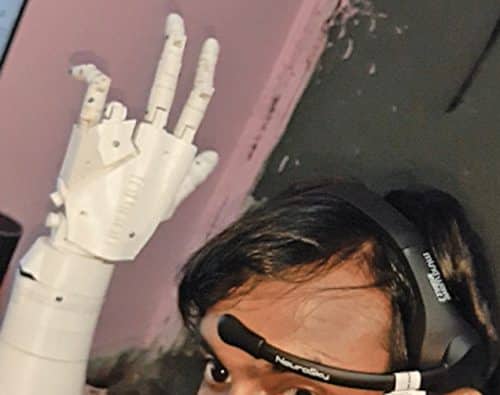
There are various open source prosthetic body parts available in the market. If you do not want to purchase them, you can 3D print them at home. I used a robotic arm made by InMoov. The complete prosthetic/robotic hand after assembling the required parts, including servo motors and fingers, looks as shown in Fig. 1.


Prerequisite
To read the mind waves, an EEG sensor needs to be connected with the Raspberry Pi. To further process those signals, a Python module is required. So, install NeuroPy library to connect with the EEG sensor and get the measured value. Since the obtained data also has to be streamed over Bluetooth, you would need pyserial library for connecting the EEG data over the Bluetooth serial port.
To move the servo motors, gpiozero library needs to be installed to control the GPIO pins. To install this and above-mentioned Python modules, open the Linux terminal and run following commands:
sudo pip3 install NeuroPy
sudo pip3 install pyserial
sudo pip3 instal gpiozero
Coding Mind Controlled Prosthetic Arm
For coding, first import the NeuroPy, pyserial, gpiozero, and other libraries into the code. Then define the servo min-max and PWM range values along with the GPIO pin number of the Raspberry Pi to control them.
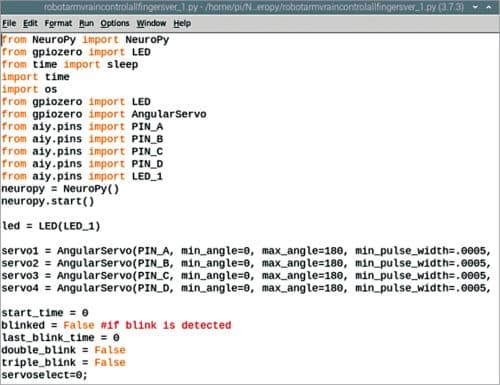
Create variables for storing the servo motor values, which will accordingly control the fingers or joints of the robotic arm using brain waves. Start NeuroPy communication so that your EEG sensor, NeuroSky, connects to Bluetooth and establishes communication with the serial port for data streaming.
In next part of the code, create a while loop to obtain the concentration level on a particular thought that is based on data from brain waves such as Alpha, Beta, Theta, and Delta. Then, create several if conditions for selecting the appropriate servo motor that is attached to various joints on the prosthetic/robotic arm.
For example, to move the little finger of the prosthetic/robotic hand with brain signals, concentrate on the servo motor attached to it. When the preset threshold value that is present in the code gets met, the servo motor will move and consequently move the little finger. Likewise, the same can be tried with rest of the fingers and the wrist.


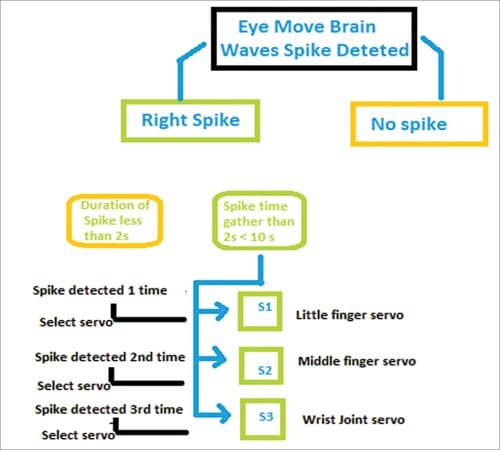
Algorithm for selecting finger movement using brain waves
The selection of correct joint movement in a prosthetic or robotic hand using various brain waves is a bit complicated to understand. I will briefly explain below how it works.
The brain signals generally fluctuate whenever we try to close and open our eyes. These fluctuations result in a spike in the brain signals that fully and properly control the blinking of the eyes. By leveraging this spike, you can select and accordingly move the desired finger joint(s).


Suppose you want to move the little finger that is connected to its respective servo motor. To do so, blink once while concentrating your thoughts on moving that finger. To move the second finger, blink twice and concentrate.
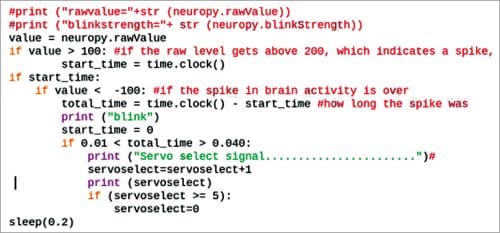
Similarly, blink according to the finger number you wish to move. To put that into practice, write a piece of code for detecting the appropriate brain wave spike corresponding to each eye movement duration.
Now connect the servo motor to the Raspberry Pi. If you too (like me) are using an AIY bonnet, use its PIN_A, PIN_B, PIN_C, and PIN_D to connect the servo motors for joints. Make sure to use the bonnet’s power pins to connect with the Raspberry Pi’s power and GND pins that will supply current to the servo motors.
However, suppose you do not have an AIY bonnet. In that case, you can make relevant changes in the code and use any of the PWM pins on the Raspberry Pi to power and control the servo motors using an external power supply ranging from 5V to 6V.
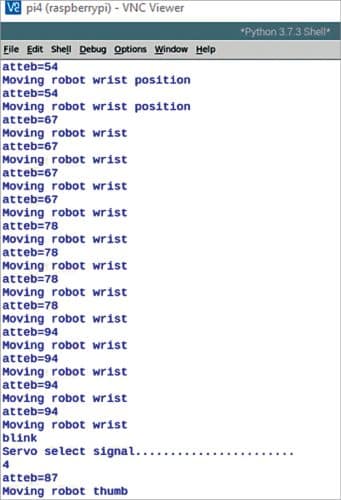
To test, connect the MindWave EEG sensor to the Raspberry Pi Bluetooth and then run the code. Now concentrate and think about moving a finger. Ensure to blink the eye as per your chosen finger order and close the eye for 5 to 10 seconds before concentrating on the next finger movement.
This article was first published online on 17 January 2022 and was published in print in EFY’s January 2022 Issue.
