


 Continuous hunting as driven a lot of animal species to extinction and the Government has brought about little change apart from introducing a few laws and conducting a few surveys. But conducting surveys is an exceptionally difficult task, especially without the help of technology. To remedy this, we are going to make a prototype Species Classification wireless camera that can help us in the monitoring and surveillance of forests. Our smart camera uses a python-based code that consists of pre-trained TensorFlow models. The pre-trained tensor models help us in matching and mapping the image in frame with the model’s trained data to detect the image in the frame.

We have used a Raspberry Pi with a camera module. The Raspberry Pi gets the video using the camera, then using the OpenCV module it cuts the video in frames. Next, using OpenCV and other modules it process the image detection of the species in the image and it tries to map it with a category and pre-trained detection model. It then shows the result of the detected species. If the detected species in the image is not available in category list then it gives the output as {none} and save that image with data and timestamp in database folder so that it can later be studied. If the detected species is available in the category list, it gives the output with name and ID of detected species and saves that data in text format with date and time in a text file named survaydb.txt and at the same time saves the image with detected named label the database folder for reference. So, in this way, our smart camera keeps track and creates a database with pictures of all species present in the forest. It can also be helpful in studying animal behaviour and can help us in studying the growth and flow of flora and fauna in the forest.
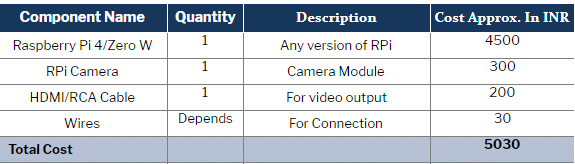
So let’s start our project by shopping for the required components.
Bill Of Materials
Coding
Assuming that you have your RPi ready with Raspbian OS and Python IDE and have access to the RPI desktop either by VNC or by HDMI based display. So we are going to start with the installation of modules and library for our project. First, open the linux terminal on your Raspberry Pi. Then install the required using the following syntax
NOTE:- We are using Python3 Environment and code is compatible with python 3 and above version only.
sudo apt-get update
sudo apt-get upgrade
sudo nano /etc/dphys-swapfile
Then change the line CONF_SWAPSIZE=100 to CONF_SWAPSIZE=1024
sudo /etc/init.d/dphys-swapfile stop
sudo /etc/init.d/dphys-swapfile start
sudo pip3 install opencv
sudo pip3 install numpy
wget https://bootstrap.pypa.io/get-pip.py
pip3 install dlib
pip3 install tensorflow
After the installation you can now proceed with the cloning of TF modules, examples, and files using the following command:
git clone https://github.com/tensorflow/tensorflow.git
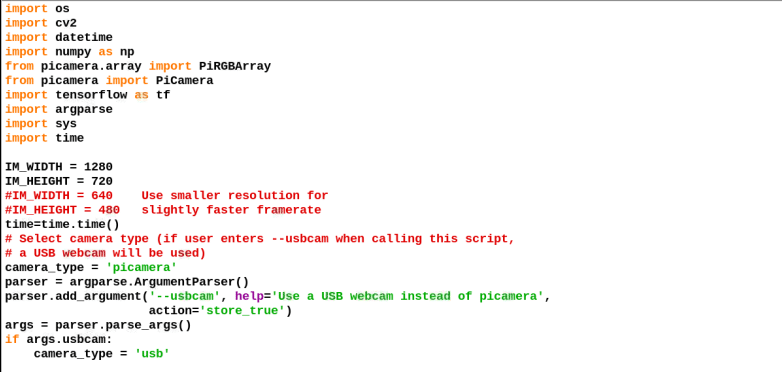
After successfully cloning, go to the directory → research folder → detect.py file in python IDE. Now let’s understand and change the code. (Refer fig 1.)
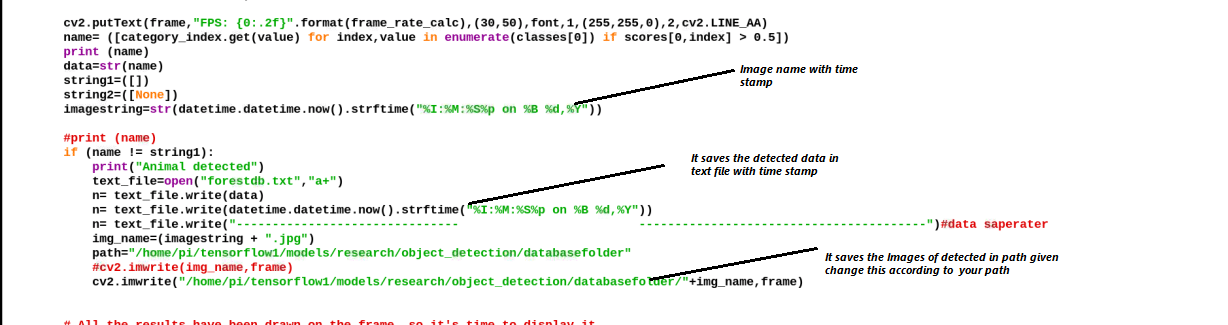
The first part of the code consists of the required library and modules. Next, we have to set the path level text file that consists of the category names of species/objects we want to make it detect. Here we have set the category level file as New.pbtx. The next part of the code is for object/species detection and then we have the code that stores the output of detection result in a string variable called “name”. Then we have the code that allots the image name with detection date and time.
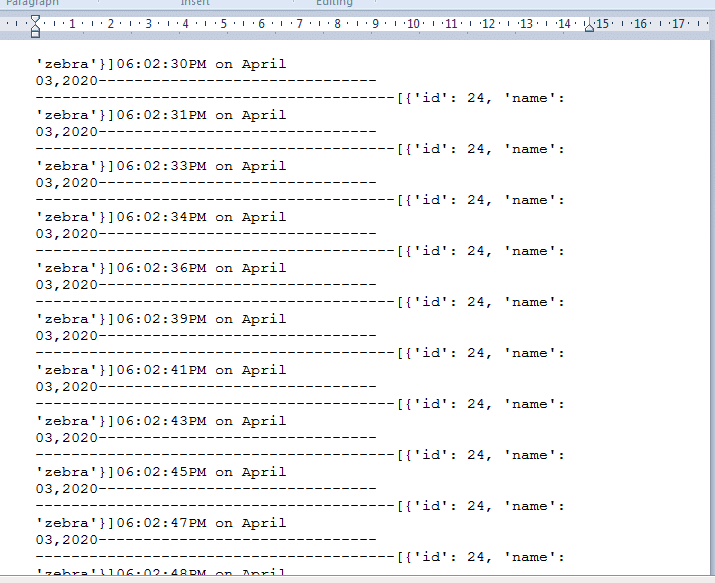
Next, we have a conditional statement that checks the output result of detection and if the condition of the result of detection is not “[]” then it saves the result with date and time in a text file with detection date and time. The next part of the code saves the detected image in the database folder. Here you can change the path for image storage as per your choice. (Refer the Fig 2,3,4)

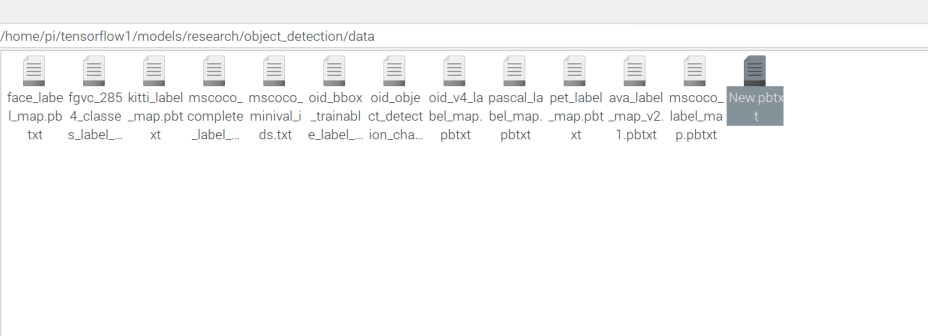
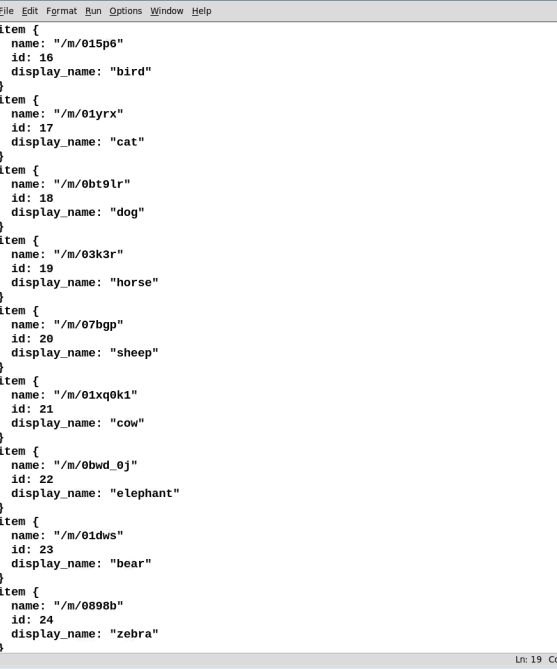
Now save the code. Next, go to the data folder and create a file named New.pbtxt file and the category of animal/species name for detection and then save that. ( Refer Fig 5,6)
Testing
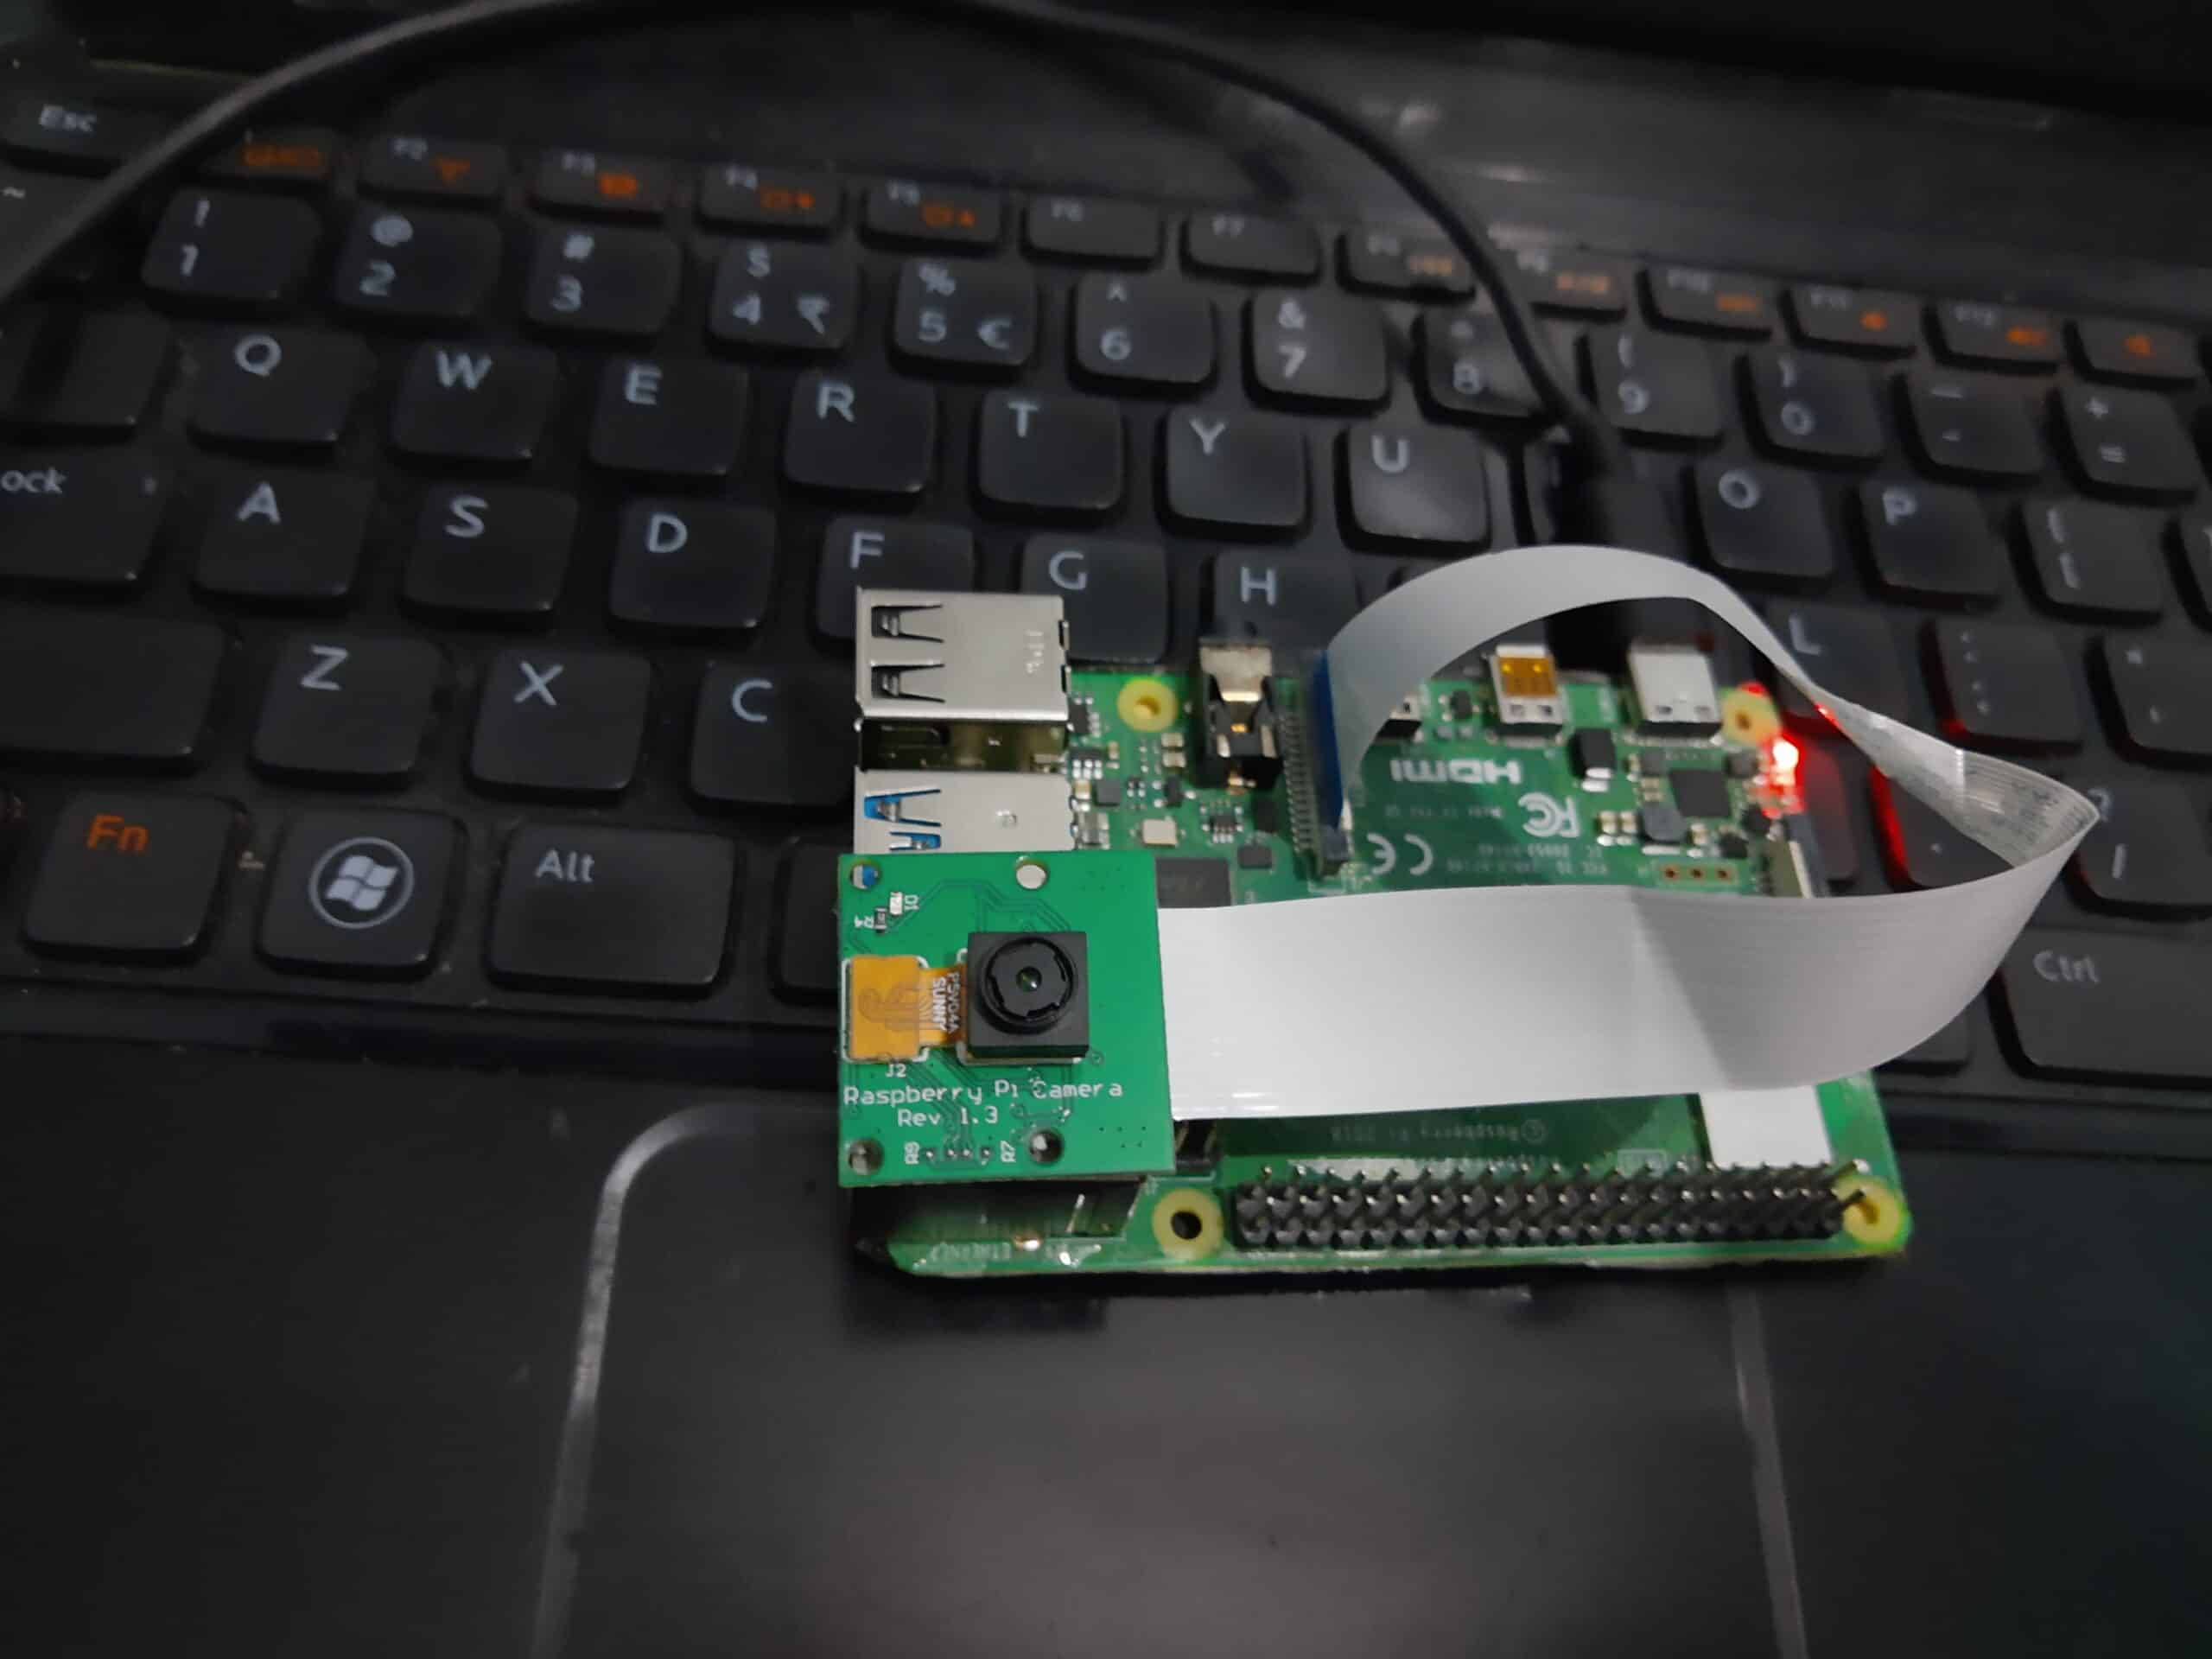
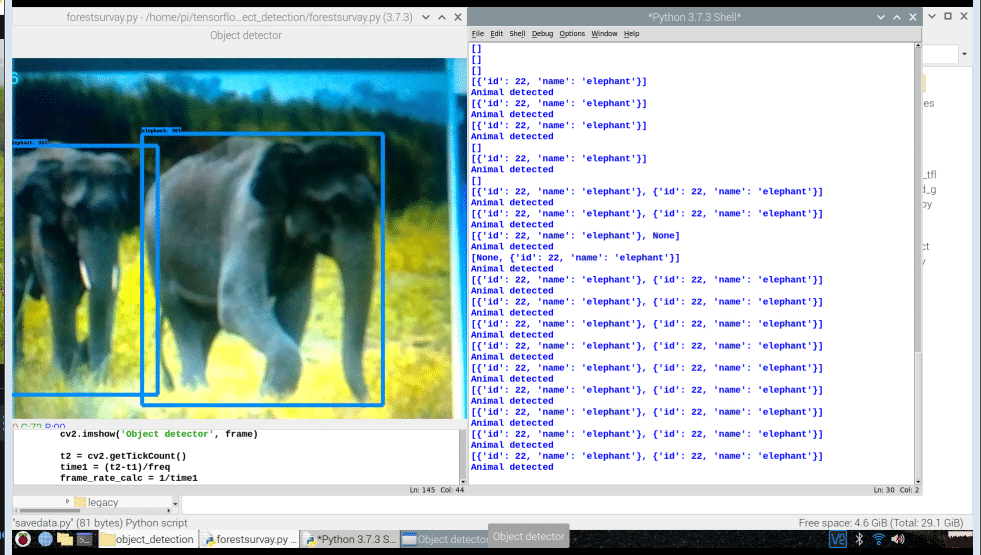
After finishing all the above parts, connect the camera module in Raspberry Pi camera port using a ribbon cable (Refer Fig 7). Next, open the code in Python IDLE and run the script and wait for few minutes so that it can load all the tensor flow modules. This will open a new window with the camera video output. Bring the camera in front of any animal such as a cow, sheep etc. Whenever an animal appears in the camera frame it will get detected and the results will be saved in a text file, and it will save that frame image in the database folder with date and timestamp. (Refer Fig 8).
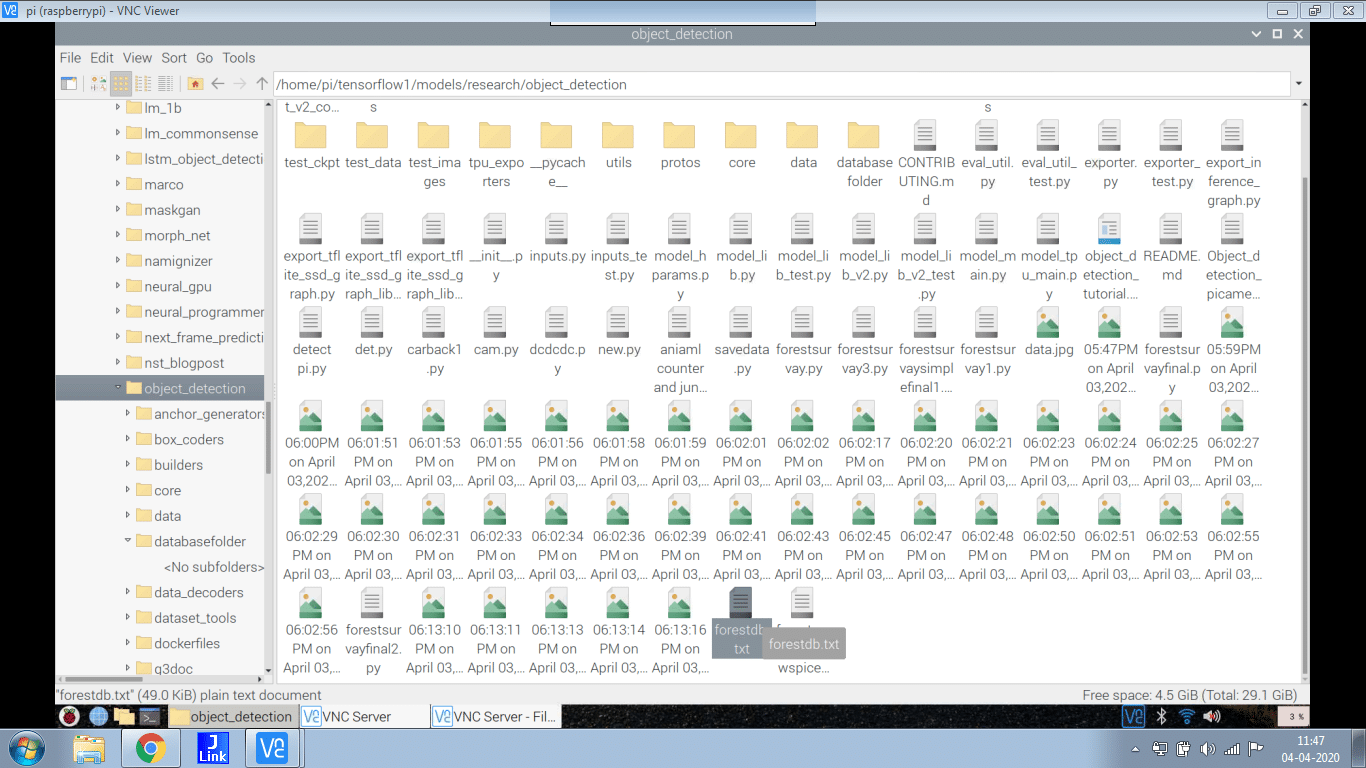
Now to check the detected species/animals for survey open the db data.txt to see the list of species/animal detected with time and date. Next, if you want to get the picture of those detected species/animal for study then open the database folder and you can see all the pictures with date and time of detected species. (Refer Fig 9,10).

HI Team EFY ,
This is Prashant , we are the Electronics Manufacturing services company based out at Manesar Gurgaon, keen to more your ref . design & develop the same under make it India Program. Please send us more details and contact point for more information .
Regards – Prashant Mishra
#9899113267
What help do you need Kindly elaborate. Send mail to [email protected]
HI Team EFY,
This is Prashant, we are the Electronics Manufacturing services company based out at Manesar Gurgaon, keen to more your ref. design & develop the same under make it India Program. Please send us more details and contact point for more information.
Regards – Prashant Mishra
#9899113267
Hey there,
I got to the section where it says
“After successfully cloning, go to the directory → research folder → detect.py file in python IDE. Now let’s understand and change the code. (Refer fig 1.)”
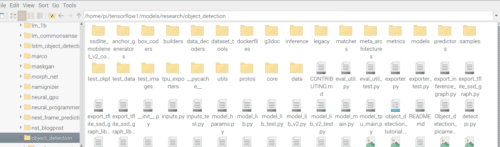
And there doesn’t appear to be any research folder in the tensorflow… so I tried downloading the model folder, and there is a research folder with and object_detection folder… but there is still no file called “detect.py” or anything similar.
Is something wrong?
I have the same problem
use git clone https://github.com/tensorflow/models to get research folder
in object detection folder copy my code and paste it there. I have attached the code with the article. Next, create the new.pbtxt file in the data folder
how to download models folder ?
in object detection folder copy my code and paste it there. I have attached the code with the article. Next, create the new.pbtxt file in the data folder
After cloning tensorflow , there does not appear to be any research folder in tensorflow.
Can anyone help me with this?
use git clone https://github.com/tensorflow/models to get research folder
from object_detection.protos import string_int_label_map_pb2
ImportError: cannot import name ‘string_int_label_map_pb2’
I got this error can any one help what to do
have you kept the New.pbtxt file in data folder? Put the names of animals to detecte as in fig 6. Or you can simply copy the list of things to detect from mrosco_level.pbtxt and then delete all other things from list and keep ony animals in list.
Can I get some reference papers.Or link of Ur this paper which u have published.
Source code is not available can you please share to [email protected]
Hi Pruthviraj, Source Code is present at the end of the page.
In Sudo pip3 install opencv
My pi showing error code 404 what can I do now?
You might have an outdated raspbian Image on a raspberry pi update to the latest version or fresh install the latest Raspbian image.
Traceback (most recent call last):
File “/home/pi/tensorflow/models/research/object_detection/forestsurvayfornewspices.py”, line 31, in
from utils import label_map_util
File “/home/pi/tensorflow/models/research/object_detection/utils/label_map_util.py”, line 29, in
from object_detection.protos import string_int_label_map_pb2
ImportError: cannot import name ‘string_int_label_map_pb2’ from ‘object_detection.protos’
why am i getting such a error like this? is there anything to change again
Have you put the .pbtxt file in the data folder with a list of names of animals to detect Check. Also, check the file name in of .pbtxt in data folder is same in code as well
yes everything did as you mentioned above. as there’s doesn’t seems to have a model folder i have cloned it using the GitHub link provided. it was cloned outside to the tensorflow folder. so that i have moved it back to it. that’s the only thing i have done.
It micgt be possible the protoc is in wrong version or not installed
Install protoc-3.11.4 from https://github.com/google/protobuf/releases
and run protoc object_detection/protos/*.proto –python_out=.
as mention in protoc installation guide
or you can simply string_int_label_map_pb2.py on internet and dowload it and paste it in object detection/protos folder
It might be possible the protoc is in wrong version or not installed
Install protoc-3.11.4 from https://github.com/google/protobuf/releases
and run protoc object_detection/protos/*.proto –python_out=.
as mention in protoc installation guide
or you can simply string_int_label_map_pb2.py on internet and dowload it and paste it in object detection/protos folder
or you can simply search protic file named “string_int_label_map_pb2.py” on internet and download it and paste it in object detection/protos folder
If still got version conflict between modules of different version contact me on what’s up 7061350809
thank you so much. will try the things you have mentioned. if theres any issue will reach to u ASAP.
Can we use raspberry pi 3 instead of model 4 for this project?
Yes, but 2GB raspberry pi 4 can perform better.
I’m getting :
ERROR: Could not find a version that satisfies the requirement opencv
ERROR: No matching distribution found for opencv
When running the command sudo pip3 install opencv
You got this error because version conflict with opencv. Try sudo pip3 uninstall open cv
sudo pip3 install opencv-python