


 Google Glasses launched a few years ago look like normal eyeglasses but it is made of a special glass and has a user interface (UI). It works like a smartphone through which you can see time of the day, check news, read books, and much more; the text appears as an overlay or a floating image in the air. At the same time, you can continue seeing your surroundings, just like you do with an ordinary pair of glasses.
The Google Glass is revolutionary and is likely to become one of the most advanced gadgets in the future. Since these smart glasses are expensive, it is difficult for most people to experience the technology. Hence, we can try and design our own smart glasses.
Full Video Explanation
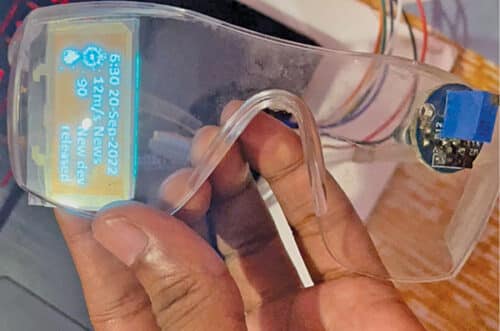
A picture of the Google Glass is shown in Fig. 1 and the author’s prototype of smart glasses is shown in Fig. 2. The components required for building the smart glasses, which are somewhat similar to Google Glass, are listed under the Bill of Materials table.
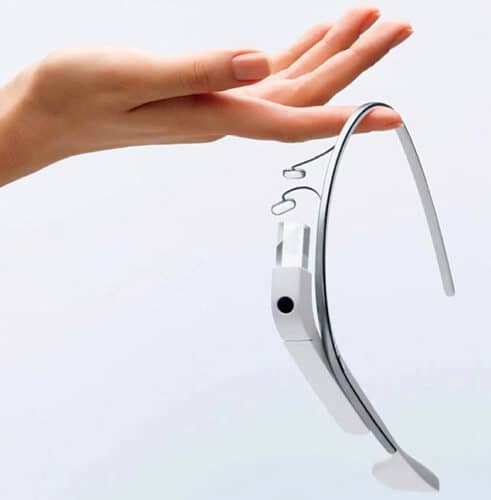

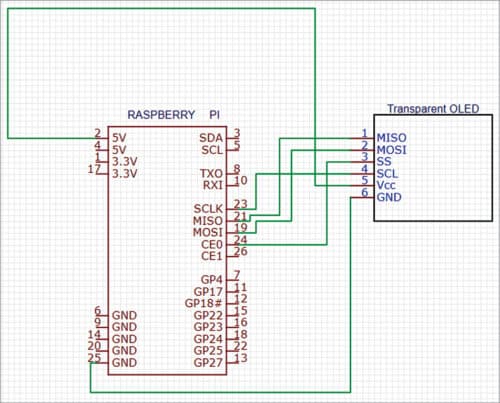
Fig. 3 shows the circuit diagram of our smart glasses built using Raspberry Pi and a transparent OLED display. Replace a lens or eyeglass in an ordinary pair of glasses with the transparent OLED display and connect it to Raspberry Pi and the battery.
| Bill of Materials | ||
| Component | Quantity | Description |
| Raspberry Pi Zero W | 1 | SBC for smart glasses |
| Transparent OLED display | 1 | 2.9cm OLED display |
| Eye glass | 1 | Eyeglass |
Code
We need Python to create a code for interfacing and configuring the OLED display. The latest version of Raspbian OS comes with Python 3 preinstalled. If you are not using the latest version, install Python and its IDE first. Next, install the libraries and modules for interfacing the display, and then the other Python modules and libraries as per the functions you want for your smart glasses.
A simple reference design of smart glasses that display time and text information on the eyeglasses is given here. To install the Python modules, open the Linux terminal and run the following command:
wget http://www.airspayce.com/
mikem/bcm2835/bcm2835-1.71.tar.gz
tar zxvf bcm2835-1.71.tar.gz
cd bcm2835-1.71/
sudo ./configure && sudo make &&
sudo make check && sudo make
install
sudo apt-get install wiringpi
#For Raspberry Pi systems after May 2019 (earlier than this, you may not need execute), you may need to upgrade:
wget https://project-downloads.drogon.
net/wiringpi-latest.deb
sudo dpkg -i wiringpi-latest.deb
Check the installation using the following:
gpio -v
Install python modules:
sudo apt-get install python3-pil
sudo apt-get install python3-numpy
sudo pip3 install RPi.GPIO
sudo pip3 install spidev
Next, clone the transparent OLED Python library and install the library:
sudo apt-get install p7zip-full
sudo wget https://www.waveshare.com/w/
upload/2/2c/OLED_Module_Code.7z
7z x OLED_Module_Code.7z -O./OLED_
Module_Code
cd OLED_Module_Code/RaspberryPi
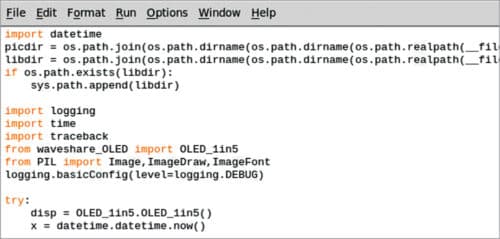
To start coding, first import the Python modules and libraries. For the prototype, the DateTime library, OLED display modules and libraries were imported. You can also import many other libraries and modules, if you want to add any more functions to the smart eyeglasses.
Note. You can download the source code from following link.
Construction and Testing
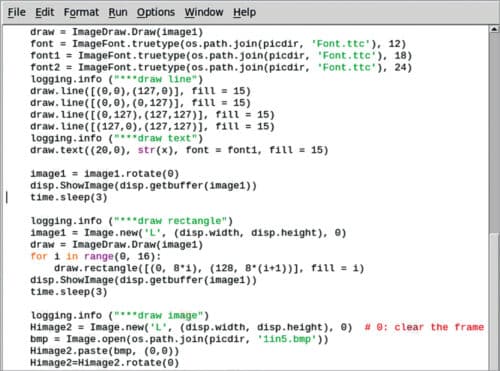
Now we have our smart glasses ready to be used. On powering the Raspberry Pi and running the code, you can see the information being displayed on the transparent OLED, like date and time, and other information that you have set in the code to be displayed. The information will appear as an overlay or an image floating in the air, which you may have seen in some science fiction movies.
Author’s final prototype used for testing is shown in Fig. 6. This is the first version of the project. In next version, we shall try to add features like controlling the display using eyes and getting notifications from the phone.
Download source code
Ashwini Kumar Sinha is a technology enthusiast at EFY
This article was first published on 26th September 2022 and was updated on 23 February 2023.
