


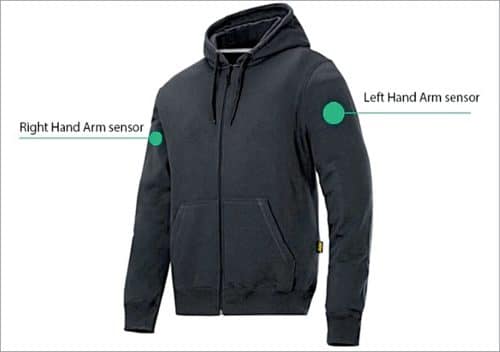
 This smart social distancing jacket comes with a smart inbuilt alarm, hinting people around you to maintain distance in crowded places like malls, offices, schools, colleges, and hospitals. Here is its novel circuit that alerts people to maintain physical distance all around you. The author’s prototype with a jacket fitted with sensors is shown in Fig. 1.
Circuit and working
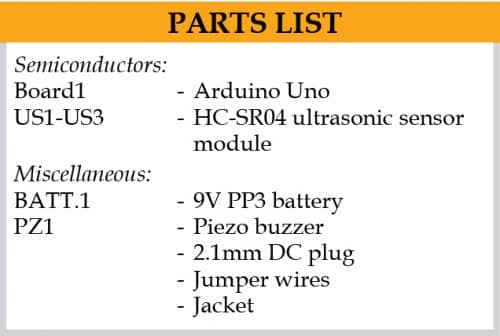
Circuit diagram of the smart jacket for social distancing is shown in Fig. 2. It is built around Arduino Uno Board1, three HC-SR04 ultrasonic sensors US1 through US3, and piezo buzzer PZ1.


The three HC-SR04 ultrasonic sensors are used to detect the distance from the back, left, and right sides of the user. Piezo buzzer PZ1 sounds alarm when any of the sensors detects a person within 30 to 100cm distance.
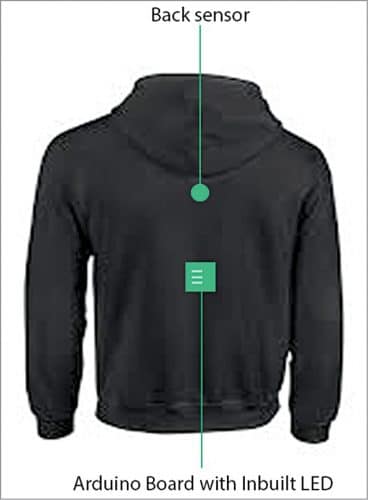
The Arduino board can be fixed at the jacket’s back side along with the buzzer. The inbuilt LED of Arduino also notifies the person standing at the back side as shown in Fig. 3.
The software program smart_jacket.ino loaded into internal memory of the Arduino is simple and easy to understand. Comments are given at the end of each command line. The code starts by defining the pin numbers of sensors. The trigger pin (input) and echo pin (output) of each sensor are defined in the code.
Construction and testing
Assemble the circuit and attach the sensors properly on the jacket. But before doing so upload the source code to Arduino using Arduino IDE.
Place ultrasonic sensor US1 on right arm of the jacket, sensor US2 on left arm, and sensor US3 and Arduino board on back side of the jacket. Connect power supply pins and input/output pins of the sensors to the Arduino board. To power up the board, a 9V PP3 battery with a 2.1mm DC plug can be used. The serial monitor utility of Arduino is used to display the measurements of all three sensors.
For testing purpose, the safe distance was kept as 30cm. You can increase the safe distance in the code as per desired physical distancing norms.
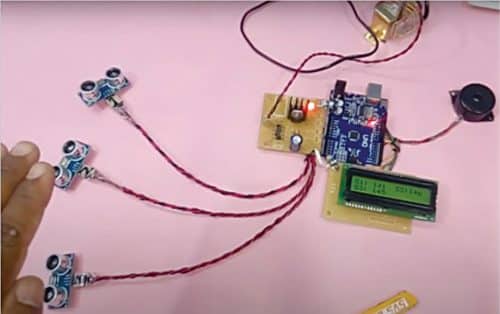
The project can be extended for use with an LCD to display the distance as shown in Fig. 4.
Download Source Code
Parth Atulkumar Shah is Manager at Makerspace and Assistant Professor at School of Design, Anant National University, Ahmedabad. Milind Chitale, Nikita Bavishi Shah and Nakul Sharma are electronics hobbyists
Please note: If you are unable to download the source code, please try to open the page in incognito mode and retry or temporarily turn off the antivirus before downloading.