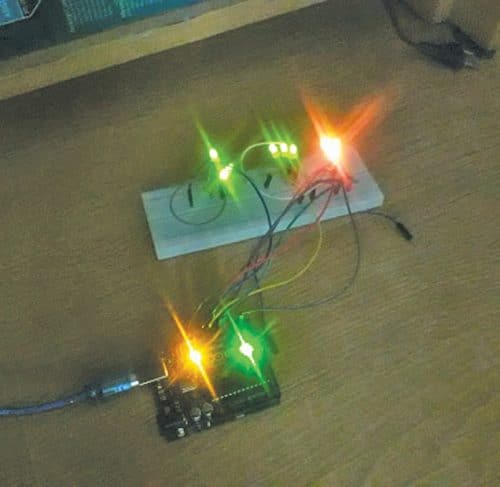
 Nameplates are generally made of wood, acrylic sheet, or a metal and fixed on a wall or kept on desk. The author’s prototype of an acrylic nameplate that can display the name of a person, designation, the department in office, or house number, etc, in tricolour is shown in Fig. 1.

Circuit and working
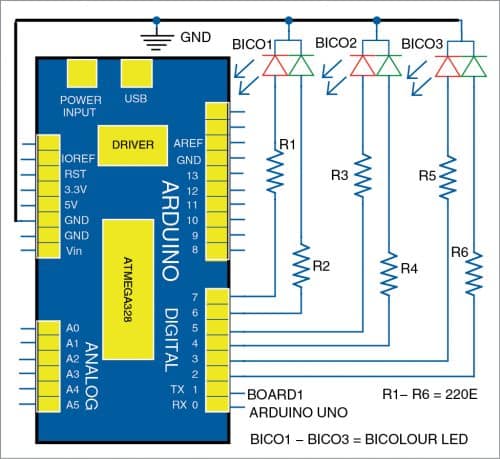
Circuit diagram of the tricolour LED name plate is shown in Fig. 2. It can be built around Arduino Uno board (Board1) and three bicolour LEDs (BICO1-BICO2).

First, all the name plate letters glow in red colour, one by one from left to right. The colour changes from red to yellow and then from yellow to green, one by one from left to right.
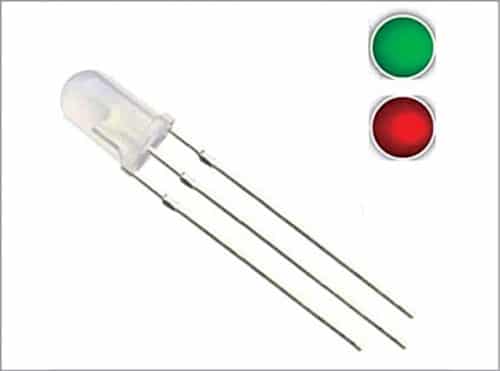
The circuit uses bicolour LEDs, not tricolour, whose red and green colours make yellow colour when combined. The LEDs’ one terminal is for red colour, another for green, and the third is a common cathode. The image of a bicolour LED is shown in Fig. 3.

Arduino Uno is an open source development board based on ATmega328P microcontroller. It has fourteen digital I/O pins of which six can be used as PWM outputs, six as analogue input pins, a USB connection, a power jack, an ICSP header, and reset button. Nameplate sequence is obtained by a program written in Arduino programming language using Arduino IDE. The source code tricolour.ino is uploaded to the Arduino board.
Construction and testing
Assemble the circuit on a breadboard or veroboard. Carve out the nameplate details on a black acrylic sheet (see Fig. 4) and fix the LEDs inside the acrylic box. When the circuit is switched on, the bicolour LEDs will serve as backlight.

Give 5V DC supply available from a laptop or desktop to Arduino board through a USB cable. Then upload the source code tricolour.ino to the board. On switching the circuit on, the colours of the nameplate will change as per sequence described above.
Download Source Code
Vinaya Kumar K. is an instructor in EEE Department of NIE Institute of Technology, Mysuru (Karnataka)


WHERE I CAN BUY THE ARDUINO BOARD.
GUIDE MW HOW TO WORK WITH ARDUINO BOARD AND HOW TO UPLOAD THE SOURCE CODE