


Note: We tested and updated this project, available on Smallest Raspberry Pi Laptop.
In this age of flexible working, the usage of laptops anywhere and everywhere has become a norm. Fast computing machines, especially for programming-related tasks, are essential.

Tasks including network penetration and testing the potency of malware and virus is often performed in spying and ethical hacking. The user is required to work on a computer that’s small in size and can’t be easily noticed. And despite the size, the laptop should have excellent specifications, on par with other high spec laptops.
So today, you will learn to design the world’s smallest hacking laptop that has a full touch keyboard. Excited?? Let’s begin. But you will first need to decide the specs of your laptop so that the appropriate hardware parts and OS can be selected.

Laptop Features
- Small as your finger
- Easy to carry and hide
- Built-in multi-touch display and keyboard panel
- Equipped with WiFi and Bluetooth LE
The best OS for ethical hacking is Kali Linux. It comes with various exploitation tools such as Metasploit, Aircrack-ng and Wireshark that are beneficial for penetration hacking and testing.
After deciding the computer specifications, let’s do some shopping for components.
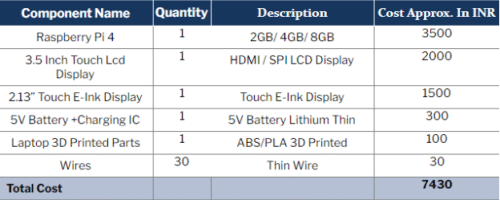
Bill Of Materials
Designing
To design the case or body of the laptop for holding the necessary hardware, begin working on three parts: base, top and front.
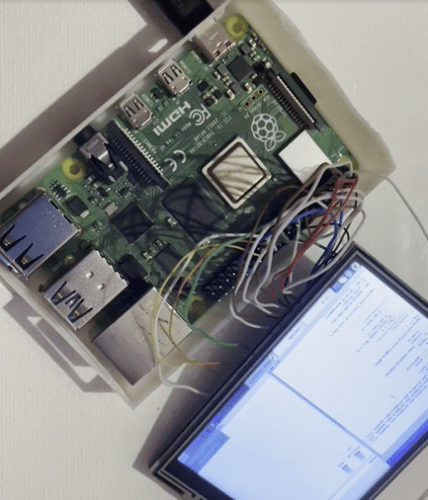
In the base part, keep the main hardware, that is, Raspberry Pi, battery and its charging system. Also, cut two slots at the bottom-front of the laptop case for the ethernet/USB and charging ports.

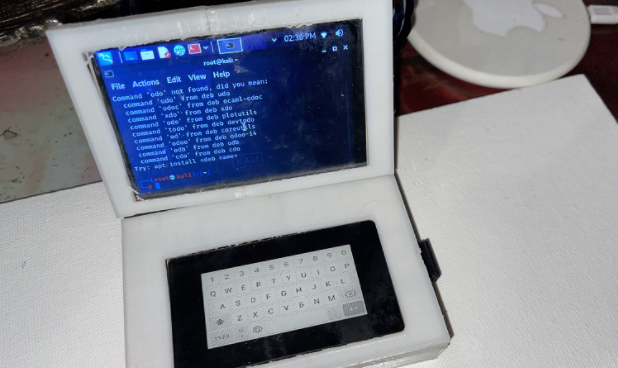
For the top part that will hold the touch e-paper-based keyboard for the laptop, cut a slot on the top-front face to affix the touch panel keyboard inside (refer Fig 4.)
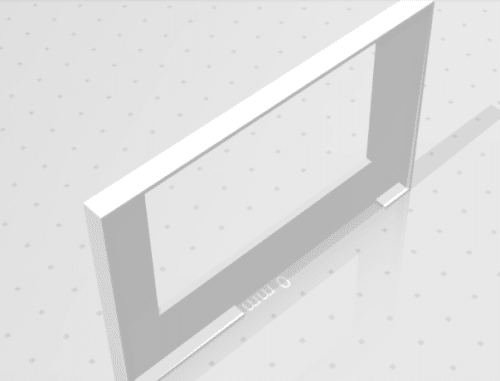
To design the LCD panel case for the laptop in the front, create an enclosure with the same size and thickness.

After designing the laptop body parts, 3D print them.
Prerequisite
Before proceeding further, follow the basic setup procedures for your Raspberry Pi board. Most white hat hackers prefer Kali Linux OS. Therefore, its setup on your RPi board is highly recommended. Please follow the below steps:
- Go to the official website of Kali Linux and download the latest version for Arm-based devices like Raspberry Pi.
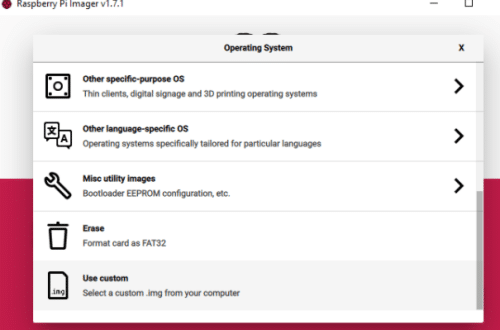
- Install the Raspberry Pi disk imager.
- Now insert the SD card into the USB drive.
- Choose the Kali Linux OS image file and install Kali Linux OS in the SD card using the Raspberry Pi disk imager.
Preparing OS for SPI Display
It is recommended to use an HDMI-based touch display sized 3.5 inches in order to keep the laptop size as small as possible.
Note that when two SPI displays are used simultaneously, a conflict is created during communication. Because an HDMI-based touch display and e-ink display (for the keyboard panel) is used for the laptop, the above condition holds true for you. However, the SPI touch e-ink display is used for keyboard panel only, so its touch function that’s I2C-based shouldn’t cause many problems.
If you are using an HDMI display for the laptop, then you can skip the following steps and go straight to the keyboard preparation section.
To use the SPI display, you need to install the required driver and set up the SPI touch display for Raspberry Pi. For this, run the following commands in the Linux terminal.
git clone https://github.com/goodtft/LCD-show.git
chmod -R 755 LCD-show
cd LCD-show/
sudo ./LCD35-show
After installing the driver, make sure to solder the pins to Raspberry Pi as per the below table. Also, connect the SPI display as shown below.
| PIN NO. | SYMBOL | DESCRIPTION |
| 1, 17 | 3.3V | Power positive (3.3V power input) |
| 2, 4 | 5V | Power positive (5V power input) |
| 3, 5, 7, 8, 10, 12, 13, 15, 16 | NC | NC |
| 6, 9, 14, 20, 25 | GND | Ground |
| 11 | TP_IRQ | Touch Panel interrupt, low level while the Touch Panel detects touching |
| 18 | LCD_RS | Instruction/Data Register selection |
| 19 | LCD_SI / TP_SI | SPI data input of LCD/Touch Panel |
| 21 | TP_SO | SPI data output of Touch Panel |
| 22 | RST | Reset |
| 23 | LCD_SCK / TP_SCK | SPI clock of LCD/Touch Panel |
| 24 | LCD_CS | LCD chip selection, low active |
| 26 | TP_CS | Touch Panel chip selection, low active |
Waveshare touch e-ink display. So open the Linux terminal and run the following command to get the library and driver for the e-ink display.
sudo pip3 install gpiozero
wget http://www.airspayce.com/mikem/bcm2835/bcm2835-1.68.tar.gz
tar zxvf bcm2835-1.68.tar.gz
cd bcm2835-1.68/
sudo ./configure && sudo make && sudo make check && sudo make install
sudo apt-get install wiringpi
sudo apt-get update
sudo apt-get install python3-pip
sudo apt-get install python3-pil
sudo apt-get install python3-numpy
sudo pip3 install RPi.GPIO
sudo pip3 install spidev
cd ~
git clone https://github.com/waveshare/Touch_e-Paper_HAT
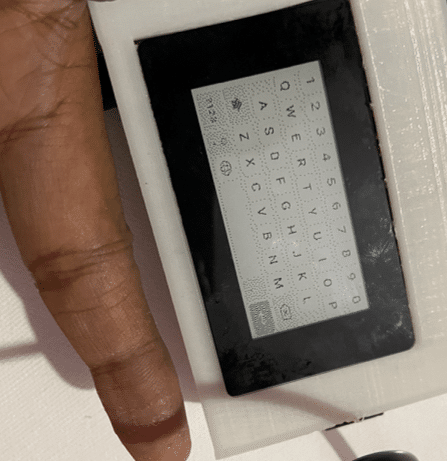
In the code, change the display picture on the e-ink display with the picture of the keyboard layout vector image. Run the code to see the changes.
Note: Connect the e-ink touch display with the GPIO of Raspberry Pi before running the code.
For creating the virtual input of mouse and keyboard in the Raspberry Pi, there are many Python libraries including pynput. Make sure to install any of them. Run the following command in the Linux terminal to install the pynput module.
sudo pip3 install pynput
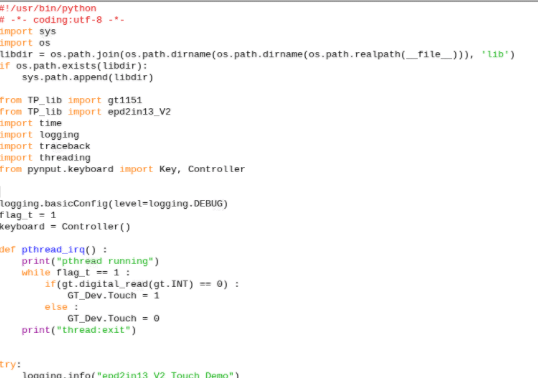
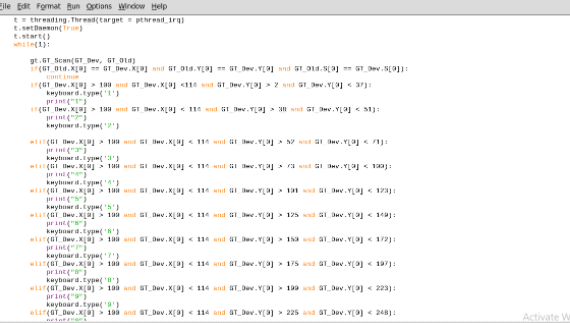
Now you are ready to begin coding for monitoring the touch points and also for checking which key is being pressed at the time, that is, converting the touch points into the desired input. So, import the library and pynput modules to Raspberry Pi.
Next, create a while loop to define a function to use pynput that will send the keyboard input to Raspberry Pi. Set the function of a key when pressed.
You will need to change the SPI(0,0 ) of the Raspberry Pi SPI port to a second SPI. So, open the lib folder and make changes in the code file of the e-ink touch display by changing SPI(0,0) to SPI(1,0) in every file. Save it.
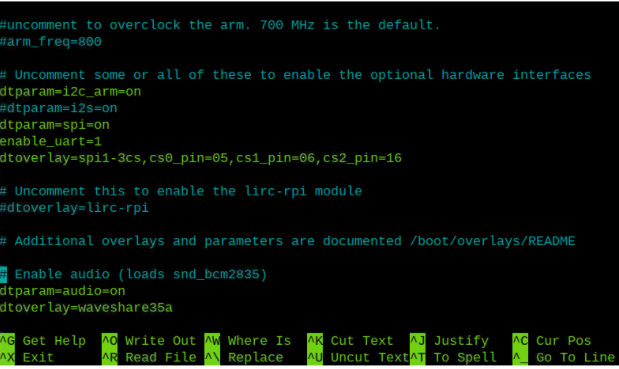
Next, enable the SPI second port of Raspberry Pi (by adding the line pointed out in Fig 14) into the config.txt file of Raspberry Pi that can be found in the boot folder in the root of Raspberry Pi.
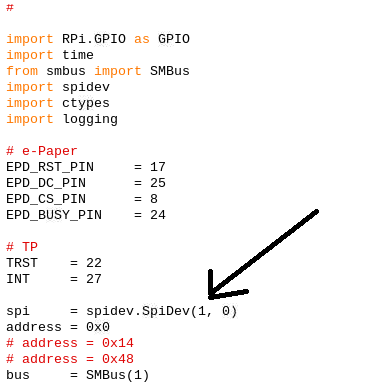
Connect the e-ink display to the Raspberry Pi pins as per the following table. Because you are using only the touch part and the touch controller is I2C based, you only need to connect the pins of the touch controller of the e-ink display to the Raspberry Pi.
E-INK Paper Pins BCM PIN Numbering Board Pin Number
| VCC | 3.3V | 3.3V |
| GND | GND | GND |
| INT | 27 | 13 |
| SCL | SCL1 | 5 |
| SDA | SDA1 | 3 |
| TRST | 22 | 15 |
Preparing The Laptop
After setting up everything in the library and modules with respect to the connection, assemble all the hardware within the 3D printed laptop case. Also, connect the battery and charging system with Raspberry Pi 5V pin and GND pin inside the case.
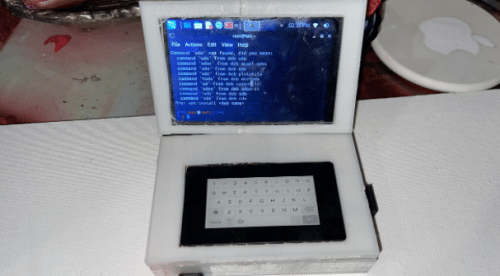

Testing

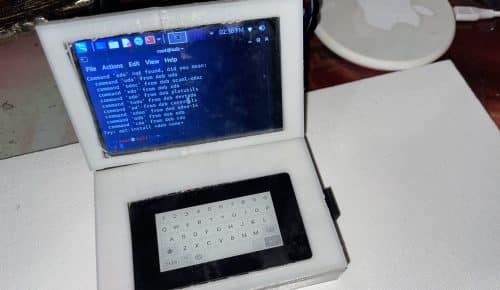
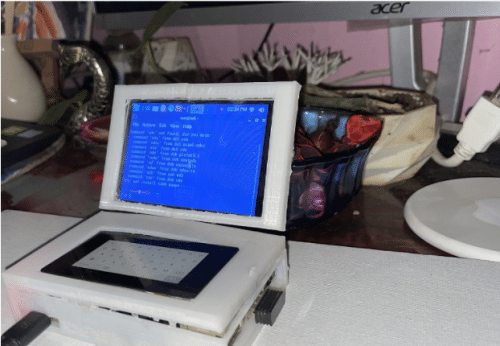
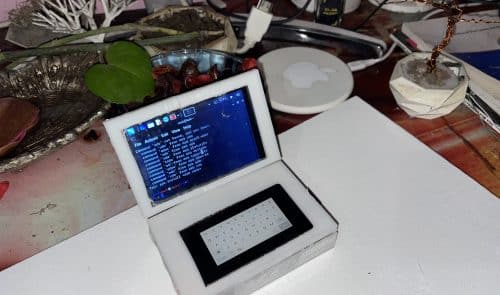
Congrats!! The world’s smallest hacking laptop created by you is now ready. Simply power it and run the keyboard code. Although small in size, this portable machine is as powerful as any large-sized hacking laptop, enabling you to perform penetration testing and check network security.
The laptop can also be used for office work, playing games or video streaming. The device is capable of performing as expected from a conventional laptop.