


 The altimeter is one of the basic and most essential devices used in-flight systems, drones, space rockets, and submarines to measure the altitude of a location (known as altimetry for land and bathymetry if underwater). It is also one of the most popular devices for para diving and paragliding but most of them are very costly. Therefore, I have decided to make an DIY of the cheapest digital altimeter that can be effectively used for all these purposes. This Altimeter uses the Arduino and BMP280 sensors to get the altitude.
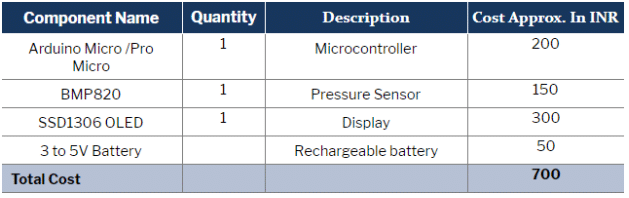
Bill Of Material
We need the following components for our device.

Coding
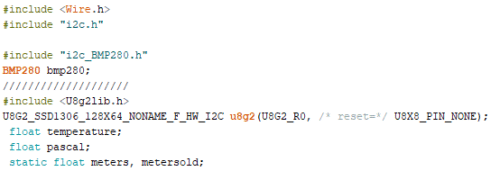
After collecting all the required components, we can begin with our coding. Open the Arduino IDE and go to Sketch → Library manager → Search. Install the following libraries.
- BMP280
- U8g2
Now include both libraries in the code and then create variables that will store the sensor readings. Next, create a setup function and then start the I2C communication with OLED and BMP280. After that, create a loop function through which the sensor data is displayed on an OLED. We are using the library U8g2 to obtain temperature, pressure, and altitude data from sensor for our altimeter device.


Working
Our Altimeter is able to measure the altitude of a place using the readings taken by the air pressure sensor. As we all know, the air pressure of a place varies according to its height with respect to the atmosphere. Air pressure decreases with an increase in height and vice-versa. So it detects the change in air pressure and calculates the altitude from sea level. Generally, all altimeters use the same principle But since they highly rely on the reading from the pressure sensor to measure the altitude, varying seasonal cycles and different weather conditions might affect those readings. That’s why to get accurate and reliable data, we need to continuously update the altimeters with the current environmental conditions.
Connection
Connect the components as shown below in the circuit diagram.

Testing
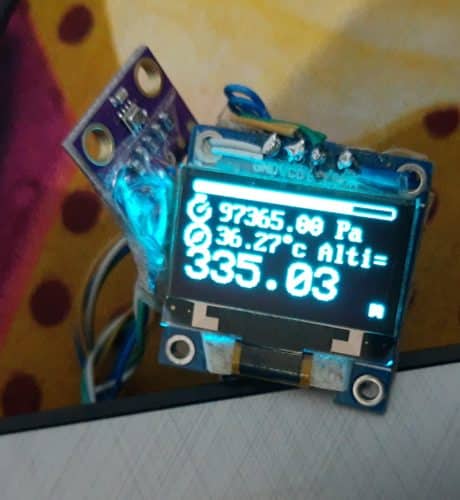
Now after getting everything ready, power the device, wait for a second and then check the readings of the temperature, pressure and altitude in the OLED display. The altitude that you will see is the normal altitude above the sea level. When you keep moving towards a gradually rising altitude, the reading automatically gets updated and increases with respect to the height from the ground. So our cheapest digital altimeter is ready. We can use this device in paragliding to get the altitude reading.
Applications
We can place this altimeter in an air balloon. Usually a GPS sensor is used in drones to obtain the coordinates of latitude and longitude for precise information about its location. However, it cannot tell us at what height it is located. Thus, here an altimeter is required to measure the altitude and help in navigation.
We can also use an altimeter in lift, elevator and in indoor positioning. As a GPS system can only get the latitude and longitude but not the altitude, an altimeter can assist in locating the height of a lift door, that is, at what floor the lift is currently located at.
Please provide full arduino code of
Cheapest digital altimeter
Attached at the end of article
The given link is incorrect. It leads to a sketch for PulseOximeter. Please correct this.
Hi Ashwini can you please send me any contact on you FB messenger whats up? I would like to discuss with you some possibilities of this project
Thanks
You can ask me in comments here, If need more support you can contact me on what’s app 7061350809. You can also EFY Electronics design community for wonderful projects
Hello! does the altimeter keep track of the highest altitude?
range +9000m to -500m
The code link is for the wrong project. You never addressed that issue.