


 Tracking and detecting suspicious activities is one of the most demanding tasks for security personnel and systems. If a security system fails in a place like an airport or bank, criminals can rob at gunpoint. Out of fear, the victims are usually unable to call the police in time for help.
But if a smart camera could detect any suspicious activity and automatically trigger an alarm to call the police, such criminal acts are likely to reduce significantly. So, let’s see how to build an AI camera system to track suspicious activities.

Training the AI Camera
Create a machine learning (ML) model having datasets of normal activities, such as walking, talking, reading, and sitting. Feed the datasets of suspicious activities like fighting, boxing, pointing a gun, or any other violent movement deemed suspicious, into the ML model.
Perform the above-mentioned activities in front of the smart camera so that various movements are captured. This will help train the ML model and deploy it on Raspberry Pi as a smart artificial intelligence (AI) camera.
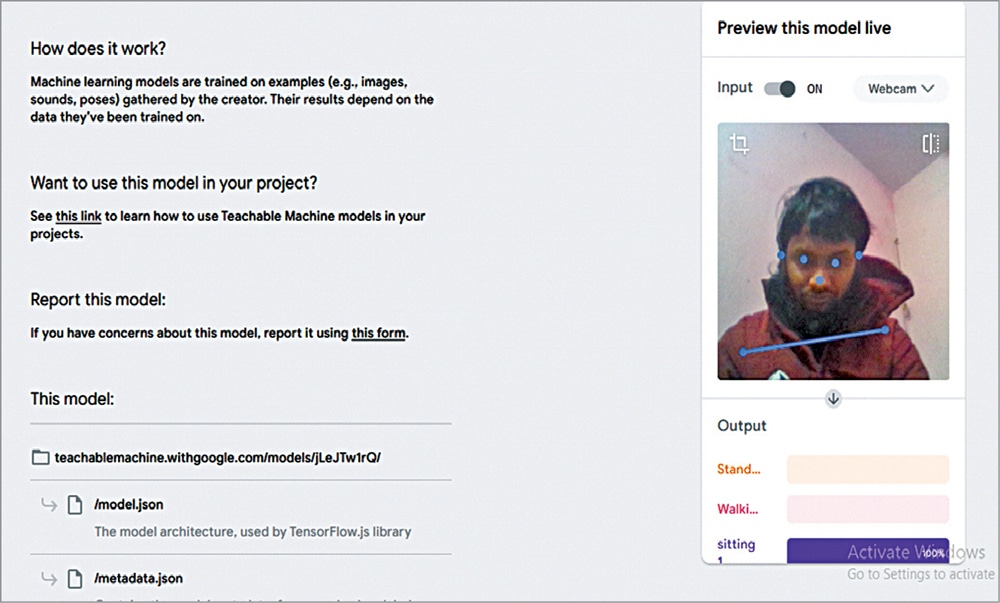
 Several flexible options exist, such as TensorFlow, Google Teachable, Edge Impulse, and Lobeo to create and train an ML model. Any of these can be chosen for the project. To demonstrate, Google Teachable is being used here.
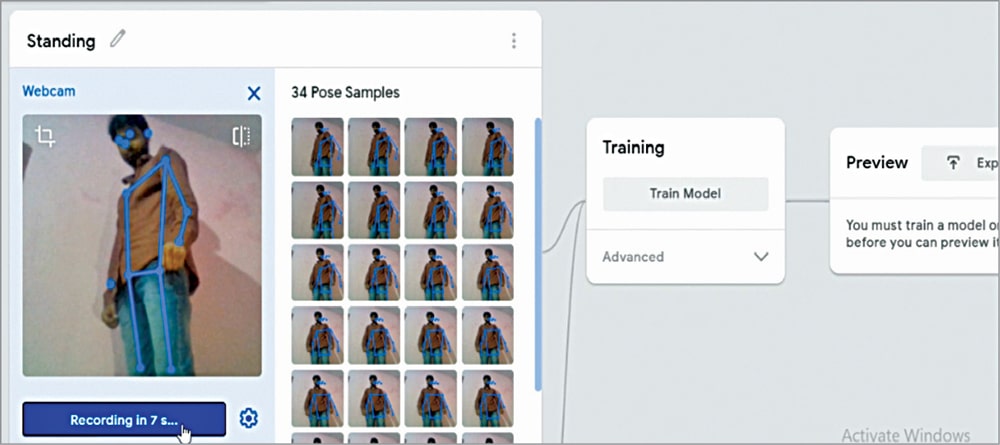
In Google Teachable, select the PoseNet option for tracking Correctly various body movements and actions. Correctly label the actions performed earlier of walking, talking, eating, standing, etc. Feed these datasets into the ML model. Similarly, correctly label and feed the datasets of activities like pointing guns, firing guns, fighting, beating, etc.

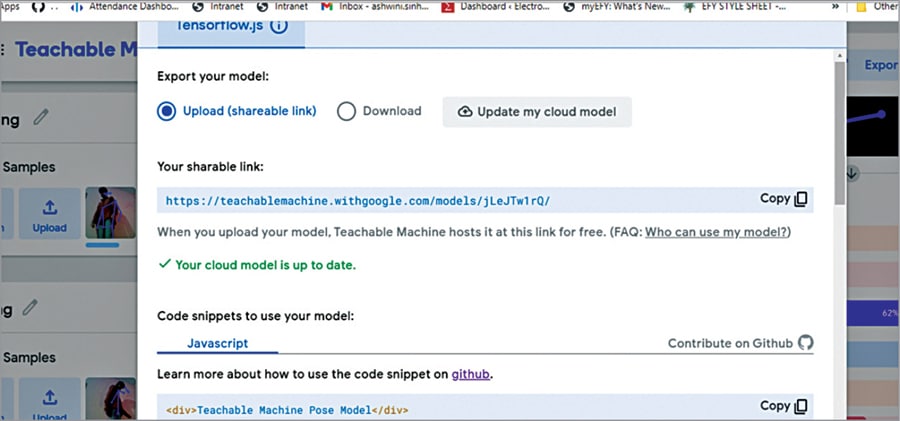
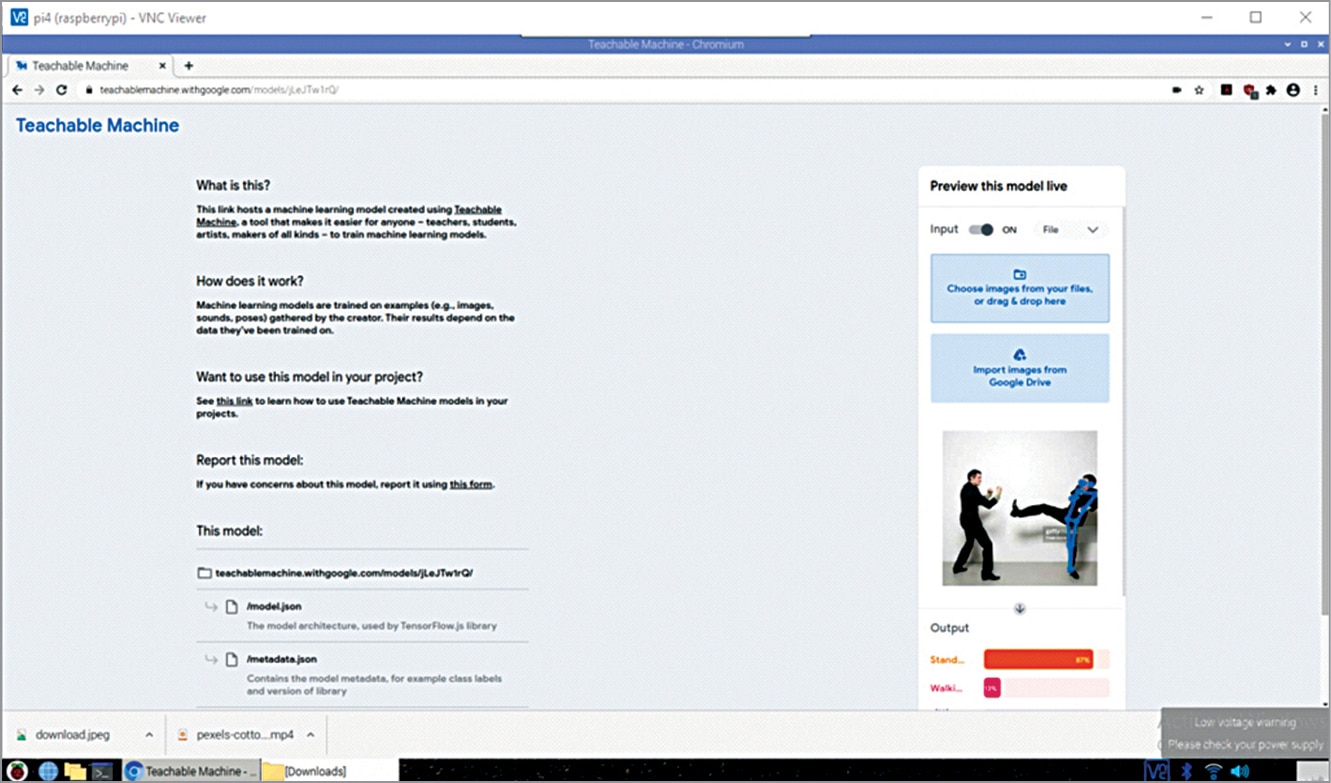
After feeding the required datasets, click on Train Model. The option to export the ML model or upload it to the cloud will appear. Uploaded the ML model to the cloud to safely store it there and let users access and deploy it anywhere in the world.
On uploading to the cloud, you will receive a URL for using the ML model. The URL of the ML model was created by the author.
Deploy the ML model on the camera and connect a speaker so that the Raspberry Pi triggers an alarm when any suspicious activity gets detected.

Suspicious Activity Tracking AI Camera – Coding
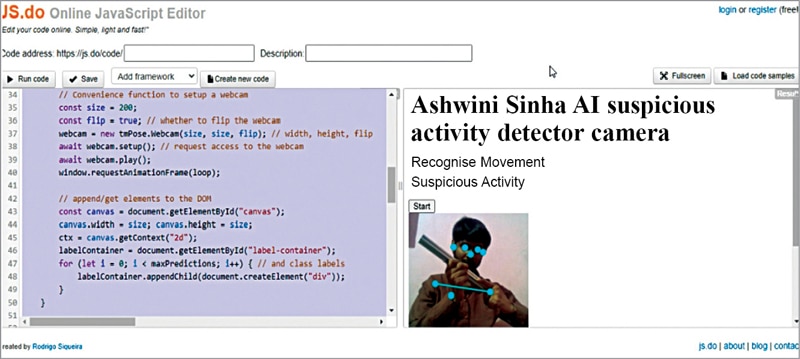
To deploy the ML model in Raspberry Pi coding is required. While uploading the ML model you would have received an example code snippet. Please copy and paste it into your JavaScript (JS) code. JS coding and testing can be done with the help of any code editor, offline or online. You can name the camera in HTML for the ML model.
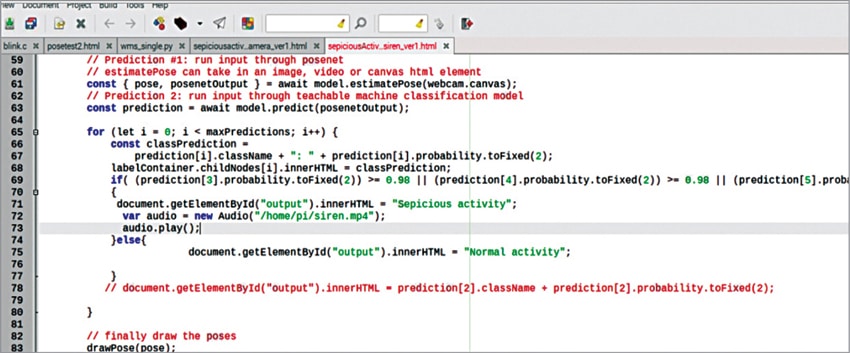
Import the ML model that was previously uploaded to the cloud. Then check whether activities such as beating, gun firing, and gun possession are detected by the ML model during video processing.
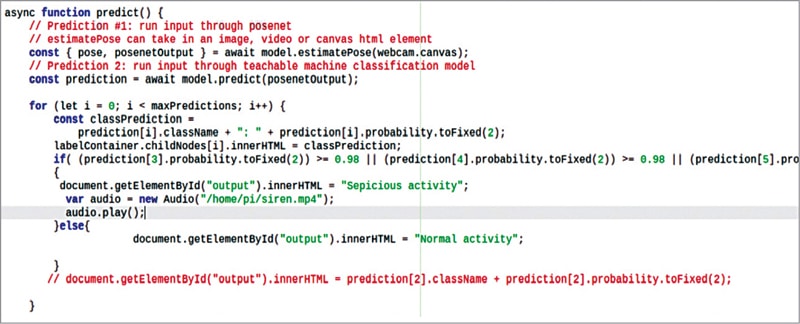
The model gives the likelihood of a particular activity to occur in the range of 0.00 to 1.00. So, by using an ‘if’ condition, if the output is greater than 0.98 then it means a person is either pointing a gun or fighting. At this point, an alarm gets triggered to alert people nearby.
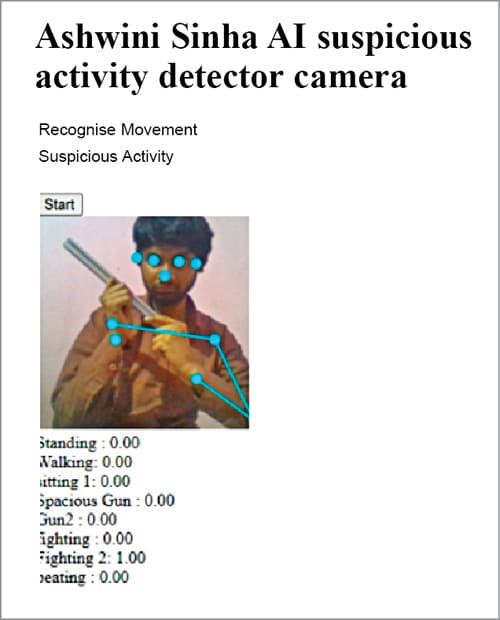
Testing
Save the JavaScript code as .html and open it in any browser with JavaScript enabled. Click on the Start button and perform the suspicious activity in front of the camera. The ML model will try to recognize it and, if found unusual, will issue an alert. You can also add functions for automatically calling or messaging the police.

Sometimes Chrome on Raspberry Pi is unable to open or access the camera and it hangs. In such a case try installing the latest version of Chrome or switch to another browser like Firefox or use an online/offline .js compiler. If the problem persists, you can use the URL of the trained ML model and directly see the output using the URL.
You can also use the Files option and upload if the browser is unable to access the camera to test the ML model you have created in Rpi.
Recommended: Top AI Engineering Projects.
Download Source Code
Ashwini Kumar Sinha is a technology enthusiast
Can we do the same project with rasperry pi 2 board. If yes what is the code for that. and what would be the success rate of that.
Not sure , Check the ode will be same you only ed to open the html file in web browser