


Introducing our groundbreaking IoT system that simplifies real-time IoT data logging, sharing, and analysis! With just one platform, you can effortlessly upload sensor data in real time, log it to Google Sheets with timestamps, and visualize it with live graphs. Need answers fast? Our system has got you covered!
Imagine the power of this technology during critical situations like the COVID pandemic. Governments can efficiently track and analyze each person’s health data using interactive graphs for better decision-making or monitoring the large number of land soil, Env data etc .
Say goodbye to the complexity of data management and embrace the ease and efficiency of our IoT solution. Experience the future of data analytics today!

| Components | Quantity | Description | Jumper wires |
| IndusBoard Coin | 1 | WiFi Microcontroller | 400 |
| Sensors Soil , Temperature etc | 1 | Sensor | 200 |
| Jumper wires | 1 | For connection | 20 |
| Total | 820 |
Step-by-step Guide
To get started with storing data in a Google Sheet, follow these simple steps:
- Create a New Google Sheet: Open Google Sheets and create a new spreadsheet. Label the columns with the data you want to store, for example, “Timestamp,” “Temperature,” “Pulse,” and more.
- Access App Script: Click on “Extensions” in the menu and select “Apps Script.” This will open a new tab with the Google Apps Script editor.
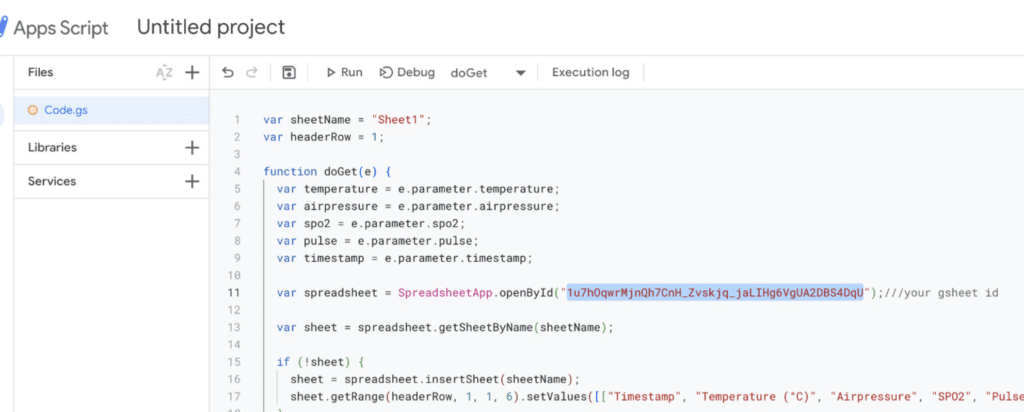
- Add Code for Data Storage: In the Apps Script editor, paste the provided code snippet (Fig 3.) to add data to the sheet. Modify the code to match your chosen column names and any additional data inputs you need.
- Save and Run: Save the script and run it to store data in Google Sheets.
Now, whenever you want to add new data, simply execute the script, and it will automatically insert the data into the specified columns of your Google Sheets.

For more detailed instructions and the code snippet (Fig 3.), refer to this link: https://docs.google.com/spreadsheets/u/0/

Now, to complete the process, follow these steps:
- Find the Google Sheet ID: Open your Google Sheet in the browser. In the URL, you will see something like this:
https://docs.google.com/spreadsheets/d/XXXXXXXXXXXXXXXXXXXXXXXXXXXXXXXXXXXXXXXX/edit. TheXXXXXXXXXXXXXXXXXXXXXXXXXXXXXXXXXXXXXXXXrepresents the Google Sheet ID. - Replace the G-Sheet ID in the Script: Go back to the Apps Script editor where you pasted the code. Look for the line of code that includes the Google Sheet ID, it might look something like this:
var sheetID = "YOUR_GOOGLE_SHEET_ID";Replace "YOUR_GOOGLE_SHEET_ID" with the actual Google Sheet ID, you found in Step 1. The updated code should now look like this:
var sheetID = "XXXXXXXXXXXXXXXXXXXXXXXXXXXXXXXXXXXXXXXX";- Save the Script: After replacing the Google Sheet ID, make sure to save the script.
Now, your script is correctly linked to the specific Google Sheet you want to store the data in. When you run the script, it will add data to the designated columns in that Google Sheet.
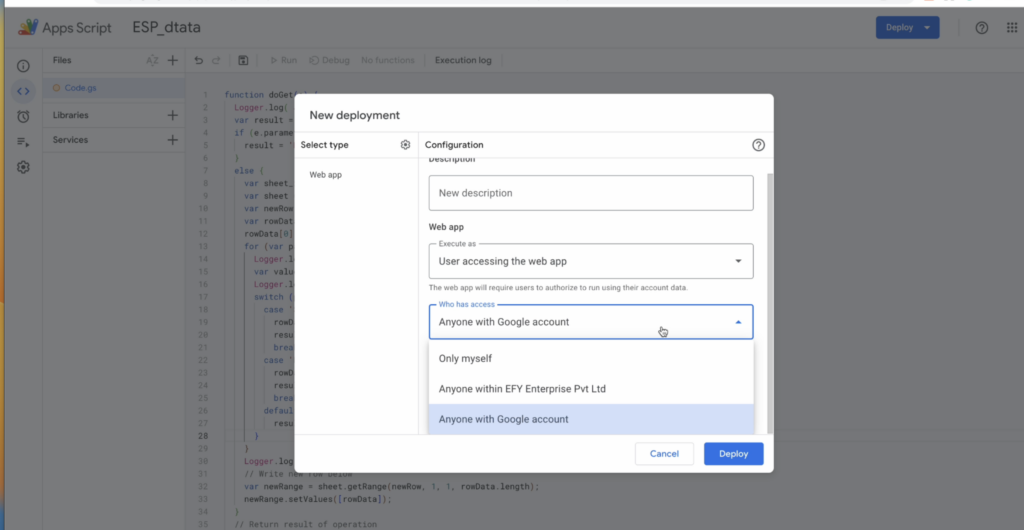
Once you have made the necessary changes to the script and you are ready to deploy the app, follow these steps:
- Save the Script: Ensure that you have saved the script with the updated Google Sheet ID.
- Publish the App: Click on the “Publish” menu at the top of the Apps Script editor and select “Deploy as web app.”
- Set Deployment Permissions: In the “Deploy as web app” dialog, you will see options for “Who has access to the app.” Choose “Anyone, even anonymous” to allow anyone to access the app without signing in to their Google accounts.
- Deploy the App: Click on the “Deploy” button to deploy the app.
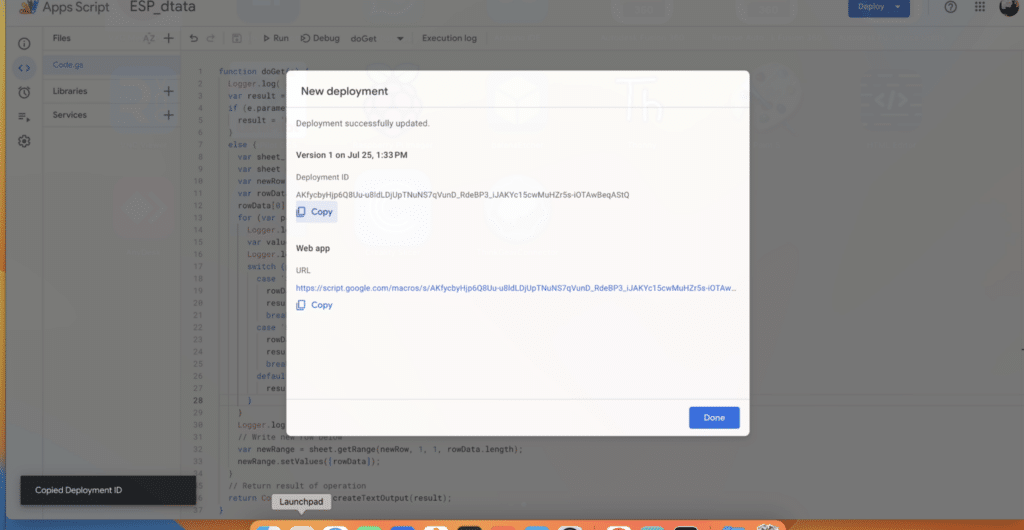
- Get the URL and App Script ID: After successful deployment, you will be provided with a URL. Copy and save this URL for later use. Additionally, take note of the “App Script ID” which can be found in the URL of the Apps Script editor. It will look something like this:
https://script.google.com/d/XXXXXXXXXXXXXXXXXXXXXXXXXXXXXXXXXXXXXXXX/edit. TheXXXXXXXXXXXXXXXXXXXXXXXXXXXXXXXXXXXXXXXXis the App Script ID.
You will need the URL and the App Script ID later when you integrate the IoT system with your Arduino code.
With the deployment complete, your IoT system is now accessible through the provided URL, and it’s ready to receive and store data in the designated Google Sheet.
Coding
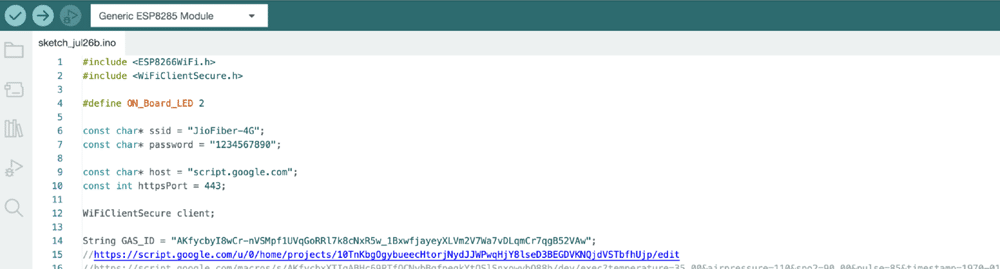
In the code, we start by including the Wi-Fi library and setting up the Wi-Fi credentials to connect to your Wi-Fi network. Next, we set the App Script ID for your Google Sheet, which we saved earlier in FIG 7.
To upload sensor data to Google Sheets, you’ll need to add the sensor library. However, for demonstration purposes, we’ll use a random number to simulate sensor data, as we are only showing the process.
Now, let’s create the setup function. Here, you’ll configure the Wi-Fi connection and check if it’s successfully connected to the internet. After that, we’ll move on to the loop function. This function continuously sends the sensor data to Google Sheets.
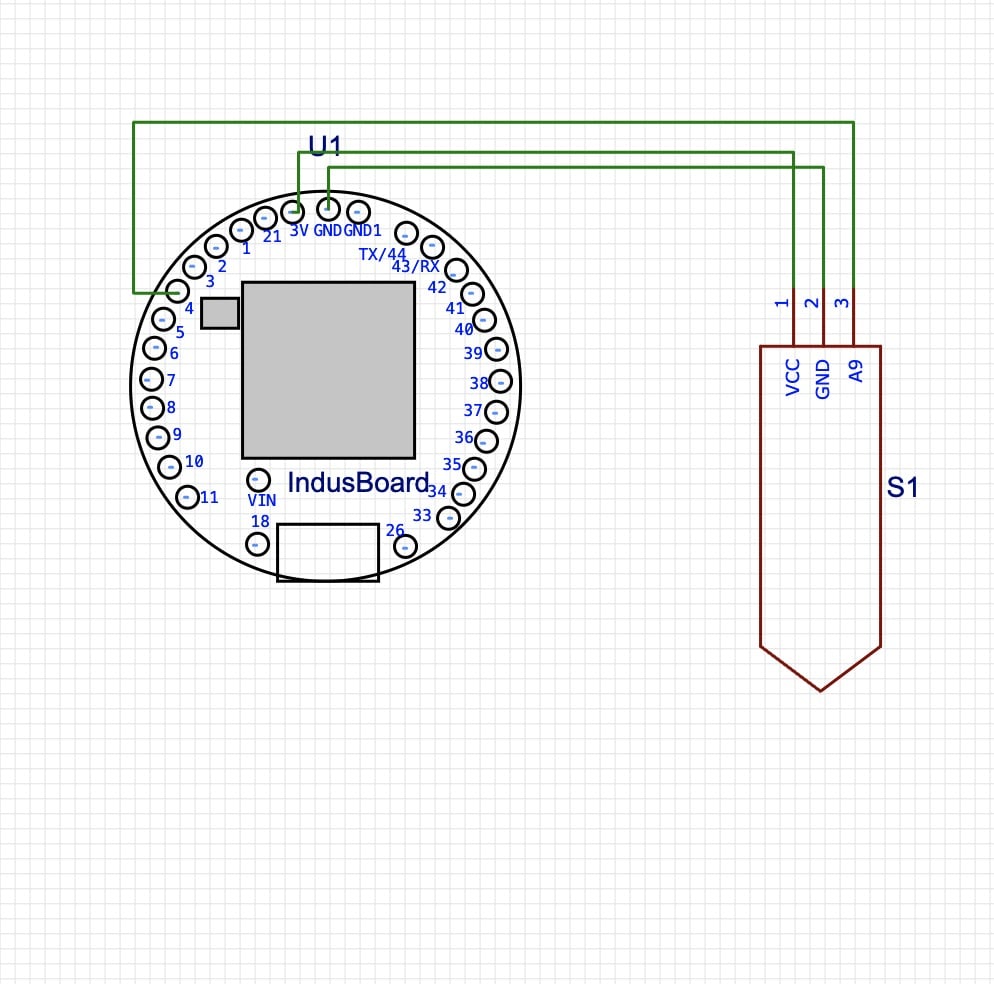
If you don’t have a real sensor, we use a random number in place of actual sensor readings. If has soil snesor connect as following, the temperature sensor integrated inside the board itself
Once you’ve completed the code, upload it to your platform, making sure all the necessary libraries and dependencies are in place.
By following these steps, your IoT system will be able to upload sensor data to Google Sheets in real time. Remember to replace the random number with the actual sensor readings when you have the real sensor connected.
Testing
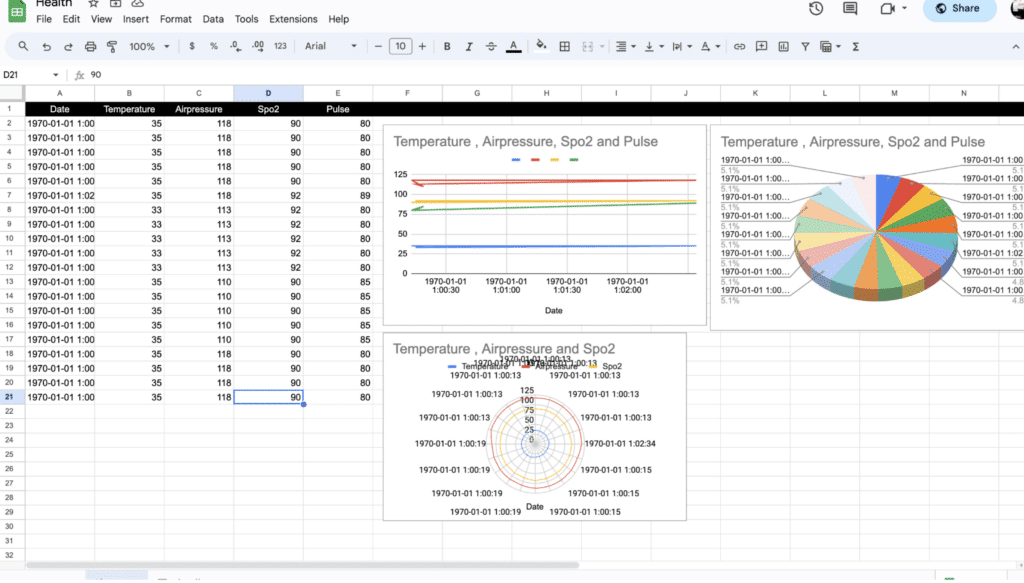
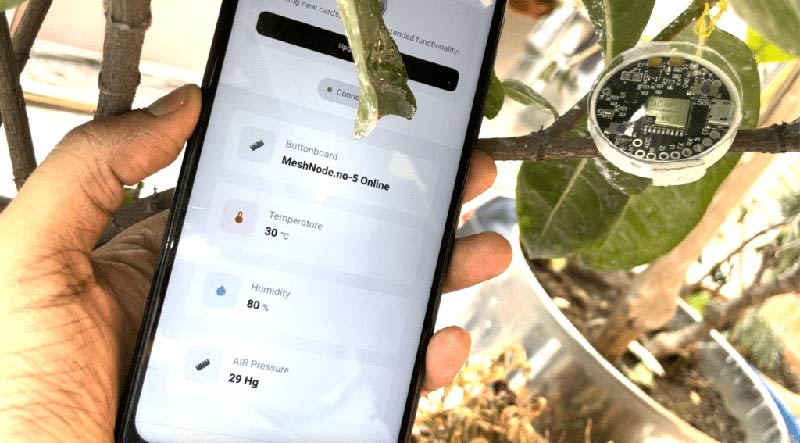
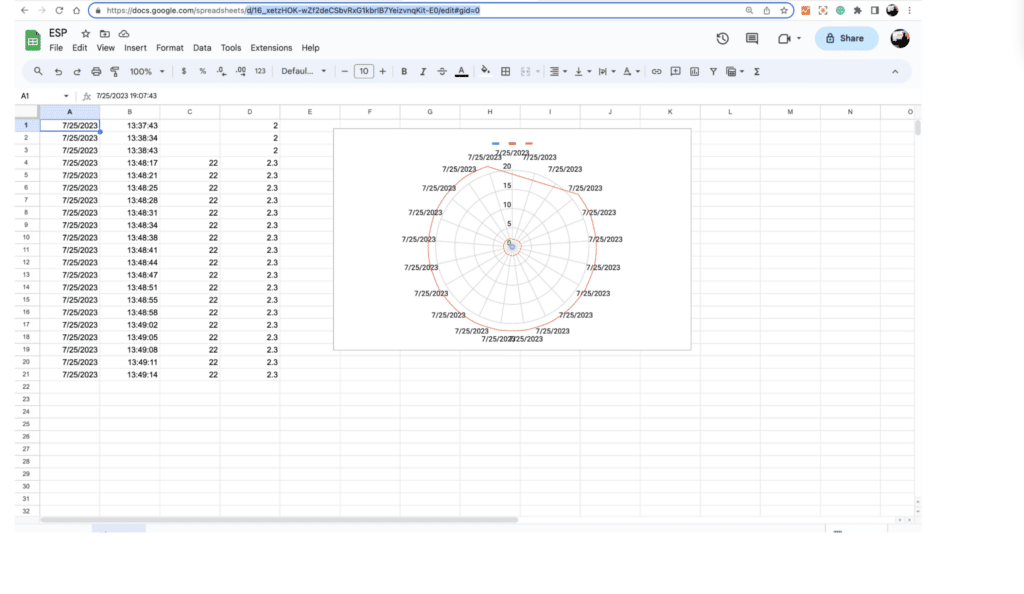
Great job! Now, open the Google Sheet, and you’ll witness the live data being uploaded from the device we’ve created. If you’ve used an actual sensor, the sheet will display real-time updates reflecting the actual data from the sensor.
To take it a step further, you can utilize the powerful Google Sheets chart functions to visualize the sensor data. These charts will automatically update with the latest readings, allowing you to monitor trends and patterns effortlessly.
With live data tracking and interactive charts, you’ll have a comprehensive view of the sensor data, enabling you to make informed decisions and gain valuable insights from the data.
Congratulations on setting up this dynamic IoT system, and enjoy exploring the real-time data and its visualization in Google Sheets! 📊📈
Check out more such interesting projects and tutorials.
