


 Mesh Networking is a wonderful technology in which multiple sensor nodes share data amongst each other. If somehow any one node or sensor nodes fails, then other nodes continue to transfer data in between themselves. Inspired by this, today we will make an IoT system with mesh network for smart homes.
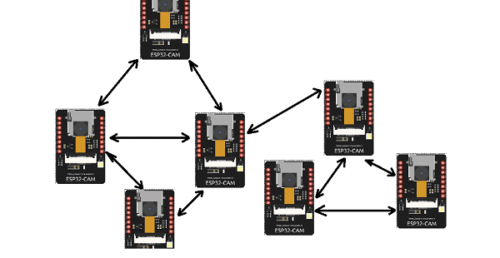
Bill Of Materials

Prerequisite Setup
Before starting our project, we need to set up the required libraries and install the ESP Board in Arduino IDE.

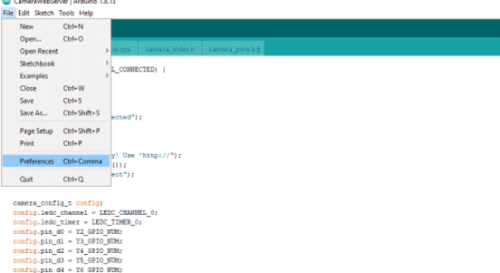
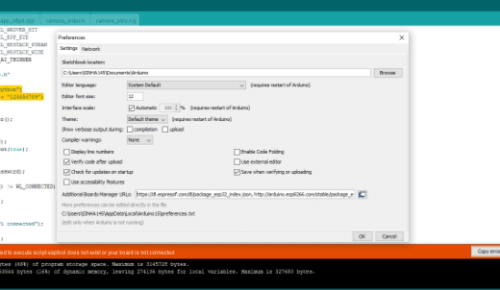
To install the ESP board in Arduino IDE, open the Arduino IDE and go to File → Preferences → Paste the following link.
https://dl.espressif.com/dl/package_esp32_index.json, http://arduino.esp8266.com/stable/package_esp8266com_index.json
Next, go to Board Manager, search for ESP32 and install it. Make sure you are connected to the network.
After that we need to install the painless mesh library for making the mesh networks. First go to the Library Manager and then install the painless mesh library to Arduino IDE.
Now we are ready for coding:-
Coding
Here we need to create two codes: one for sensor nodes for mesh network and another one for master node that will get data from child sensor nodes and process them into the set action. So first let’s create the code for the master node.
Sensor Node Code
The master node will receive data from other sensor nodes and then process it to get information about whether the gate is open or closed. If the gate is open, then it will automatically turn ON the garage/room light. Here I am using the built-in LED on pin 4 of ESP 32 Cam to indicate the connection and transfer of data to mesh.
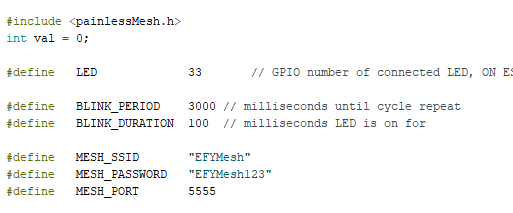
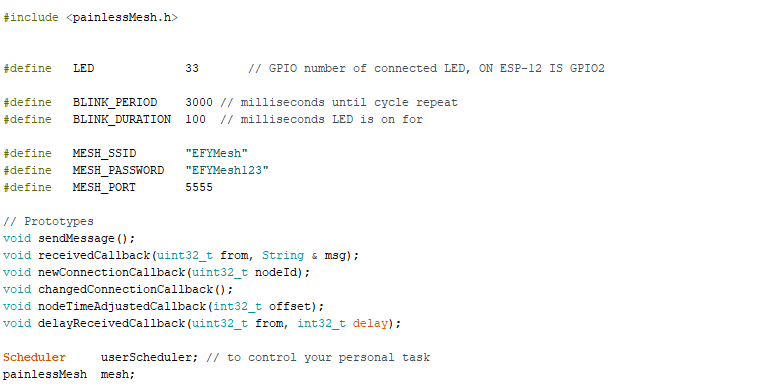
First of all, we need to include the painless mesh library in the code and then set a variable value that stores the value of sensor data. Next, we have a set of functions that checks the message coming from nodes in the mesh network and broadcasts it to the mesh network.
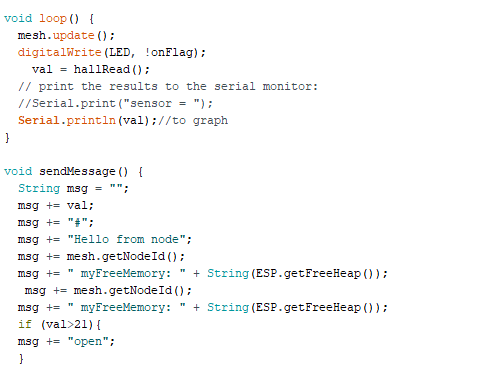
After that we have a loop function where we take sensor readings and allot them to the variables that we have created. Here I am using the inbuilt Hall sensor in ESP32 Cam to check whether the gate or door is open or not. We fix the ESP Cam and magnet in such a way that when the door is closed, the magnet and Hall sensor on ESP come in contact with each other.
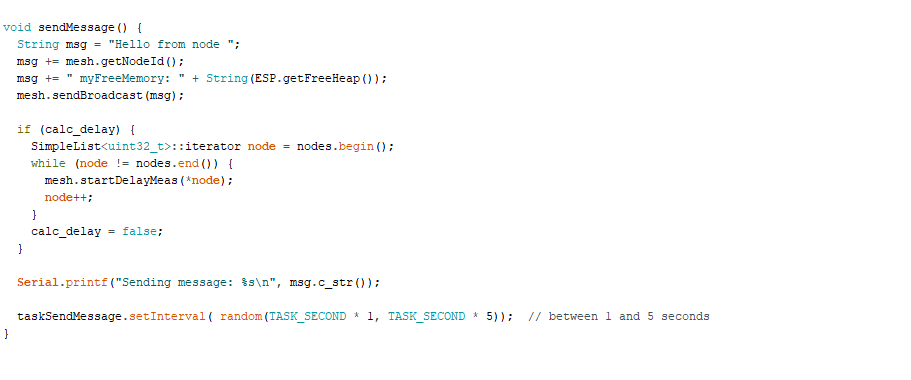
Next, we have a send message function where the message with sensor values is broadcasted to all nodes in the mesh. We have also created an if condition that checks if the sensor value of the door is open or not. If detected that the door is open, then the message is broadcasted as an open message in mesh nodes.
Code for master
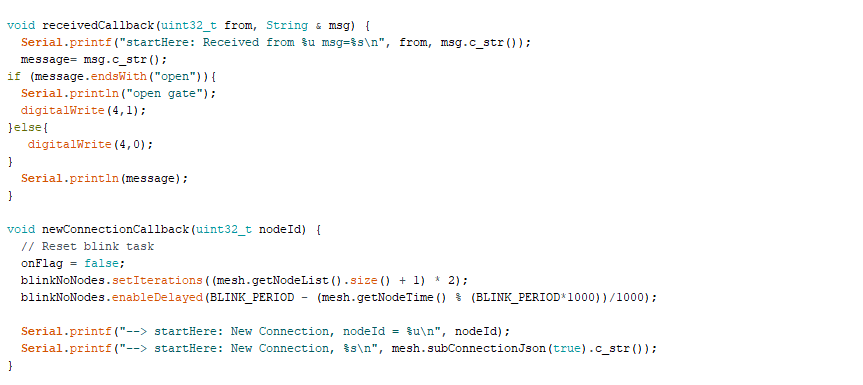
This is the code for the master node that will receive data from sensor nodes and then process them in action. Here we have taken the sensor data from the sensor node and checked its message. If the message says the door is open, then lights are turned ON automatically.
In the first part of the code, we have the same code as above having the mesh name and password. Next, in the receive callback function, we try to get the message from the sensor node and check if the message contains the “open” message in the broadcast message. If it contains “open” in the broadcast message, then it will trigger the light to turn ON. Here, we have used the built-in LED flashlight of ESP32 Cam.
Testing
Now power both the nodes and wait for a few seconds. Both the nodes in the mesh network will start broadcasting data to each other and it is indicated by the blinking of a red builtin LED. Now bring the magnet far from the Master node ESP32 Cam and the light will turn ON automatically.

Hi. Can you give us the full raw code from above.. but two pictures are broken..
Why do you upload only pictures not the code himself?
Thank you!