


 ‘Please Keep Silence!’ You must have seen this message written in such places as libraries and offices. But some people tend to, intentionally or unintentionally, make noise in such silence zones, disturbing others. What if there was a device that could help maintain silence in such silence areas?
In this project, we make a sensitive smart noise detector that can identify loud talkers and alert us by displaying a red light and trigging a buzzer. You can also connect this device to your phone through a customised app to set sensitivity levels as per choice.
To start, the following components are needed:

Coding
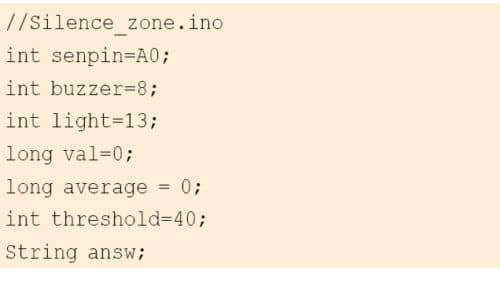
Software program (silence_zone.ino) in Arduino handles all necessary functions for noise detection. Set up the variables for storing values in Arduino code, as shown in Fig. 1.
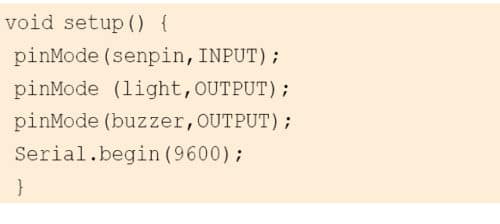
Then, configure Bluetooth and I/O pin for input and output in setup( ) function. Here, Bluetooth baud rate is set to 9600, but you can try with 38400 default baud rate as well (Fig. 2).
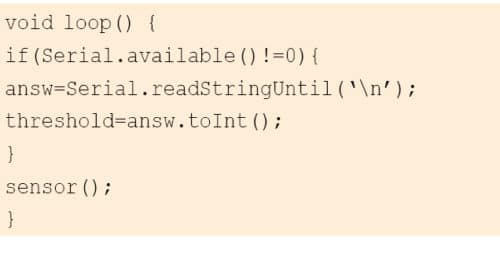
Next, set loop functions for running the code repeatedly (Fig. 3). In this loop function, create an if( ) condition that listens to Bluetooth incoming string. Then, convert that string to integer value and set that integer value to threshold value.
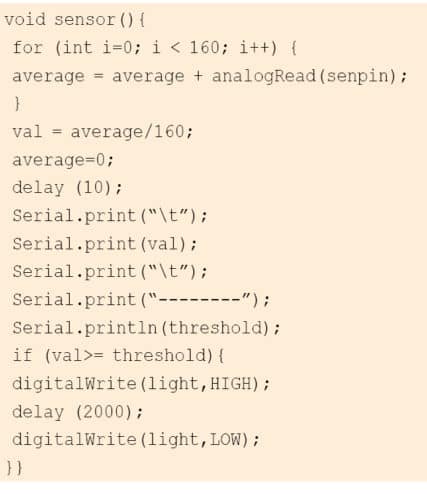
In the next part of coding, create sensor( ) function to get sensor value (Fig. 4). For sensor value, take an average of several readings of detected noise levels. The formula for obtaining average output is given by sum of all readings/number of samples taken. In this project, we considered 160 samples of various noise levels to get the average output.
Building App
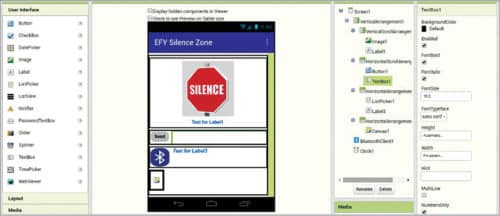
MIT App Inventor is used to develop the Android app for this project. Create a layout in the app, as shown in Fig. 5, using the following components:
- 2 text level
- 1 text input
- 1 list picker
- 1 button
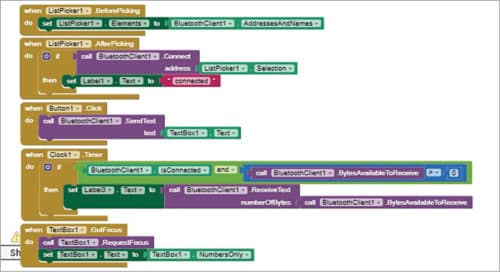
To start building the app, open MIT App Inventor from https://appinventor.mit.edu and set the code in Blocks Editor section, as shown in Fig. 6. Save the code as silence_zone and save its .apk file to the computer. This .apk file will be used in the Android phone later.
Circuit connections and testing
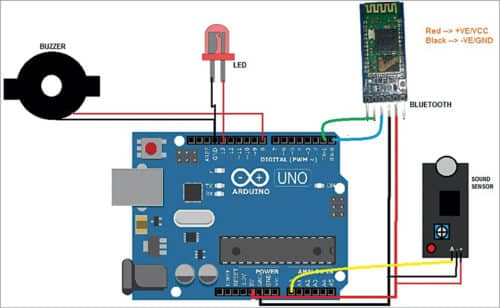
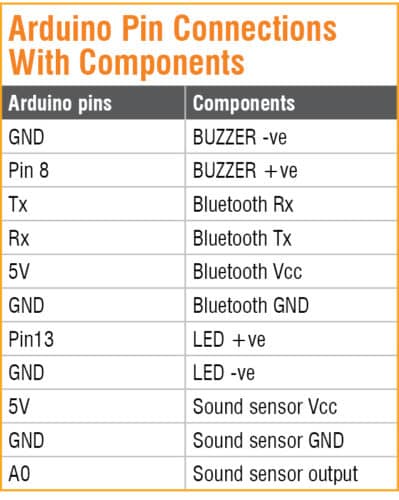
After developing the firmware and the app, connect the components with Arduino, as shown in Fig. 7. Arduino pin connection details are also shown in the table.
Power Arduino board using a 5V DC adaptor/power bank. Copy silence_zone.apk file from the computer to the Android phone. Install the app and open it from the phone. Tap on Bluetooth icon in the app and select HC-05 from the list to connect the phone with Bluetooth HC-05 in the circuit.
You will now be able to see the noise level value in the text bar in the app. When noise level reaches the threshold value, the LED light and buzzer will automatically get triggered by Arduino.
Download Source Folder
You can also reset the threshold value using the app. To do so, tap on the text box next to Send, enter the value you want to add and click on Send to set the threshold value.
Ashwini Kumar Sinha is an electronics hobbyist and tech journalist at EFYi

This Project won’t work well. Sound Sensor give 0(zero) value all time as a sensor value.
Can you elaborate, First check your sensor with simple test, Go to Examples and upload the Analog read code to Arduino and see the output of the sensor in the serial monitor is it increase with noise. If not then try to increase the sensitivity of sensor using the pot on the sensor module.
Is there exactly someone who made prototype of this.
Noise detector, not noise cancelling. But nice project, one step for a greater purpose.
Project application MIT is not opening in my computer as well as it’s not a open source we have yo buy it.
So ashwin sir how i open it