


 In order to not forget confidential details such as login IDs, passwords, bank account number etc. we often note them down on a document for future references. But it not safe to write these things down on paper as anyone can access it and use it for wrong purposes. To prevent this, I have made a RFID tag-based storage device where you can safely keep such information from anyone’s reach. And this RFID tag is so small that it can be kept anywhere, like in between a book, a bag or as a sticker. Isn’t it awesome?!!
So, let’s begin with this amazing DIY project.

First, collect the following components.
Bill Of Materials

Prerequisite
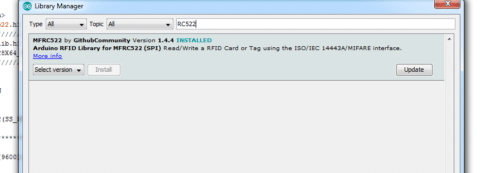
Before you begin to write the Arduino code, go to Tools –> Library Functions and install the following library functions (Refer Fig 1.)
- Ug8 Oled library
- Adafruit gfx
- MFRC522 RFID
Coding
Here, we will write two codes: One for storing your data into the RFID tag/card and other for reading that stored data and displaying it on the OLED display.
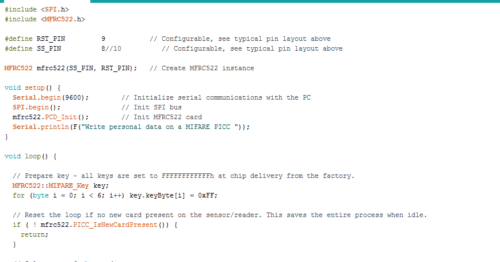
First, let’s begin with the RFID writing code for storing your data into the RFID tag/card. You can download the code from below or you find it in RFID library example folder. (Refer Fig 1.)
Now, let’s go to the RFID reading code for obtaining the stored data.
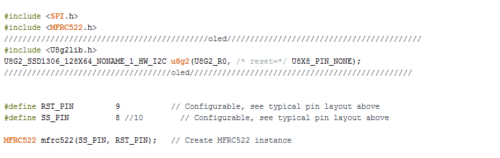
Here, we have initialized the following libraries in the code. (Refer Fig 2.)
- SPI.h
- MFRC522.h
- U8g2lib.h
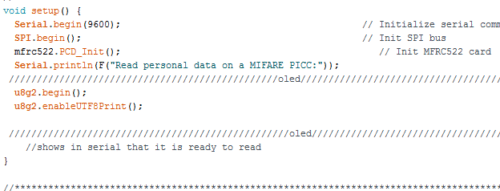
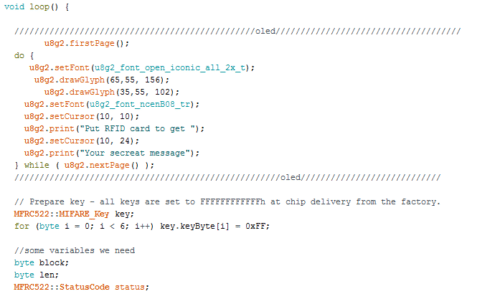
After that we create a Setup function where we setup the OLED, SPI (for RFID reader) and Serial communication (for debugging). (Refer Fig 3.)
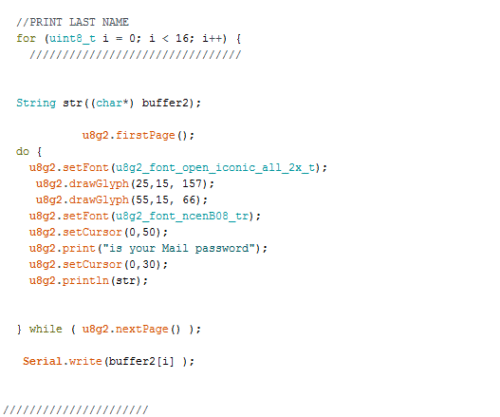
Next, we create a loop function that repeatedly checks the presence of a RFID tag/card near the reader. Once detected, the RFID card is further checked for UUID (Universally Unique Identifier). Once the UUID is verified, the stored data then can be safely retrieved. (Refer Fig 4, 5.)
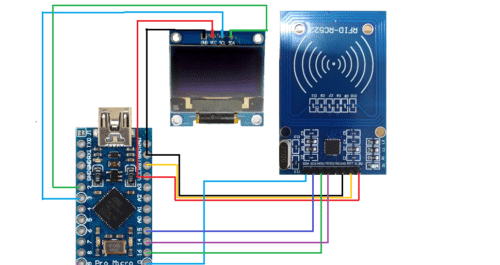
Connection
After completing both the codes, let’s now connect the components as described below:
| Arduino Pro Micro | RS522 RFID |
| RST | Reset |
| Pin 10 | SDA |
| Pin 16 | MOSI |
| Pin 14 | MISO |
| Pin 15 | SCK |
| VCC | VCC |
| GND | GND |
Testing
In order to check that everything is working, upload the RFID writing code in the Arduino board and make sure that the right connections are made. Then open the serial monitor and write the message or password that you want to store. After that, upload the reading code in the Arduino board and place the same RFID tag/card near the RFID module. It should read and display the stored message or password.

Can I get a Synopsys of this project, please?