


 Most people use the side and rear-view mirrors to manoeuvre their cars since a camera installed at the back of the car can be quite expensive. So, today we have undertaken the task of creating a smart back-camera system for cars. Our system can also be used as a smart car dashboard display that can play music, video and do a lot of things that a computer can do.
In this project, we will use Raspberry pi to connect the camera and display to the video of the back of the car. We will also add an ultrasonic sensor that measures the distance from our car to any obstacle behind the car. So let’s start our project by shopping of following components.
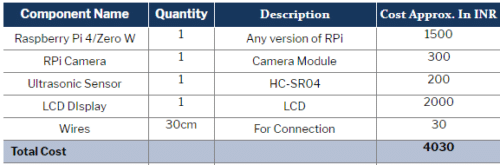
Bill of Materials

Coding
Before starting with the code, we need to install the libraries and python modules. To do this, open the raspbian terminal and use the following commands to install the python modules
sudo pip3 install opencv
sudo pip3 install Bluetin_Echo
sudo pip3 install espeak
Now, after installation of modules, open the python3 IDLE and create the following code
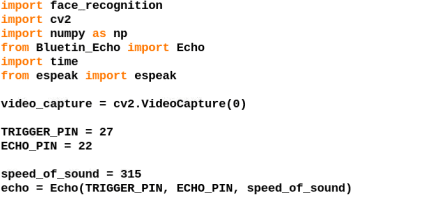
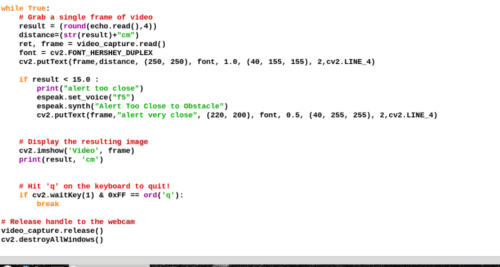
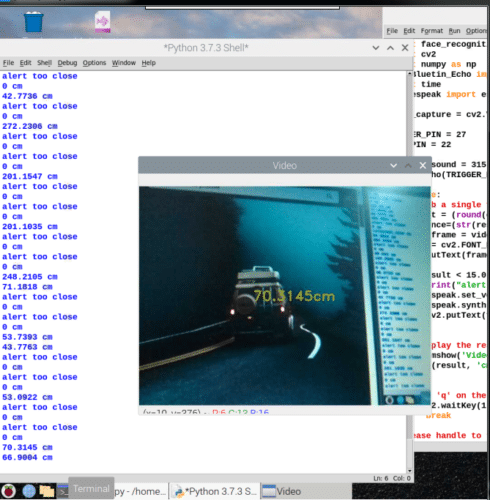
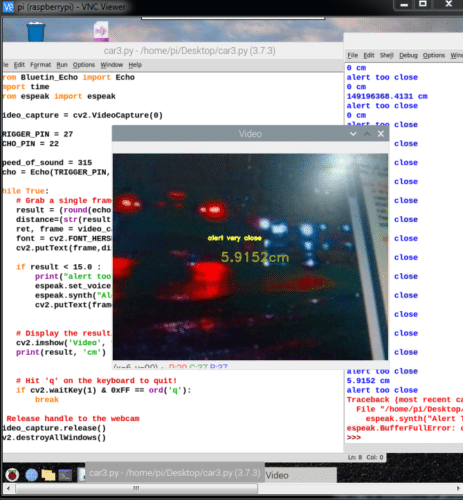
First import the required libraries (espeak, cv2, time, Bluetin_Echo) in code, then set the ‘echo’ and ‘trigger’ pin to ‘no’. For the ultrasonic sensor, we’ve used the pin 27 for ‘echo’ and 22 for ‘trigger’. Next, we set the sound speed and then start the ‘echo’ and ‘trigger’ signal at the speed of sound. After that, we need to create a ‘while’ loop that will run repeatedly. In this loop, we will check the distance between the car and the obstacle using the ultrasonic sensor reading. Next, we try to display the video frame camera with distance reading on the screen. After that, we have created an ‘if’ condition that checks whether the distance between the car and the obstacle is under 15cm or not (this threshold can be changed). If it returns true, the LCD display will alert us, as will the speaker. (Refer Fig 2,3)
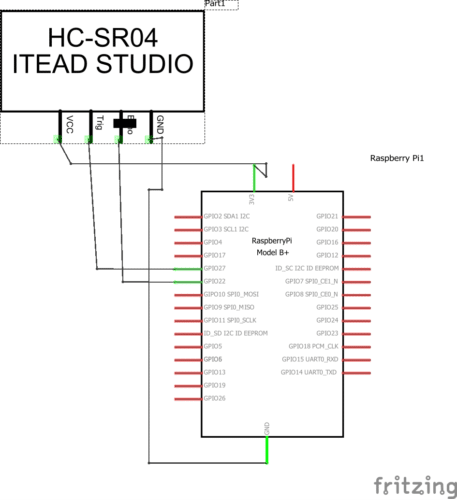
Connection
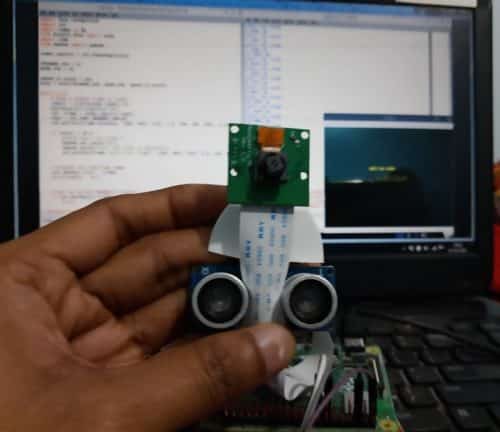
Now connect the ultrasonic sensor as in the circuit diagram (Refer Fig 4). Then the camera in with a raspberry pi using the ribbon cable after this you set the camera and ultrasonic sensor in the back part of the car.
Next, attach the car aux input to RPI audio output jack. Then connect the raspberry pi display to its HDMI input if your display is HDMI based or RCA input if your display is RCA cable based.
Testing Power
The PI with 5V and then run the code we have created. After a few seconds, you will see the window display the camera video with distance readings. Now when you come too close, the system will start alerting through speakers saying “Too close to collision “ and same will be displayed on the camera video.
This page is not viewable properly. The ads are getting overlapped on the text. Please fix
Hi Iqbal, thank you for your comment. We have re-edited the article and formatting has been done.